3D Character Creation
Class 03: Construction ModelsTopics
- Construction Model
- Tra-Digital Art
- Class 03 Lab
Class three coming in hot
Construction Model
Construction Model:
2D animated characters must have some sort of understructure in order to maintain consistency. Simple conceptual shapes are drawn underneath that help maintain volume and proportions. Whole areas are drawn first and the details are laid on top of them. Broad to detail. The “Xeroxed” technique allowed Disney to skip the inking process; subsequently you see the drawings underneath.
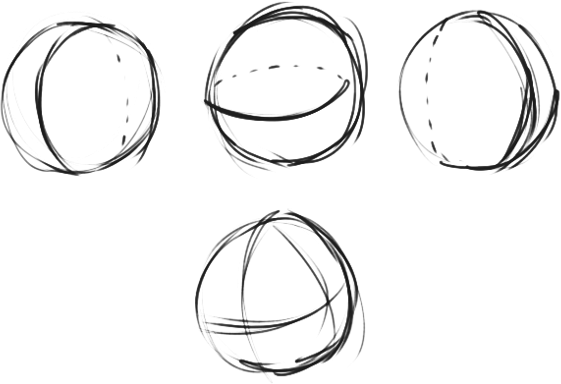
Sphere:
This is the most basic 3-dimensional shape. These are used often in conjunction with other shapes or just distorted on its own. So how do you draw a sphere? A circle with center lines. You must draw these lines! The lines let you know where your sphere is tilting or rotating.
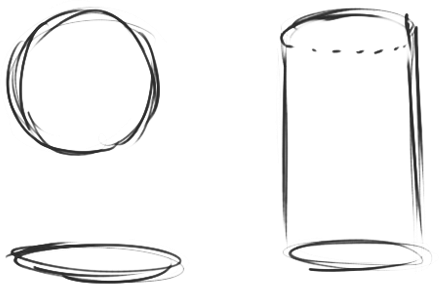
Cylinders:
This is the second easiest shape to draw and the second most used. Again this is just a circle, but is extruded. You must use perspective on this.
Planes:
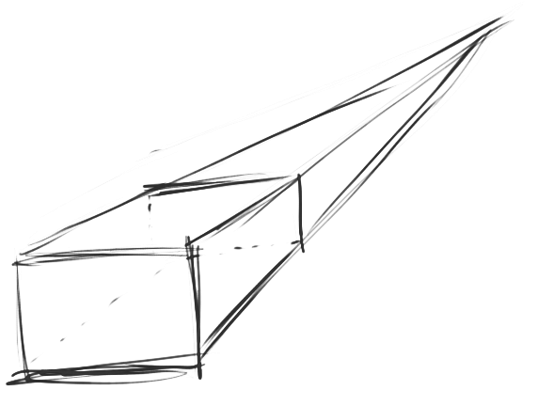
The toughest 3-D element because it is very susceptible to poor perspective. Good for blocking in feet and hands, as well as, pushing perspectives. Avoid this shape.
Cartoon Anatomy:
Remember your anatomy and still use that as your basis for movement and design. This next section I am going to explain how classic characters are designed. These are a good place to start but don’t get tied down to them. Just have a solid understructure.
Head:
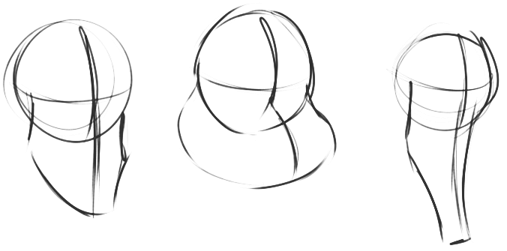
Use a sphere for the cranium and extend a line for the jaw from the ear line. You must use center lines, these are guides. They are referred to as construction lines. Notice just like in real anatomy the center line tells you where to place the eyes, ears, and jaw line; easy. Often the center lines are used as anchor points. That means that those lines do not deform and help stick features on the face.
Anchor Points:
Anchor points are specific points that we use to attach facial features. These are used to keep the details from sliding around on the face. Used to keep character “on model“
Hard anchor points which are attached to the bones and hardly move. These include:
- the inside lower corner of the eyes
- The bridge of the nose where it connects to the head
- Just under the nose betweens the nostrils where it connects to the head
- The cheek bones
- The middle of the ears
- The back of the jaw just below the ear lobes
Soft anchor points are attached more to the surface of the face and are freely moving. These include:
- The inside and outside ends of the eyebrows
- The top lip in the middle just below the nose
- The middle of the bottom lip
- The outside ends of the mouth
- The top rounded edge of the eyes
- The outside point of the eyes
- The middle point of the hairline above the brows (or the part in the character’s hair)
- The tip of the nose

Jaw:
The jaw is obviously a hinge that is used to open the mouth. In 3D animation you will primarily just rotate the jaw to the open the mouth. In a cartoony character the jaw is more flexible. You should imagine the mandible being attached by a rubber band where the masseter would ordinarily be. Do not get to crazy but you should take advantage of this.

Torso:
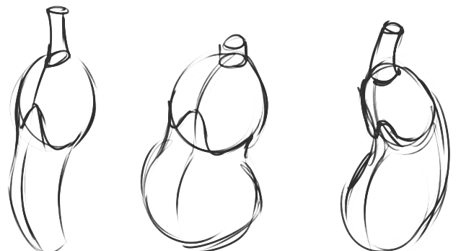
You’ve probably seen this draw as a bean shape. I suggest thinking about anatomy and envisioning a sphere attached to a cylinder. This way you know not to deform the sphere (ribcage). The pelvis is best drawn or visualized as an attached hemisphere on the bottom. Draw your center lines!
Appendages:
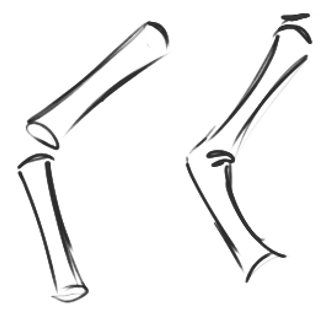
This is obvious but arms and legs are made of cylinders. Don’t create one cylinder for a whole appendage. Instead have one cylinder for each section to avoid rubber hose animation with lack of specified joints. Do not have the same proportions all the way through your limbs. This is boring. Picture the limbs as rubber and add folds and plenty of overlap to help define joints and positioning.
The arm is a hinge. Like a hinge it bends in one spot, it is not curved. There should be a definite elbow, varying volumes (consistent), and straight vs. curves.
Phalanges:
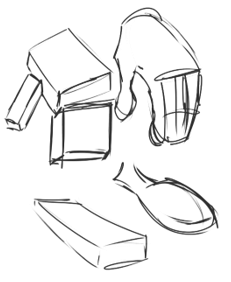
A lot of cartoon books will suggest drawing hands and feet as circles. I don’t suggest this. There will be a lack of form. Instead use elongated cubes. These show the planes of the hands better and better resemble the form.
Variation:
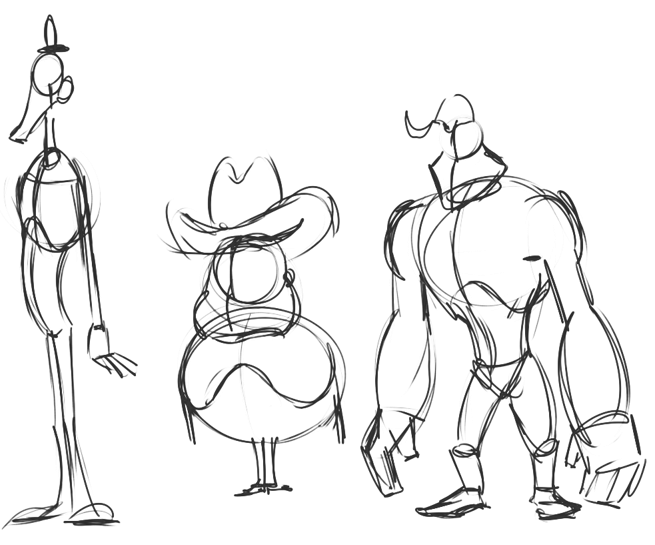
These “rules” may seem limiting but with exaggeration you can get a lot out of them. It is all about pushing proportions. The more you exaggerate the cartoonier and interesting the forms will look. Also feel free to create more interesting shapes by combining and distorting these. Again these are mostly suggestions but there must be structure.
Tra-Digital Art
Tra-Digital Art:
The idea of tra-digital art is to mimic traditional methods using a digital medium. You want to research a practical traditional process such as various painting methods, drawing methods, etc.
Here are two common methods utilized by character designers:
Cell Animation:
Before computers were used to create animations the entire process was done on paper and cells. In this method artists first created pencil test animations on paper. Once the movment was perfected the drawings would be cleaned up. The paper drawing would then be traced onto clear cells via the inking department. After the ink dried, the cells were flipped and painted with solid colors. These would then be combined together with background art to create each frame of the film. This is a VERY time-consuming process.

Grisaille Painting:
Grisaille painting is the technique of producing a grayscale version of the painting entirely before applying color. This allows the artist to concentrate on other aspects of the work of art such as value, silhouette, composition, etc. without having to concern themselves with the complexities of color.
A lot of character designers employ this technique because it allows them to focus primarily on silhouette value which many consider the most important aspect of a character design.

Class 03 Lab
Animal Story Lab
Written and visual works can be broadly broken into two categories, fiction and non-fiction. In this assignment you will be given a news article about real-life intriguing animal stories. Imagine a feature film is being made from this story and then design the main protagonist.
You may find your own animal story or use one of animalStories.
You will be graded on the following:
- Lab Requirements
-
Techniques and processes covered in the instructional material is followed and implemented.
-
- Creativity & Craftsmanship
-
Excellent design choices, novel & appealing, and solid clean caliber work.
-
Resources:
- Assignment Video Tutorials
- You may watch the tutorial videos below to help you complete your assignment.
Wait! Before you go!
Did you remember to?
- Read through this webpage
- Submit Animal Story Lab on Canvas
