
Digital Imaging I
Class 04: CompositingTopics
- Selection Tools
- Masking
- Transform Tools
- Layers
- Compositing Techniques
- Assignment 04

Welcome to class fore!
Selection Tools
Selection Tools
Photoshop has a variety of tools available to select areas of the image. Generally it is best to use the more automated broad tools and work your way to the more specific manual tools. You can see an overview of selection tools available in Photoshop below.

“I’ve been selected!”
Marquee Select Tools
- Rectangular Marquee Tool
- Used to make a rectangular selection.
- Eliptical Marquee Tool
- Used to make a circular selection.
- Single Row Marquee Tool
- Used to make a selection of a single horizontal line.
- Single Column Marquee Tool
- Used to make a selection of a single horizontal line.

Lasso Tools
- Lasso Tool
- You can freehand draw a selection.
- Polygonal Lasso Tool
- Allows you to create a selection based on drawing a polygonal shape.
- Magnetic Lasso Tool
- While drawing freehand the selection will snap to the subjects edges.

Quick Selection Tools
- Quick Selection Tool
- Creates a selection based on edges of a subject.
- Magic Wand Tool
- Makes a selection similar to the fill tool in that it selects areas based on the similarity of what is clicked on.
- Object Selection Tool
- Using a marquee you select an area and Photoshop will attempt the select an object inside.

Other Ways to Select:

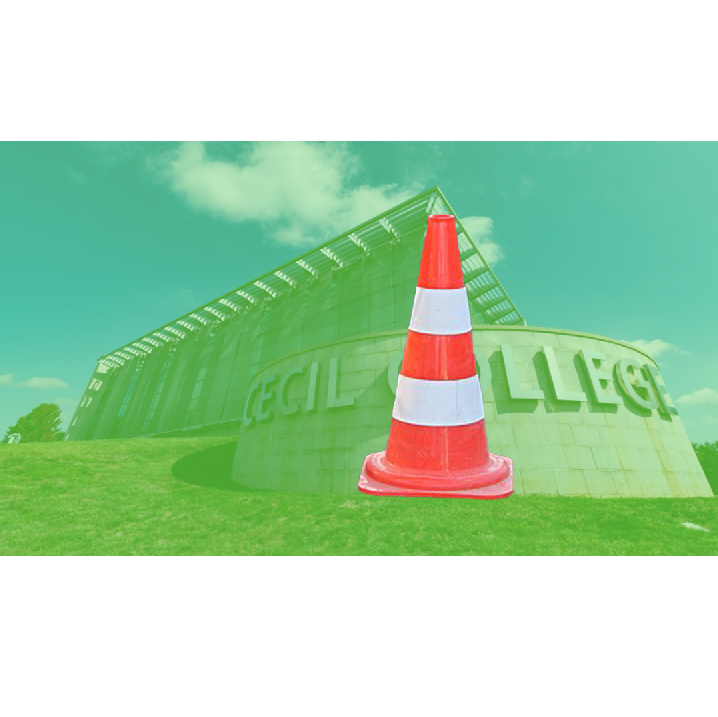
Masking
Layer Masks:
A mask in Photoshop uses an achromatic raster image that affects the visiblity of the layer it is linked to, showing areas defined by white, hiding the areas defined by black, and show partial visibility in the areas of gray. This is an excellent non-destructive method for selective visibility, adjustments, effects, etc. and should be your main method to complete these tasks if possible.
Vector Masks:
A vector mask will hide parts of an image in the same manner as a layer mask but instead uses a vector shape (path). This is slightly more complicated to make (draw shape path, then press Layer>Vector Mask>Current Path or cmd/ctrl + click on the mask button). The advantage of this over a layer mask (raster based) is that it creates perfect crisp edges that are non-destructively scaleable.
Clipping Masks:
Clipping masks work very similar to layer masks. There are two main differences to a layer mask. First is that they are not directly linked to the layer they are applied to and instead affect the layers presented below them. The other difference is that their masking is not determined by achromatic value but instead by transparency/opacity/alpha.


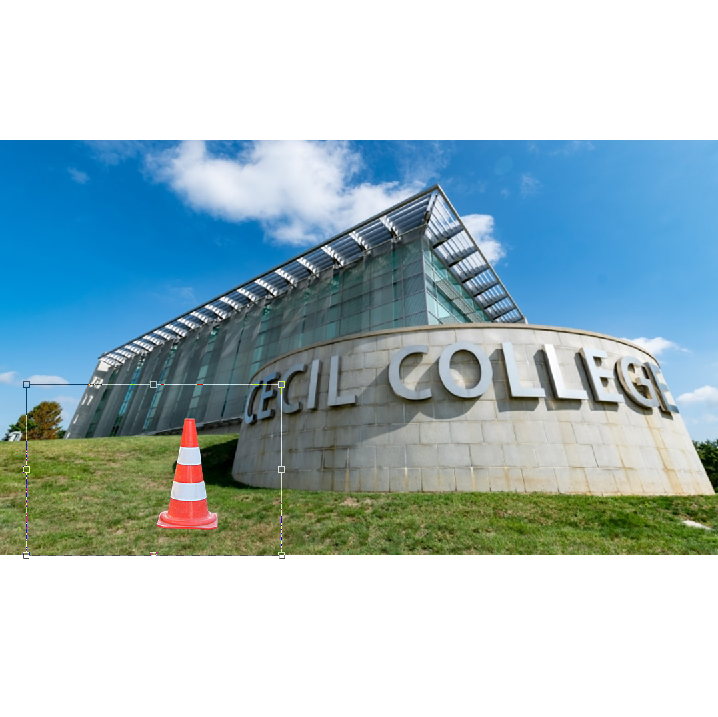
Transform Tools
Transform Tools
These tools allow you to manipulate position, scale, skew, and deformation of imagery. You can see a description of the tools available below.
- Edit > Free Transform
- Allows you to scale and warp your object.
-
- hotkeys:
- press ctrl/cmd + t enables free transform.
- hold shift to scale proportionally.
- hold ctrl/cmd to warp corner handles independently of other handles
- Edit > Transform
- There are a variety of options to scale and warp your selected object.Scale, Rotate, Skew, Distort, Perspective, Warp | Rotate 180, Rotate 90 Clockwise, Rotate 90 Counter Clockwise | Flip Horizontal, Flip Vertical.
- Edit > Puppet Warp
- Using pins you can grab and stretch areas of an object.
- Filter > Liquify…
- Using brushes you can warp an image.
Layers
Layers:
Layers inside of Photoshop allows you to place raster images, vector images, text, and other elements on individual areas that each overlap each other much like clear cells in classic animated films.
Types:
- Pixel Layers
- Raster images
- Adjustment Layers
- Layers that affect the value, hue, etc. of the elements below it
- Type Layers
- Contains text
- Shape Layers
- Contains vector art
- Smart Objects
- Protected elements with the original version stored (non destructive)
Layer Options:
- Opacity
- The transparency of the entire layer; 0 being invisible, 100 being entirely opaque.
- Fill
- Only affects the transparency of the pixels of the image. For example, if lowered to 0, layer styles will still be visible.
- Lock
- You may lock the layer entirely from changes or choose a specific type.

Layer Blending Modes:
- Normal
- Edits or paints each pixel to make it the result color. This is the default mode. (Normal mode is called Threshold when you’re working with a bitmapped or indexed-color image.)
- Dissolve
- Edits or paints each pixel to make it the result color. However, the result color is a random replacement of the pixels with the base color or the blend color, depending on the opacity at any pixel location.
- Behind
- Edits or paints only on the transparent part of a layer. This mode works only in layers with Lock Transparency deselected and is analogous to painting on the back of transparent areas in a sheet of acetate.
- Clear
- Edits or paints each pixel and makes it transparent. This mode is available for the line tool (when fill region is selected), the paint bucket tool , the brush tool , the pencil tool , the Fill command, and the Stroke command. You must be in a layer with Lock Transparency deselected to use this mode.
- Darken
- Looks at the color information in each channel and selects the base or blend color–whichever is darker–as the result color. Pixels lighter than the blend color are replaced, and pixels darker than the blend color do not change.
- Multiply
- Looks at the color information in each channel and multiplies the base color by the blend color. The result color is always a darker color. Multiplying any color with black produces black. Multiplying any color with white leaves the color unchanged. When you’re painting with a color other than black or white, successive strokes with a painting tool produce progressively darker colors. The effect is similar to drawing on the image with multiple magic markers.
- Color Burn
- Looks at the color information in each channel and darkens the base color to reflect the blend color by increasing the contrast. Blending with white produces no change.
- Linear Burn
- Looks at the color information in each channel and darkens the base color to reflect the blend color by decreasing the brightness. Blending with white produces no change.
- Lighten
- Looks at the color information in each channel and selects the base or blend color–whichever is lighter–as the result color. Pixels darker than the blend color are replaced, and pixels lighter than the blend color do not change.
- Screen
- Looks at each channel’s color information and multiplies the inverse of the blend and base colors. The result color is always a lighter color. Screening with black leaves the color unchanged. Screening with white produces white. The effect is similar to projecting multiple photographic slides on top of each other.
- Color Dodge
- Looks at the color information in each channel and brightens the base color to reflect the blend color by decreasing the contrast. Blending with black produces no change.
- Linear Dodge
- Looks at the color information in each channel and brightens the base color to reflect the blend color by increasing the brightness. Blending with black produces no change.
- Overlay
- Multiplies or screens the colors, depending on the base color. Patterns or colors overlay the existing pixels while preserving the highlights and shadows of the base color. The base color is not replaced but is mixed with the blend color to reflect the lightness or darkness of the original color.
- Soft Light
- Darkens or lightens the colors, depending on the blend color. The effect is similar to shining a diffused spotlight on the image.
- If the blend color (light source) is lighter than 50% gray, the image is lightened as if it were dodged. If the blend color is darker than 50% gray, the image is darkened as if it were burned in. Painting with pure black or white produces a distinctly darker or lighter area but does not result in pure black or white.
- Hard Light
- Multiplies or screens the colors, depending on the blend color. The effect is similar to shining a harsh spotlight on the image.
- If the blend color (light source) is lighter than 50% gray, the image is lightened, as if it were screened. This is useful for adding highlights to an image. If the blend color is darker than 50% gray, the image is darkened, as if it were multiplied. This is useful for adding shadows to an image. Painting with pure black or white results in pure black or white.
- Vivid Light
- Burns or dodges the colors by increasing or decreasing the contrast, depending on the blend color. If the blend color (light source) is lighter than 50% gray, the image is lightened by decreasing the contrast. If the blend color is darker than 50% gray, the image is darkened by increasing the contrast.
- Linear Light
- Burns or dodges the colors by decreasing or increasing the brightness, depending on the blend color. If the blend color (light source) is lighter than 50% gray, the image is lightened by increasing the brightness. If the blend color is darker than 50% gray, the image is darkened by decreasing the brightness.
- Pin Light
- Replaces the colors, depending on the blend color. If the blend color (light source) is lighter than 50% gray, pixels darker than the blend color are replaced, and pixels lighter than the blend color do not change. If the blend color is darker than 50% gray, pixels lighter than the blend color are replaced, and pixels darker than the blend color do not change. This is useful for adding special effects to an image.
- Difference
- Looks at the color information in each channel and subtracts either the blend color from the base color or the base color from the blend color, depending on which has the greater brightness value. Blending with white inverts the base color values; blending with black produces no change.
- Exclusion
- Creates an effect similar to but lower in contrast than the Difference mode. Blending with white inverts the base color values. Blending with black produces no change.
- Hue
- Creates a result color with the luminance and saturation of the base color and the hue of the blend color.
- Saturation
- Creates a result color with the luminance and hue of the base color and the saturation of the blend color. Painting with this mode in an area with no (0) saturation (gray) causes no change.
- Color
- Creates a result color with the luminance of the base color and the hue and saturation of the blend color. This preserves the gray levels in the image and is useful for coloring monochrome images and for tinting color images.
- Luminosity
- Creates a result color with the hue and saturation of the base color and the luminance of the blend color. This mode creates an inverse effect from that of the Color mode.
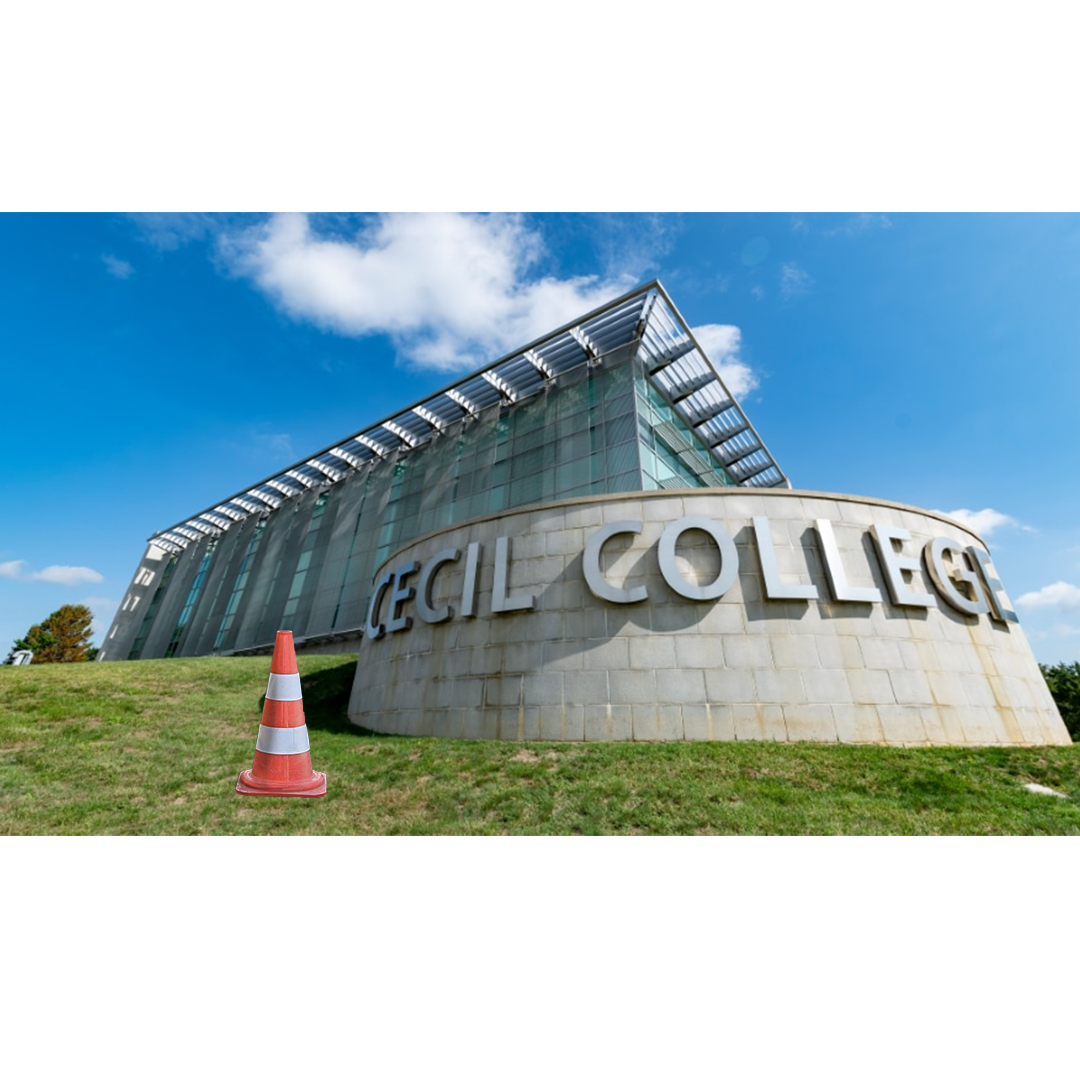
Compositing Techniques
Compositing:
The process of combining multiple images to one cohesive image. Generally you are trying to make it look natural or at least somewhat believable.

Assignment 04
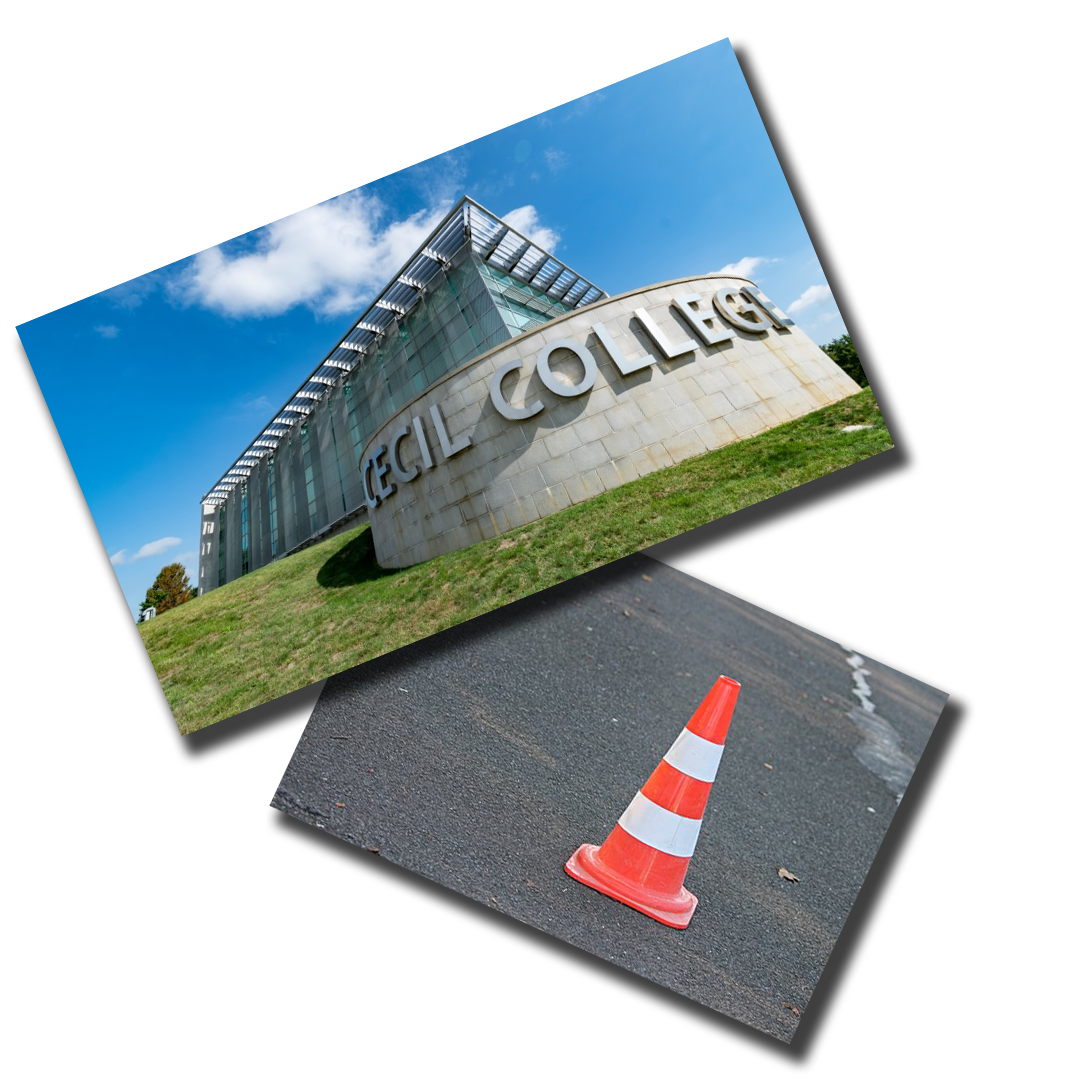
Composite Image:
One of the most fun uses of Photoshop is compositing images together. In this assignment you will combine 2 or more images together to make something new. You may create whatever you like but it should be something fantastic. You should not create something natural like placing a person on a sidewalk, or fish in an aquarium. Instead, place a person walking on clouds or a fish floating through the woods. You masking should be clean and precise (I shouldn’t see any rough edges). Although you are creating something imaginative it should look believable. This means the lighting, shadows, reflections, color, contrast, etc. should all match. You want your images to match.
Your image should be 6 by 9 inches with 300 ppi. Once completed name your file “yourLastName_assignment04.psd”.
You will submit this digitally on Canvas. All assignments will also include the project cover sheet. You can grab it here. Just answer the questions in the document.
You will be graded on the following:
- Project Cover Sheet
-
Thoroughly completed and thoughtfully written with little or no grammatical errors.
-
- Assignment Specific Requirements
-
Single Photoshop Document at 6″ x 9″, 300 ppi
- Clean, accurate masking
- Scene matching (lighting, shadows, reflections, etc.)
- Image adjustment (color, contrast, etc.)
-
-
Craftsmanship
-
Clean high-quality work
-
-
Creativity
-
Interesting and novel.
-
Resources:
- Project Cover Sheet
- You may download the project cover sheet here.
- Assignment Video Tutorials
- You may watch the tutorial videos below to help you complete your assignment.
Assignment Video Tutorials
Wait! Before you go!
Did you remember to?
- Read through this webpage
- Submit Week 04 Composite Image Assignment on Canvas
- Composite image and project cover sheet
- Post your finished images and description on the Week 04 Composite Image Assignment Critique Discussion Board
- … and reply to at least two of your peers’ work on the Discussion Board
