
Game Design
Class 12: 3D AnimationTopics
- Character Rigging
- Animation
- First Person (3d animation) Lab Demonstration
- First Person (3d animation) Lab

Class strikes 12
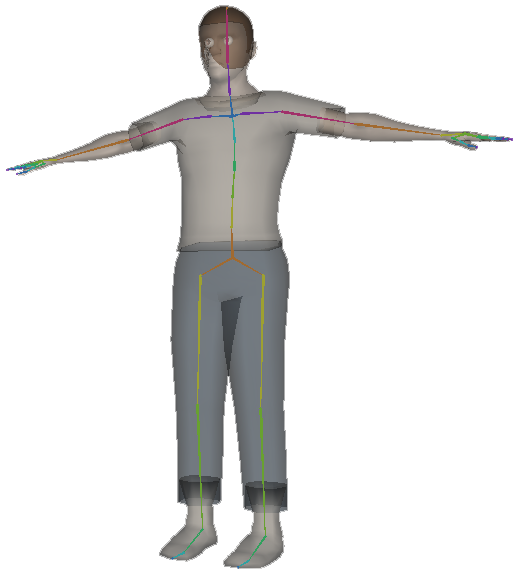
Character Rigging
Character Rigging:
A 3D model is a stiff object that you may transform (translate, rotate, scale) but that is all. If you wish to have it deform in a recognizable structured way you must rig it. This involves applying deformers and controllers to the mesh. Character rigs almost always use a skeleton as the primary deformer and main apparatice to apply rigging elements to.
Animation
Animation:
Animation means “to give life to.” In our case that means making still characters and objects move over often giving the appearance of internal motivation. 3D computer animation consists of may disciplines but animators are the ones that make things move.
Types of Motion:
Personally I break down character movements into two categories:
- Locomotion:
- Continual movement that generally represents very physical actions that move the entire character such as walking, running, fighting, dancing, etc.
- Iconography:
- Movement that is meant to be representative and usually involves a pose (symbol) to pose (symbol) method. Motions that are meant to represent internal character thoughts such as talking, emotive acting, etc. fall into this category.
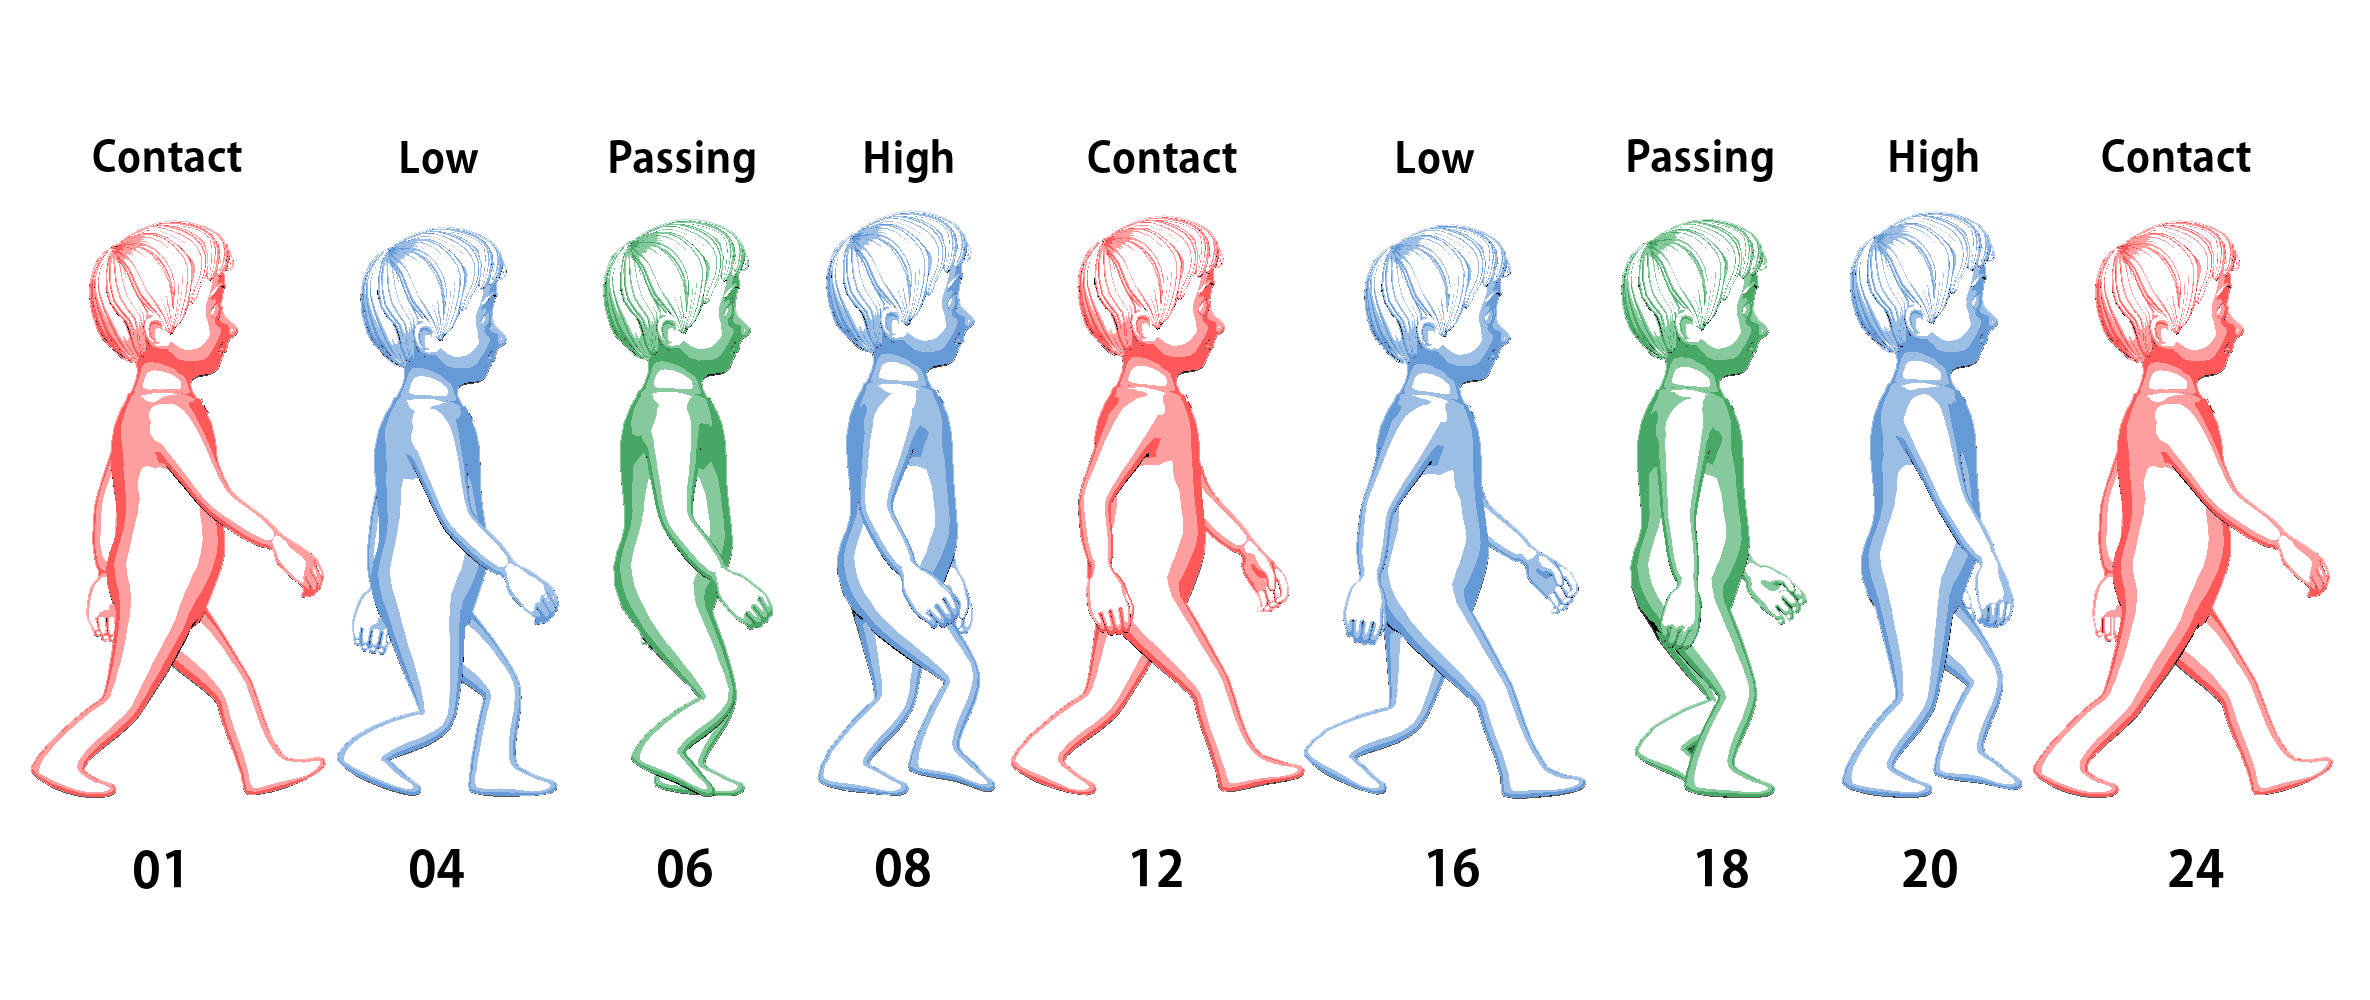
Walk:
The walk is the primary mode of locomotion for human beings. There is a surprising amount of variation in walks between emotions and individuals. However, there is a basic formula, that once mastered, can be built upon to produce a variety of unique walks.

Process:
-
- Start with the legs:
- Typically you want to start with the area that is driving the action, in this case it is the legs.
- The first keys you should create should be the extreme storytelling ones, in this case it is the contacts.
- The passing position is the next set of keys to create since they are the key breakdown of the extreme contacts.
- Lastly you add nuance to your feet. This includes the way the foot drags while it moves, ball roll, and toe curl.
-
- Animate the core:
- The core of the body (hips and spine) is the main line of action and helps inform the rest of the body.
- The hips should be animated first using the leg keys as a guide as to where it should be angled. Again work on extremes first.
- The spine should be animated as a whole and individual parts separately since it works together. The spine should animate oppositely of the hips. It is the “bridge” between what the legs and arms are doing.
- The head is animated oppositely to keep it straight.
-
- Arms:
- The arms are the least important part and very easy to animate.
- Simply animate the shoulders swing oppositely of the legs and have each subsequent joint swing slightly later to generate the appearance of drag.
Walk:
Here are keys:
Run:
Although the run cycle shares some similarities to the walk cycle it is surprisingly different from a walk. Like the walk it is also a formula you must commit to memory.
Process:
I would suggest approaching the run differently than the walk. You should use the pose to pose method:
- Pose the entire body on the contact frames first.
- Pose the passing position next.
- Pose the up and down positions last.
- Make any adjustments/fixes necessary.
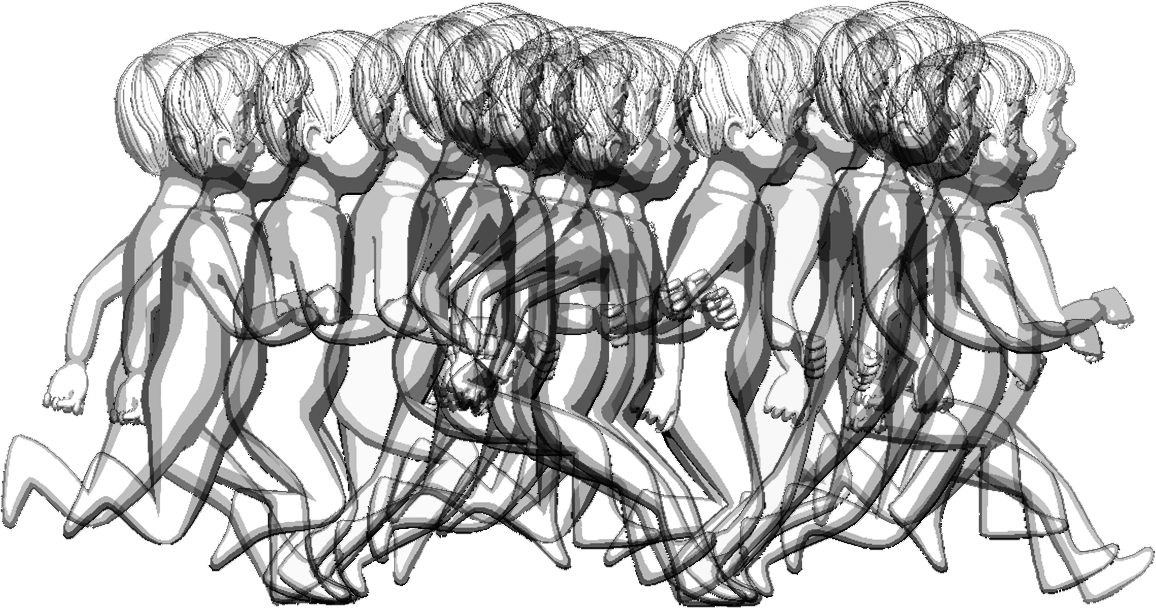
Run:
Here are keys:

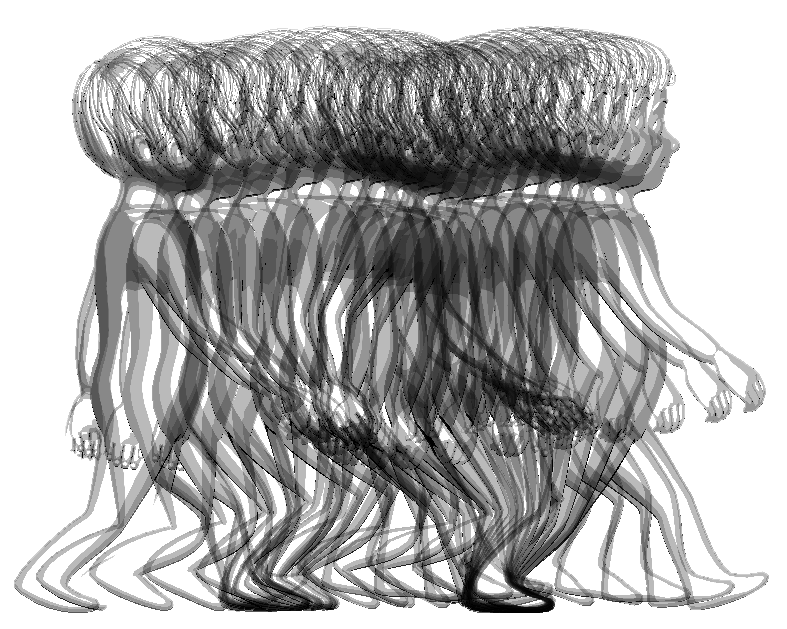
Layering Animation Method
The layering animation method is a viable option for a number of situations. It is particularly useful for when you have complicated overlapping actions. A walk cycle is a good example of when the layering method is appropriate.
Progression of keys layered on top of each other
Just Rig (no keys)
Leg Keys
Core Keys (hips, spine, head/head)
Arm Keys
Altogether
First Person (3d animation) Lab Demonstration
Assets
- Environment
-
- Terrain
- The ground that is sculpt through a heightmap
- Trees/Details
- Trees and other details such as rocks are placed on the terrain
- Other assets
- Other geometry is imported such as buildings and water. A skybox is imported
- Game Controller
- This will control the game for now it will spawn the enemies
- Characters
-
- Player
- First person controller
- Enemies
- Zombies that will seek you out and damage you

We do not have finalized graphics but a good start.
Scripts
- Updated Scripts
-
- EnemyControllerScript
- Adjust the player detection distance and add code to apply animation states
- Old Scripts
-
- PlayerControllerScript
- We will apply a shooting mechanic to this script
- PlayerStatsScript
- Holds health and may add or remove it
- EnemySpawnScript
- Will spawn the enemy wherever it is place at a rate given
using System.Collections;
using System.Collections.Generic;
using UnityEngine;

public class PlayerControllerScript : MonoBehaviour
{
    private LayerMask enemyMask = 1 << 10;

    public float nextFire = 0.0f;
	public float fireRate = 0.5f;
	public float damageAmt = 25.0f;
	public float knockBackAmt = 250f;

	public Transform shootPos;

	public GameObject hitSpawn;
	EnemyControllerScript enemyControllerScript;

	public LineRenderer line;

	Ray shootRay;
	RaycastHit hit;
	bool shootResult;
	GameObject spawnedHit;

	void Update ()
	{
		if(Input.GetButton("Fire1") && Time.time > nextFire)
		{
			Shoot(shootPos.position, shootPos.forward);
			nextFire = Time.time + fireRate;
		}
	}

    void Shoot (Vector3 origin, Vector3 direction)
    {
		shootRay = new Ray (origin, direction);
		Debug.DrawRay (shootRay.origin, shootRay.direction * 3f, Color.red, 1f);

		line.enabled = true;

		line.SetPosition(0, new Vector3 (origin.x -.25f, origin.y -.25f, origin.z  + .1f));
		line.SetPosition(1, shootRay.GetPoint (100));

		StartCoroutine(ShootLine());

		shootResult = Physics.Raycast (shootRay, out hit, 50f);
		if (shootResult)
		{
			spawnedHit = Instantiate (hitSpawn, hit.point, Quaternion.identity);
			StartCoroutine (ShootSpawn (spawnedHit));

			enemyControllerScript = hit.transform.GetComponent<EnemyControllerScript>();
			if(enemyControllerScript != null)
			{
				hit.transform.gameObject.GetComponent<Rigidbody>().AddForceAtPosition (shootRay.direction * knockBackAmt, hit.point);
				enemyControllerScript.EnemyHealthAdjustment(-damageAmt);
			}
		}
	}

	IEnumerator ShootLine()
	{
		yield return new WaitForSeconds (.25f);
		line.enabled = false;
	}

	IEnumerator ShootSpawn(GameObject spawnedHit)
	{
		yield return new WaitForSeconds (2f);
		Destroy (spawnedHit);
	}
}
using System.Collections;
using System.Collections.Generic;
using UnityEngine;

public class PlayerStatsScript : MonoBehaviour
{
    public float playerHealth = 100f;

    public void PlayerHealthAdjustment(float playerHealthAdjustment)
    {
        playerHealth += playerHealthAdjustment;
    }
}using System.Collections;
using System.Collections.Generic;
using UnityEngine;
public class EnemySpawnScript : MonoBehaviour
{
public GameObject enemy;
public float spawnRate;
private float nextSpawnTime;
void Update ()
{
if(Time.time > nextSpawnTime)
{
nextSpawnTime = Time.time + spawnRate;
Instantiate (enemy, transform.position, Quaternion.identity);
}
}
}using System.Collections;
using System.Collections.Generic;
using UnityEngine;
public class EnemyControllerScript : MonoBehaviour
{
private GameObject playerObject;
private UnityEngine.AI.NavMeshAgent enemyNav;
private Animator enemyAnim;
private LayerMask playerMask = 1 << 9;
public bool playerPresent = false;
public float enemyAttackAmount;
public float enemyAttackRate;
private float enemyNextAttackTime = 0.1f;
public float enemyHealth = 100f;
void Awake()
{
playerObject = GameObject.FindGameObjectWithTag("Player");
enemyNav = GetComponent<UnityEngine.AI.NavMeshAgent>();
enemyAnim = GetComponentInChildren<Animator>();
}
void Update()
{
if(!playerPresent)
enemyNav.SetDestination(playerObject.transform.position);
EnemyAnimation();
}
void FixedUpdate()
{
playerPresent = DetectPlayer();
AttackPlayer();
}
bool DetectPlayer()
{
Vector3 fwd = transform.TransformDirection(Vector3.forward);
if(Physics.Raycast(transform.position, fwd, 2, playerMask))
return true;
else
return false;
}
void AttackPlayer()
{
if(playerPresent && Time.time > enemyNextAttackTime)
{
enemyNextAttackTime = Time.time + enemyAttackRate;
playerObject.GetComponent<PlayerStatsScript>().PlayerHealthAdjustment(-enemyAttackAmount);
}
}
public void EnemyHealthAdjustment(float enemyHealthAdjustment)
{
enemyHealth += enemyHealthAdjustment;
if(enemyHealth <= 0)
{
Destroy(gameObject);
}
}
public void EnemyAnimation()
{
enemyAnim.SetBool("PlayerNear", playerPresent);
}
}
First Person (3d animation) Lab
First Person (3d animation) Lab:
With the enemy model complete you rig and animate the results.Then the animated model will be brought into Unity and hooked up.
You will be graded on the following:
- Lab Requirements
- Techniques and processes covered in the instructional material is followed and implemented.
- Creativity & Craftsmanship
- Excellent design choices, novel & appealing, and solid clean caliber work.
Resources:
- Assignment Video Tutorials
- You may watch the tutorial videos below to help you complete your assignment.
Assignment Video Tutorials
Wait! Before you go!
Did you remember to?
- Read through this webpage
- Submit Class 12: First Person (3d animation) Lab on Blackboard
