You have a complete finished page using the Divi theme. This theme pretty much as all the options one could want but what if you wanted something that it doesn't have and is not available via a plugin? The answer is you create a child theme and/or plugin. These will run after the primary theme but allow you to add what you would like without interfering with the theme.
Click on the > to start
You may just use what you created in the last lab as the starting point for this lab.

- Creating a child theme is actually very similar to creating a theme but a bit simpler. First we need to create a folder and some files.
- Navigate to your site's theme folders. In Local right-click on the site name and select Show Folder. From there navigate to siteName>app>public>wp-content>themes.
- Create a folder inside called "Divi-child".
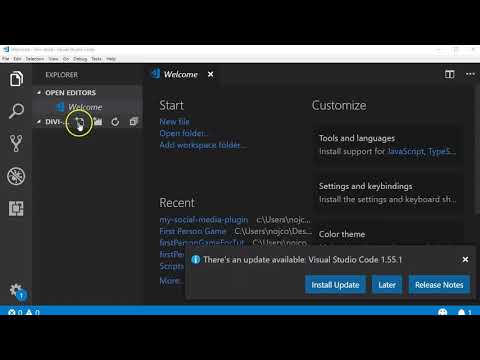
- Open Microsoft Visual Studio Code. Click and drag the Divi-child folder you just created into the program to load the folder location. It will appear in a left panel.
- Press the
 New File button to create a new file. Save this document as style.css.
 - Press the New File button to create a new file. Save this document as functions.php.
- The bare bones of the child theme is now there.
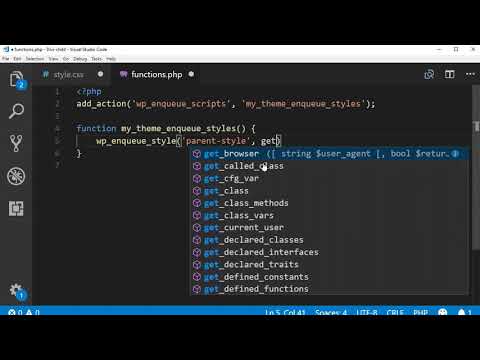
- Like creating a theme a functions.php file must be coded to load in our files (in this case just the stylesheet).
- Open the functions.php and enter the following code:
<?php
add_action( ‘wp_enqueue_scripts’, ‘my_theme_enqueue_styles’ );
function my_theme_enqueue_styles() {
wp_enqueue_style( ‘parent-style’, get_template_directory_uri() . ‘/style.css’ );} - Open the style.css and enter the following code:
/*
Theme Name: Divi Child
Theme URI: elegantthemes.com
Description: Divi Child Theme
Author: Your Name
Author URI: http://yoursite.com
Template: Divi
Version: 1.0.0
*/ - This is most basic start of the child theme.
<?php
add_action('wp_enqueue_scripts', 'my_theme_enqueue_styles');

function my_theme_enqueue_styles() {
    wp_enqueue_style('parent-style', get_template_directory_uri() . '/style.css');}
/*
Theme Name: Divi Child
Theme URI: elegantthemes.com
Description: Divi Child Theme
Author: Jon Cone
Author URI: teachmecone.flywheelsites.com
Template: Divi
Version: 1.0.0
*/


- Now that the child theme has the necessary elements it can be activated, customized, and previewed.
- Open Local, start the site, and log in as admin.
- In the Dashboard navigate to Appearance>Themes. Activate Divi-child that you just created.
- Preview your site by pressing on the site name at the top-left of the window. You should see no difference in the site.

/*
Theme Name: Divi Child
Theme URI: elegantthemes.com
Description: Divi Child Theme
Author: Jon Cone
Author URI: teachmecone.flywheelsites.com
Template: Divi
Version: 1.0.0
*/

<!--Your CSS rules may differ. Just experiment with it-->
body {
    background-color:black;}
p {
    color:red;}
div.et_pb_section {
    background-color:gray;
}
.et_pb_text_4 > div:nth-child(1) > h2:nth-child(1) > span:nth-child(1)
{
    font-size:4em;
}
- You may use the style.css document of the child theme to apply any custom css to your site.
- In Visual Studio Code open style.css from the child theme folder you created.
- You may use any selectors you wish but you may find that you are competing with classes that override tag names like p, h1, li, a, etc. To make more specific selectors you may use the browser web developer tools.
- On the front-end (what the user sees) right-click over an element and select Inspect or Inspect Element from the popup. This will open the inspector panel with the html highlighted.
- Right-click on the element in the inspector panel and select Copy>Copy selector or Copy>CSS Selector.
- Back in Visual Studio Code paste what you copied (ctrl + v or cmd + v). A very specific selector will be entered. You may need to adjust it (remove or add classes, id's, or others).
- You may add as many declarations onto this selector to create your CSS rule.
- Create at least three CSS rules.


- The child theme is appropriate for apply CSS to tweak the design of the site. If you want to add, remove, or alter content you should use a plugin. Like the child theme we need to create a shell of folders and files to make our plugin.
- In Local right-click on the site name and select Show Folder. Navigate to yourSiteName/app/public/wp-content/plugins. We will create an alert plugin inside here.
- Create a folder called "my-alert-plugin".
- Open Microsoft Visual Studio Code (if it is not already open). Click and drag the my-alert-plugin folder you just created into Visual Studio Code.
- In Visual studio code create a folder by pressing the
 Create Folder button. Name it "css".
 - Create another folder by pressing the Create Folder button again. Name it "includes".
- You now have the folder structure. Let's add the files.
- Inside the master folder my-alert-plugin folder press the Create File button. Name this file "my-alert-plugin.php".
- Inside the css folder press the Create File button. Name this file "style.css".
- Inside the includes folder press the Create File button. Name this file "my-alert-plugin-functions.php".
- We now have the shell of the plugin that we can build in.
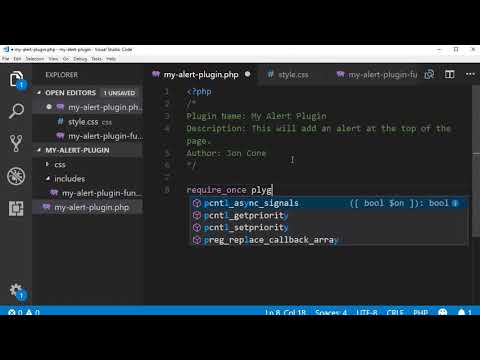
<?php
/*
Plugin Name: My Alert Plugin
Description: This will add an alert at the top of the page
Author: Your Name
*/

require_once plugin_dir_path(__FILE__) . 'includes/my-alert-plugin-functions.php';
- Wordpress gets its information about the plugin much like it does a theme, with a heading. We will create a simple one.
- In Visual Studio Code open my-alert-plugin.php.
- Type:
<?php
/*
Plugin Name: My Alert Plugin
Description: This will add an alert at the top of the page
Author: Your Name
*/ - This information will be readable inside Wordpress.
- This PHP document will just be used for information about the plugin. We will use my-alert-plugin-functions.php document to do the actual work. In order for this to happen we need to tell it to run. That is added to this document.
- Type:
require_once plugin_dir_path(__FILE__) . 'includes/my-alert-plugin-functions.php'; - Save your file.
- Inside the Dashboard navigate to Plugins.
- You should see your plugin installed but not activated. Click on Activate underneath its name.

<?php

add_action('wp_head', 'map_add_text');

function map_add_text()
{
    ?>
    <h1 class="currentStatus">Closed for corona</h1>
    <?php
}

wp_enqueue_style('pluginCSS', plugins_url('../css/style.css', __FILE__));- The plugin is activated and running but it isn't doing anything. Let's write the code in our function that will actually do the behavior we are looking for.
- In Visual Studio Code open my-alert-plugin-functions.php.
- Type
<?php
add_action('wp_head', 'map_add_text');
function map_add_text()
{
?>
<h1 class="currentStatus">closed for corona</h1>
<?php
} - This will add the message in the header section of the site. We need to format it though.
- Type
wp_enqueue_style( 'pluginCSS', plugins_url('../css/style.css', __FILE__) ); - This will connect the stylesheet of the plugin so we can apply CSS to our message.

<!--your css code may differ. Format it it however you like-->
.currentStatus {
    padding: 5px;
    text-align: center;
    background-color: red;
    color: white;
font-size: 1.5em;}- The message that the plugin is applying to the site needs to be formatted.
- In Visual Studio Code open style.css.
- Enter
.currentStatus {
padding: 5px;
text-align: center;
color: white;
background-color: red;
font-size: 1.5em;
} - The message should be properly formatted now.
- Preview the site to make sure it is working.
- You can create a much more robust plugin using this same process.

- You may add whatever you like to the child-theme and plugin.
- When you are happy with your site you can export it for submission.
- In Local right-click on the site name in the list on the left. In the popup choose Export. Don't enter anything in the window. Press Export. In the popup choose where you want to export and export.
- Now, log into Blackboard (Here) and click on this course. Inside the course, select Class 13, then the Class 13: Divi Child Site (child theme creation) Lab folder, then the assignment with the same name. Finally, Attach the zipped file.

You have finished the Divi Child Theme Site lab series! You now know the basics of Divi, child themes, and plugins. You have a better grasp of CMS in general. The last thing in this course is to create your own site. It may be whatever you like.
If you run into any issues please do not hesitate to contact me:
- jcone@cecil.edu
- (240) 466-1996