
Web Design II
Class 03: Intro to JavaScriptTopics
- Introduction to JavaScript
- JavaScript Examples
- Class 03 Single Page Site (javascript components) Lab

Class 3 will be just right.
Introduction to JavaScript
JavaScript:
JavaScript is an object oriented scripting language used to develop organized block of commands and is often used to add dynamic components to the web.
Progressive Enhancement:
- HTML = content
- CSS = design
- JavaScript = interactivity
Complexity:
- HTML = markup language
- JavaScript = scripting language
- C = programming language
Introduction to Programming:
We will be touching on programming. There are majors and courses dedicated to programming solely. It is good to be able to “read” code. Once you know one language, others are more easy to acclimate to.
All language contains:
- Syntax = grammar
- Semantics = vocabulary
JavaScript Structure:
- Variable
- Container that holds a value
- Statement
- A single line of code containing instructions.
- Function
- Blocks of statements.
- Object
- Contains properties (variables), events (test situation [ex. onclick, and methods (functions).
Metaphorically
- Functions are like machines.
- Statements are the things the machine does.
- Variables are things the machine may interact with.
Variables:
Variables may store, update, or replace data.
Variables:
Variables may store, update, or replace data.
- Three Properties
-
- var (keyword):
- The reserve word var declares that it is a variable.
- Name:
- The name allows you to call the information whenever you need it.
- Value:
- The data that is stored in the variable. This is not necessary to declare this initially.
- Rules
- Name cannot begin with a number.
- Name cannot include spaces.
- Name cannot use anything but letters, numbers, _, and/or $ (usually $ refers to jQuery).
- Name cannot use a reserve or keyword.
-
- Camel Case:
- In order to differentiate words without spaces you can start with lowercase and then uppercase for each subsequent word. (ex. totalPrice).
- youCanActuallyReadAWholeSentenceWithoutSpaces
- muchharderifcamelcaseisnotusedEVENWORSEINALLCAPS
var dogName = ‘Paco’ ;
Variable Assignment:
When you apply a value to a variable it is called an assignment.
JavaScript Data Types:
- number: 123, -123, 1.23, etc.
- string: ‘text’
- boolean: true, false
- array: list[‘white’,’black’,’red’]
- object:document
- and more…
Scope:
- Local
- The variable only exists inside the function it is declared in
- Global
- The variable exists outside a specific function and may be used anywhere in the code.
Statements:
A statement is a single line of code that contains instructions.
- A statement may be a variable assignment, mathematical equation, function call, etc.
- Each statement ends with a semicolon (;). Think of it like a period at the end of a sentence.
Comments
Comments are used to explain what is happening in your code and are not read by the computer.
-
- //
- Used to comment out a single line.
- /* at start and then */ at the end
- Used to comment out multiple lines of code. As much as you’d like.
Operators:
Expressions: Are assignments, math, or concatenations that evaluates into a single value.
Expressions, Conditionals, and loops use operators.
Common Operators (math):
- + addition (concatenation strings)
- – subtraction
- * multiplication
- / division
- % modulo (remainder)
Postfix Operators (increment/decrement):
- ++ adds one
- — subtracts one
Logical Operators (increment/decrement):
- && and
- || or
- ! not
Assignment Operators:
- += total += 1 is same as total = total + 1
- -= total += 1 is same as total = total – 1
- *= total += 1 is same as total = total * 1
- /= total += 1 is same as total = total / 1
- %= total += 1 is same as total = total % 1
Comparison Operators (for conditionals):
- > greater than
- >= greater than or equal to
- < less than
- <= less than or equal to
- == equal to
- != not equal to
Conditions & Loops:
Conditions and loops test for a certain condition and if met run a block of code once or many times.
If Statement: tests the condition and then runs if true.
For Loop: set a variable to count the times code runs and stops when that is reached.
{
Do this
}
Else
{
Do this
}
For (as long as this is true)
{
Do this
}
While Loop: runs a loop while specified condition is true.
Do While Loop: runs without conditional then test afterwards to run again.
While (this is true)
{
Do this
}
Do
{
Do this
}
Repeat (if this is true)
Functions/Methods:
A function (method when inside an object) completes a specific task with a block of commands grouped together so that they may be called and reused.
Function Syntax:
- function
- the keyword that let’s the computer know that this a function.
- ()
- the parameters are data that is passed to the function to process.
- {}
- the code block contains all the statements the function runs.
- return
- the return is the information sent back from a function call.
- function call
- this is how you execute a function. You may also send a function data via arguments.
Objects:
Objects are data models that may contain variables, functions, and events.
Object Components:
- Properties
- properties are variables nested inside of objects.
- properties come in pairs, key and value.
- Methods
- methods are functions nested inside of objects
- methods contain blocks of code that complete a given task
- Events
- events describes the response of the object to an input.
- events respond to things such as clicking, hovering, entering text, etc.
Typical Order of Operations:
- event triggers a method
- method completes a series of instructions
- method retrieves/updates object properties
Built-in Objects:
- Browser Object Model
- Represents information regarding the browser, history, screen, etc.
- Document Object Model
- Represents information regarding the document (HTML).
- Global JavaScript Objects
- These are generic built-in commonly used objects.
Document Object Model (DOM):
The complete document is represented as an object. All elements are also represented as children objects of the DOM. JavaScript communicates with the HTML document via the DOM.
Script Syntax:
- <script>
- Holds javaScript. Either embedded or linked.
- document
- Represents the DOM.
- .dot notation represents a member operator. The text that follows is part of the object.
- write()
- This is a built in method of the DOM.
- ‘<p>Hello World</p>’
- This is the parameter (data) being sent to the write method.
document
<html>
<head>
<body>
<title>
<style>
<h1>
<p>
Events:
Events are how your user interacts with the webpage. Events trigger functions.
Event Handling:
- Select element to be interacted with.
- Indicate event type that triggers a response.
- Code that runs once triggered.
HTML Event Handler:
This is the oldest form of producing an event. It is considered bad practice but is very simple to produce.
Browser View
The time?
Traditional DOM Event Handler:
This is superior to the HTML event handler in that it allows you to separate the JavaScript from HTML.
Browser View
Click me for the date!
DOM level 2 Event Listener:
This is the newest way of attaching a JavaScript event to an element. It is the most complicated but is also the most flexible. Adobe Animate generates this code.
Browser View
Show Date
JavaScript Examples
Below you will find examples of various JavaScript Components. You are NOT required to do these. I just included them as examples if you would like to try any of them. You MUST complete the lab slide show tutorial at the very bottom of this page.
Read More JavaScript Tutorial Video
Read More:
Add a read more button that will reveal more information when clicked.
HTML:
- <p>
- The text.
- <span id=”dots”>
- A span that has the … when the rest of the text is hidden.
- <span id=”more”>
- A span that holds the hidden text.
- <button onclick=”readMoreFunction()” id=”rmBtn”>
- A read more button that runs the readMoreFunction when clicked.
CSS:
- #more {}
- display: none;
- Turn off the more text by default.
JavaScript:
- function readMoreFunction() {
- Function that will run when the button is pressed.
-
- var dots = document.getElementById(“dots”);
- Variable that stores the … text.
- var moreText = document.getElementById(“more”);
- Variable that stores the more text.
- var btnText = document.getElementById(“rmBtn”);
- Variable that stores the read more button.
- if(dots.style.display === “none”) {
- If the … is not visible.
-
- dots.style.display = “inline”;
- Turn on the … using inline.
- btnText.innerHTML = “Read more”;
- Change the button text to read more.
- moreText.style.display = “none”;
- Turn off the read more text.
- else {
- Else do the following
-
- dots.style.display = “none”;
- Turn the … off.
- btnText.innerHTML = “Read less”;
- Change the button text to read less..
- moreText.style.display = “inline”;}}
- Turn on the read more text.
Read More HTML
Accordion JavaScript Tutorial Video
Accordion:
Expands and collapses sections.
HTML:
- <button>
- Use the button tag to make a clickable object.
- class=”accordionBtn”
- Add a class attribute to target the object.
- <div>
- Create a div that will contain what will be revealed.
- class=”accordionPnl
- Add a class attribute to target the panel that will be revealed.
CSS:
- .accordionBtn {}
- background-color: #eee; color: #444; cursor: pointer; padding: 18px; width: 100%; text-align: left; border: none; outline: none; transition: 0.4s;
- Style the accordion button.
- .active, .accordionBtn:hover {}
- background-color: #ccc;
- Style the accordion button when it is active and on hover.
- .accordionPnl {}
- padding: 0 18px; background-color: white; display: none; overflow: hidden;
- Style the accordion panel so it is hidden initially.
JavaScript:
- var accBtn = document.getElementsByClassName(“accordionBtn”);
- Store all of the elements with the acccordionBtn class name into an array named accBtn.
- var i;
- Create an array to count in the for loop.
- for (i = 0; i < accBtn.length; i++) {
- For each of objects in accBtn run the following code.
-
- accBtn[i].addEventListener(“click”, function() {
- Add an event listener that listens for click and runs a function.
-
- this.classList.toggle(“active”);
- Turn on or off the object highlighting if selected.
- var accPnl = this.nextElementSibling;
- Store the current accordion panel into accPnl variable so it can be controlled.
- if (accPnl.style.display === “block”) {
- If the display is set to block (visible).
-
- accPnl.style.display = “none”;}
- Turn the display off.
- else {
- Else the display is probably set to none (off).
-
- accPnl.style.display = “block”;}});}
- Turn it on using block.
Accordion HTML
Accordion CSS
Accordion JavaScript
Modal JavaScript Tutorial Video
Modal:
A popup.
HTML:
- <button>
- Use the button tag to make a clickable object.
- class=”modalBtn”
- Add a class attribute to target the object.
- <div class=”modal” id=”modal”>
- Create a div with a class and id that will contain what will be revealed.
- <div class=”modalContent”>
- Create a div with a class and id that has the content.
- <p class=”closeBtn”>
- The close button.
CSS:
- #modalBtn {}
- margin: 25px; padding: 10px; font-size: 1.25em; font-weight:700;
- Style the modal button.
- .modal {}
- display: none; position: fixed; z-index: 1; left: 0; top: 0; width: 100%; height: 100%; overflow: auto; background-color: rgba(0,0,0,0.25);
- Style the modal popup.
- .modalContent {}
- background-color: white; margin: 15%auto; padding: 20px; border: 1px solid rgb(75, 75, 75); width: 80%;
- Style the content of the modal.
- .closeBtn {}
- color: rgb(104, 104, 104); font-size: 1.5em; font-weight: bold; text-align: center;
Style the close button.
- .closeBtn:hover, .closeBtn:focus {}
- color: black; text-decoration: none; cursor: pointer;
- Style the content of the modal.
JavaScript:
- var modal = document.getElementById(“modal”);
- Store the modal element in the variable named modal so it can be accessed.
- var modalBtn = document.getElementById(“modalBtn”);
- Store the modal button element in the variable named btn so it can be accessed.
- var closeBtn = document.getElementsByClassName(“closeBtn”)[0];
- Store the close button element in the variable named closeBtn so it can be accessed.
- modalBtn.onclick = function() {
- Apply a function when the button is clicked.
-
- modal.style.display = “block”;}
- Turn on the modal from display: none to display:block.
- closeBtn.onclick = function() {
- Apply a function when the button is clicked.
-
- modal.style.display = “none”;}
- Turn off the modal from display: block to display:none.
- window.onclick = function(event) {
- Apply a function when the window is clicked.
-
- if (event.target == modal) {
- If the modal is the thing clicked.
-
- modal.style.display = “none”;}}
- Turn off the modal from display: block to display:none.
Modal HTML
Modal CSS
#modalBtn {
Modal JavaScript
Tabs JavaScript Tutorial Video
Tabs:
Tabs inside of a page that you can reveal.
HTML:
- <button>
- Use the button tag to make a clickable object.
- class=”tableBtn”
- Add a class attribute to target the object.
- <div class=”tabContent”>
- Create a div with a class that will contain what will be revealed.
CSS:
- .tabBtn {}
-
background-color: rgb(148, 147, 121); color: white; float: left; border: none; outline: none; cursor: pointer; padding: 14px16px; font-size: 17px; width: 20%;
- Style the tab.
- .tabBtn:hoverl {}
-
background-color: rgb(80, 79, 57);
- Highlight the tab on mouse hover.
- .tabContent {}
-
color: black; background-color: rgb(224, 224, 207); display: none; padding: 50px; text-align: center;
- Style the content revealed by the tab.
- .tabActive {}
-
color: black; background-color: rgb(224, 224, 207);The style of the opened tab.
JavaScript:
- function openTab(tabClicked) {
- Apply a function when the window is clicked.
-
- var i;
- Counting variable for the For loops.
- var tabContent = document.getElementsByClassName(“tabContent”);
- Store the tab contents in this variable so it may be accessed in the code.
- for (i = 0; i < tabContent.length; i++) {
- For each object in stored in the tabContent variable run the following code.
-
- tabContent[i].style.display = “none”;}
- Turn off the tab content from display: block to display:none.
- var tabBtns = document.getElementsByClassName(“tabBtn”);
- Store the tab buttons in this variable so it may be accessed in the code.
- for (i = 0; i < tabBtns.length; i++) {
- For each object stored in the tabBtns variable run the following code.
-
- tabBtns[i].classList.remove(“tabActive”);
- Remove the tabActive class so none are active.
- if(tabBtns[i] == tabClicked) {
- If the current tab button is the same as the tab that is clicked run the code below.
-
- tabBtns[i].classList.toggle(“tabActive”);
- Toggle the tabActive class so that the tab button appears on.
- tabContent[i].style.display = “block”;}}}
- Turn the tabContent on via block so the tab content is not visible.
- document.getElementById(“defaultOpen”).click();
- Click whatever tab button as the defaultOpen id attribute so that the tab is on to start.
Tabs HTML
<div class=“tabContent”>
<div class=“tabContent”>
<div class=“tabContent”>
Tabs CSS
Tabs JavaScript
Greeting JavaScript Tutorial Video
Greeting:
This code will check the time of day and type out a greeting.
HTML:
- <h3 id=”greeting”>
- This heading will be targeted and replaced using JavaScript.
CSS:
- #greeting {}
-
font-size: 3em; font-family: ‘Segoe UI’, Tahoma, Geneva, Verdana, sans-serif;
- Style the greeting.
JavaScript:
- var today = new Date();
- Store today’s date into a variable.
- var hourNow = today.getHours();
- Find the current hour and store that.
- var greetingTxt;
- Variable that will hold the generated greeting.
- if(hourNow > 18) {
- If the hour is greater than 18 out of 24.
-
- greetingTxt = “Good Evening!”;
- Greeting is good evening.
- else if(hourNow > 12){
- If the hour is greater than 12 out of 24.
-
- greetingTxt = “Good Afternoon!”;
- Greeting is good afternoon.
- else if(hourNow > 0){
- If the hour is greater than 0 out of 24.
-
- greetingTxt = “Good Morning!”;}
- Greeting is good morning.
- else {
- Else just do the following…
-
- greetingTxt = “Welcome!”;}
- Greeting is welcome.
- var i;
- Variable counter.
- var txt = greetingTxt;
- Variable to transfer the greeting to the typewriter.
- var speed = 50;
- Variable that determines the speed of the typing.
- function typeWriter() {
- Function that will create the typing effect.
- if (i < txt.length) {
- If the counter is less than the length (number of characters) in the text.
-
- document.getElementById(“greeting”).innerHTML += txt.charAt(i);
- Select the element with the greeting id and enter the next character of the greeting.
- i++;
- Increment the counter (add one to).
- setTimeout(typeWriter, speed);}}
- Wait to run the function again after the specified amount in the speed variable.
- typeWriter();
- Actually start the function that writes out the greeting.
Greeting HTML
Greeting CSS
Greeting JavaScript
Class 03 Single Page Site (javascript components) Lab
Single Page Site (javascript components) Lab:
Solid HTML code made the page well-structured, semantic and ADA compliant. The CSS has added design aesthetics as well as made the it responsive. Now it is time to add some pizzazz with interactive elements utilizing JavaScript. In this lab we will add at least one interesting interactive element such as an accordion, drop-down, popup, etc.
You will be graded on the following:
- Basic Document & File Structure:
- Master folder created with correct sub folders.
- All files named and placed correctly.
- Basic HTML and CSS structure produced.
- JavaScript Code:
- Code functions correctly.
- All coding and formatting errors removed
- Interactivity
- Buttons follow the usability standards.
- Aesthetics:
- Interesting and appealing design.
- Descriptive and well-written text
Resources:
- Assignment Video Tutorials
- You may watch these tutorial videos below to help you complete your assignment.
- Assignment Lab Materials
- You may download the lab materials used here: wd2_week03_labmateraisl.
Lab Tutorial Slideshow
This tutorial will review the HTML and CSS that was covered in Web Design I.

Besides an adaptive grid, responsive frameworks typically include other interactive components. These are achieved through advanced CSS and JavaScript. In this lab we are going to create a couple of JavaScript components.
If you run into any issues please do not hesitate to contact me:
jcone@cecil.edu
(240) 466-1996
Click on the > to start
You may use what you prodcued in the last class or start with the zip folder below
One Page Site (javascript components) Lab Materials (

- You may use what you created in the last lab or use the provided one here: One Page Site (javascript components) Lab Materials (all required materials are included).
- If you choose to work from what you created last lab you won't need any additional files.
- Once you have the lab materials or your previously created lab you should open up the index.html file in Visual Studio Code.
<!DOCTYPE html>
<html>
<head>
<title>About Cone</title>
<meta name="viewport" content="width=device-width, initial-scale=1.0">
<link rel="stylesheet" href="css/style.css" />
</head>
<body>
<div class="header row">
<div class="col-8-s col-6-m col-4-l">
<h1 class="responsive-h">About Cone</h1>
</div>
<div class="col-4-s col-6-m col-8-l">
<figure>
<img class="responsive-img logoLarge" src="images/coneLogoLarge.png" />
<img class="responsive-img logoSmall" src="images/coneLogoSmall.png" />
<figcaption>Look upon my majesty</figcaption>
</figure>
</div>
</div>
<div class="content row">
<div class="col-4-s col-6-m col-8-l">
<h2>I am Cone</h2>
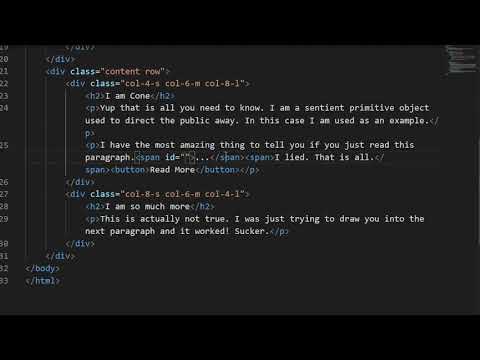
<p>Yup that is all you need to know. I am a sentient primitive object used to direct the public away. In this case I am used as an example.</p>
<p>I have the most amazing thing to tell you if you just read this paragraph.<span id="dots">…</span> <span id="more">I lied. That is all.</span><button id="rmBtn">Read more</button></p>
</div>
<div class="col-8-s col-6-m col-4-l">
<h2>I am so much more</h2>
<p>This is actually not true. I was just trying to draw you into the next paragraph and it worked! Sucker.</p>
</div>
</div>
</body>
</html>
- We will create two basic JavaScript components. The first one will be a "read more." This is button that when pressed will reveal more content.
- After the first paragraph element add another paragraph with two spans and a button. One span for the ..., one for the content of the read more, and a button for the read more/less button. It should look something like this:
<p>I have the most amazing thing to tell you if you just read this paragraph.<span>…</span> <span>I lied. That is all.</span><button>Read more</button></p> - Feel free to add any content you would like to the read more but we now have a shell for the component.
- Add some classes so we can target the elements to apply style and scripts. "dots", "more", and "rmBtn" should inserted into the two spans and button we just created. The result:
<p>I have the most amazing thing to tell you if you just read this paragraph.<span id="dots">…</span> <span id="more">I lied. That is all.</span><button id="rmBtn">Read more</button></p> - Time to add some CSS and JavaScript

- Like CSS, JavaScript can be included in the HTML document or exist as its own document linked. Like CSS it is most often best practice to create it as an external file.
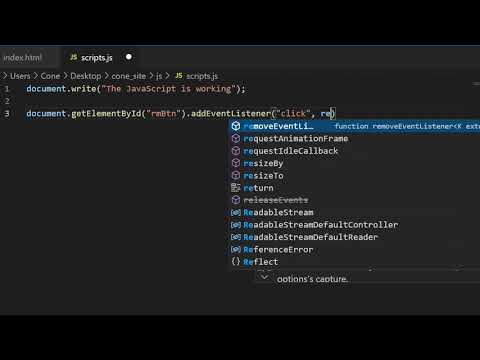
- In Visual Studio Code select File>New File. Press File>Save. Navigate to js folder and save the file as scripts.js.
- Let's write some test code just to see if it is working. Type:
document.write("The JavaScript is working");
If you save and preview the index.html file you will see nothing happens. It's not linked! - JavaScript is a bit different than CSS. JavaScript executes where it is written. This means we actually want to link it at the end of the document. This way the HTML elements we are targeting exist before the code runs.
- Just before the closing body tag write:
<script src="js/scripts.js"></script> - Save the document and preview. You will see The JavaScript is working written in plain text at the bottom of the page!
<!DOCTYPE html>
<html>
<head>
    <title>About Cone</title>
    <meta name="viewport" content="width=device-width, initial-scale=1.0">
    <link rel="stylesheet" href="css/style.css" />
</head>
<body>
    <div class="header row">
        <div class="col-8-s col-6-m col-4-l">
            <h1 class="responsive-h">About Cone</h1>
        </div>
        <div class="col-4-s col-6-m col-8-l">
            <figure>
                <img class="responsive-img logoLarge" src="images/coneLogoLarge.png" />
                <img class="responsive-img logoSmall" src="images/coneLogoSmall.png" />
                <figcaption>Look upon my majesty</figcaption>
            </figure>
        </div>
    </div>
    <div class="content row">
        <div class="col-4-s col-6-m col-8-l">
            <h2>I am Cone</h2>
            <p>Yup that is all you need to know. I am a sentient primitive object used to direct the public away. In this case I am used as an example.</p>
            <p>I have the most amazing thing to tell you if you just read this paragraph.<span id="dots">…</span>   <span id="more">I lied. That is all.</span><button id="rmBtn">Read more</button></p>
        </div>
        <div class="col-8-s col-6-m col-4-l">
            <h2>I am so much more</h2>
            <p>This is actually not true. I was just trying to draw you into the next paragraph and it worked! Sucker.</p>
        </div>
    </div>
<script src="js/scripts.js"></script>
</body>
</html>
document.write("The JavaScript is working");
- The way JavaScript (and other programming languages) interacts with HTML is through the Document Object Model. Basically the idea is that the entire webpage is broken into a hierarchy of objects (generally elements) that may be targeted to have code imposed onto.
- We want code to run when we we click on the Read More button. To do this we will create an event listener. This tells JavaScript to run a function when an event (click in this case) occurs on the specified object (element). Write:
document.getElementById("rmBtn").addEventListener("click", readMoreFunction); - Next we need to create the event handler. This will be the function that runs when the event listener is triggered. On a new line:
function readMoreFunction()
{
} - Cut and paste document.write("The JavaScript is working"); code inside the brackets of the readMoreFunction we just created. Save the document.
- Test the index.html file. You will see when you press the Read More button the text will appear. It's not what we want but we can see the event is working.
<!DOCTYPE html>
<html>
<head>
    <title>About Cone</title>
    <meta name="viewport" content="width=device-width, initial-scale=1.0">
    <link rel="stylesheet" href="css/style.css" />
</head>
<body>
    <div class="header row">
        <div class="col-8-s col-6-m col-4-l">
            <h1 class="responsive-h">About Cone</h1>
        </div>
        <div class="col-4-s col-6-m col-8-l">
            <figure>
                <img class="responsive-img logoLarge" src="images/coneLogoLarge.png" />
                <img class="responsive-img logoSmall" src="images/coneLogoSmall.png" />
                <figcaption>Look upon my majesty</figcaption>
            </figure>
        </div>
    </div>
    <div class="content row">
        <div class="col-4-s col-6-m col-8-l">
            <h2>I am Cone</h2>
            <p>Yup that is all you need to know. I am a sentient primitive object used to direct the public away. In this case I am used as an example.</p>
            <p>I have the most amazing thing to tell you if you just read this paragraph.<span id="dots">…</span>   <span id="more">I lied. That is all.</span><button id="rmBtn">Read more</button></p>
        </div>
        <div class="col-8-s col-6-m col-4-l">
            <h2>I am so much more</h2>
            <p>This is actually not true. I was just trying to draw you into the next paragraph and it worked! Sucker.</p>
        </div>
    </div>
<script src="js/scripts.js"></script>
</body>
</html>
document.getElementById("rmBtn").addEventListener("click", readMoreFunction);

function readMoreFunction()
{
    document.write("The JavaScript is working");
};

- The event is operational but not functioning the way we want. We will use JavaScript to change the styling and text of the elements in the read more component.
- First let's "turn off" the content of the read more so it is not initially visible. In the index.html document create a style section and add the CSS rule:
#more {display: none;} - In the scripts,js file remove the document.write("The JavaScript is working"); from the body of the readMoreFunction. This was just to test the code.
- In order to change elements in the webpage we must be able to target them. In this case we will store them as variables like so:
var dots = document.getElementById("dots");
var moreText = document.getElementById("more");
var btnText = document.getElementById("rmBtn"); - Using a simple if/else condition we can turn on and off CSS and HTML content. It should look like this:
if (dots.style.display == "none") {
dots.style.color = "rgb(250 0 0)";
dots.style.display = "inline";
btnText.innerHTML = "Read more";
moreText.style.display = "none";}
else {
dots.style.display = "none";
btnText.innerHTML = "Read less";
moreText.style.display = "inline";} - Save the files and preview. You will now see that when you click on the Read More button it will reveal your content.
<!DOCTYPE html>
<html>
<head>
    <title>About Cone</title>
    <meta name="viewport" content="width=device-width, initial-scale=1.0">
    <link rel="stylesheet" href="css/style.css" />
    <style>
        #more {display: none;}
    </style>
</head>
<body>
    <div class="header row">
        <div class="col-8-s col-6-m col-4-l">
            <h1 class="responsive-h">About Cone</h1>
        </div>
        <div class="col-4-s col-6-m col-8-l">
            <figure>
                <img class="responsive-img logoLarge" src="images/coneLogoLarge.png" />
                <img class="responsive-img logoSmall" src="images/coneLogoSmall.png" />
                <figcaption>Look upon my majesty</figcaption>
            </figure>
        </div>
    </div>
    <div class="content row">
        <div class="col-4-s col-6-m col-8-l">
            <h2>I am Cone</h2>
            <p>Yup that is all you need to know. I am a sentient primitive object used to direct the public away. In this case I am used as an example.</p>
            <p>I have the most amazing thing to tell you if you just read this paragraph.<span id="dots">…</span>   <span id="more">I lied. That is all.</span><button id="rmBtn">Read more</button></p>
        </div>
        <div class="col-8-s col-6-m col-4-l">
            <h2>I am so much more</h2>
            <p>This is actually not true. I was just trying to draw you into the next paragraph and it worked! Sucker.</p>
        </div>
    </div>
<script src="js/scripts.js"></script>
</body>
</html>
document.getElementById("rmBtn").addEventListener("click", readMoreFunction);

function readMoreFunction()
{
    var dots = document.getElementById("dots");
    var moreText = document.getElementById("more");
    var btnText = document.getElementById("rmBtn");

    if (dots.style.display == "none") {
        dots.style.color = "rgb(250 0 0)";
        dots.style.display = "inline";
        btnText.innerHTML = "Read more";
        moreText.style.display = "none";}

    else {
        dots.style.display = "none";
        btnText.innerHTML = "Read less";
        moreText.style.display = "inline";}
}

- The Read More component is complete. Now is a good time to preview it. Save both documents (index.html & scripts.js) and open index.html in your favorite browser.
- It should work similar to the example embedded below.
- We will create one more component. It will be more complicated but we will go quicker since we have some experience now.
About Cone
I am Cone
Yup that is all you need to know. I am a sentient primitive object used to direct the public away. In this case I am used as an example.
I have the most amazing thing to tell you if you just read this paragraph....
I am so much more
This is actually not true. I was just trying to draw you into the next paragraph and it worked! Sucker.
Unfortunately the responsive elements of the image and title changing based on side does not function in this preview.

<!DOCTYPE html>
<html>
<head>
    <title>About Cone</title>
    <meta name="viewport" content="width=device-width, initial-scale=1.0">
    <link rel="stylesheet" href="css/style.css" />
    <style>
        #more {display: none;}

        .accordionBtn {
            background-color: rgb(246, 148, 35);
            color: #444;
            cursor: pointer;
            padding: 18px;
            width: 100%;
            text-align: left;
            border: none;
            outline: none;
            transition: 0.4s;}
        .active, .accordionBtn:hover {
            background-color: #ccc;}
        .accordionPnl {
            padding: 0 18px;
            background-color: white;
            display: none;
            overflow: hidden;}
    </style>
</head>
<body>
    <div class="header row">
        <div class="col-8-s col-6-m col-4-l">
            <h1 class="responsive-h">About Cone</h1>
        </div>
        <div class="col-4-s col-6-m col-8-l">
            <figure>
                <img class="responsive-img logoLarge" src="images/coneLogoLarge.png" />
                <img class="responsive-img logoSmall" src="images/coneLogoSmall.png" />
                <figcaption>Look upon my majesty</figcaption>
            </figure>
        </div>
    </div>
    <div class="content row">
        <div class="col-4-s col-6-m col-8-l">
            <h2>I am Cone</h2>
            <p>Yup that is all you need to know. I am a sentient primitive object used to direct the public away. In this case I am used as an example.</p>
            <p>I have the most amazing thing to tell you if you just read this paragraph.<span id="dots">…</span>   <span id="more">I lied. That is all.</span><button id="rmBtn">Read more</button></p>
        </div>
        <div class="col-8-s col-6-m col-4-l">
            <h2>I am so much more</h2>
            <p>This is actually not true. I was just trying to draw you into the next paragraph and it worked! Sucker.</p>

            <button class="accordionBtn">Interesting Facts About Cone</button>
            <div class="accordionPnl">
                <p>He is not interesting, obviously. Move along.</p>
            </div>

            <button class="accordionBtn">Cone Joke</button>
            <div class="accordionPnl">
                <p>Heard a microchip making all sorts of awful puns. Turns out it was made of silly cone. You regret this don't you?</p>
            </div>

            <button class="accordionBtn">Cone's Friend List</button>
            <div class="accordionPnl">
                <p>...</p>
                <p>...in progress.</p>
            </div>
        </div>
    </div>
<script src="js/scripts.js"></script>
</body>
</html>
- An accordion is similar to a read more component but consists of multiple sections. It is very popular because it makes your content vertically collapsible which keeps the site cleaner works well for mobile devices.
- Write the following in theindex.html after the first paragraph element:
<button class="accordionBtn">Interesting Facts About Cone</button>
<div class="accordionPnl">
<p>He is not interesting, obviously. Move along.</p>
</div>
<button class="accordionBtn">Cone Joke</button>
<div class="accordionPnl">
<p>Heard a microchip making all sorts of awful puns. Turns out it was made of silly cone. You regret this don't you?</p>
</div>
<button class="accordionBtn">Cone's Friend List</button>
<div class="accordionPnl">
<p>...</p>
<p>...in progress.</p>
</div>
This will create the accordion buttons and the content that is revealed in each. - Create some CSS rules to format the accordion:
.accordionBtn {
background-color: rgb(246, 148, 35);
color: #444;
cursor: pointer;
padding: 18px;
width: 100%;
text-align: left;
border: none;
outline: none;
transition: 0.4s;}
.active, .accordionBtn:hover {
background-color: #ccc;}
.accordionPnl {
padding: 0 18px;
background-color: white;
display: none;
overflow: hidden;} - Now the index.html is setup for the accordion.

document.getElementById("rmBtn").addEventListener("click", readMoreFunction);

function readMoreFunction()
{
    var dots = document.getElementById("dots");
    var moreText = document.getElementById("more");
    var btnText = document.getElementById("rmBtn");

    if (dots.style.display == "none") {
        dots.style.color = "rgb(250 0 0)";
        dots.style.display = "inline";
        btnText.innerHTML = "Read more";
        moreText.style.display = "none";}

    else {
        dots.style.display = "none";
        btnText.innerHTML = "Read less";
        moreText.style.display = "inline";}
}

var accBtn = document.getElementsByClassName("accordionBtn");
var i;

for (i = 0; i < accBtn.length; i++) {
    accBtn[i].addEventListener("click", function() {
        this.classList.toggle("active");
        var accPnl = this.nextElementSibling;
        if (accPnl.style.display === "block") {
            accPnl.style.display = "none";
        }
        else {
            accPnl.style.display = "block";
        }
    });
}
- The accordion elements are there but it needs JavaScript to make it function.
- In scripts.js write:
var accBtn = document.getElementsByClassName("accordionBtn");
var i;
for (i = 0; i < accBtn.length; i++) {
accBtn[i].addEventListener("click", function() {
this.classList.toggle("active");
var accPnl = this.nextElementSibling;
if (accPnl.style.display === "block") {
accPnl.style.display = "none";
}
else {
accPnl.style.display = "block";
}
});
} - This code stores all elements with the accordionBtn class and stores them as accBtn. Using the variable's total (accBtn.length) a for loop is run that many times to have an event listener and handler attached to each instance. The event handler (function) will reveal the accordion content if it is off and turn it off if it is on.

- The Accordion component is complete. Now is a good time to preview it. Save both documents (index.html & scripts.js) and open index.html in your favorite browser.
- It should work similar to the example embedded below.
- Before you submit you should review your code and Save your file (File > Save), navigate to your file on your Desktop, and double-click it to open and preview it in your browser.
- Look for any errors. If there are any, look through your code and fix them. When you are happy, proceed
- Remember your site is not just the single HTML document you have created but the root folder and all contents therein. You MUST submit the ENTIRE folder
- You cannot submit folders on Blackboard. Instead we can zip the folder and submit that. Navigate to the location of your site folder. Right-click over top of it and select Send to > Compressed (zipped) folder on Windows and Compress on MacOS. A new zipped file will be created
- Lastly, log into Blackboard (Here) and click on this course. Inside the course, select Week 03, then the Week 03: Single Page Site (javascript components) Lab folder, then the assignment with the same name. Finally, Attach the zipped file.
About Cone
I am Cone
Yup that is all you need to know. I am a sentient primitive object used to direct the public away. In this case I am used as an example.
I have the most amazing thing to tell you if you just read this paragraph....
I am so much more
This is actually not true. I was just trying to draw you into the next paragraph and it worked! Sucker.
Unfortunately the responsive elements of the image and title changing based on side does not function in this preview.

Now you are a real programmer! You can see with JavaScript we can create truly unique and interactive projects. I know you probably don't feel real comfortable with it yet. Honestly it will be a long time before that happens. My goal for you is to get a general understanding of it so you can find and manipulate code in the future.
If you run into any issues please do not hesitate to contact me:
- jcone@cecil.edu
- (240) 466-1996
Wait! Before you go!
Did you remember to?
- Read through this webpage
- Watch the videos
- Submit Class 03 Single Page Site (javascript components) Lab on Blackboard
