
Web Design I
Class 03: Image EditingTopics
- Internal CSS
- Art Elements and Design Principles
- Image Adjustment Basics
- Week 03 Fixed-Width Page (adjustments) Lab

You made it to class 03. I have a feeling it will be just right.


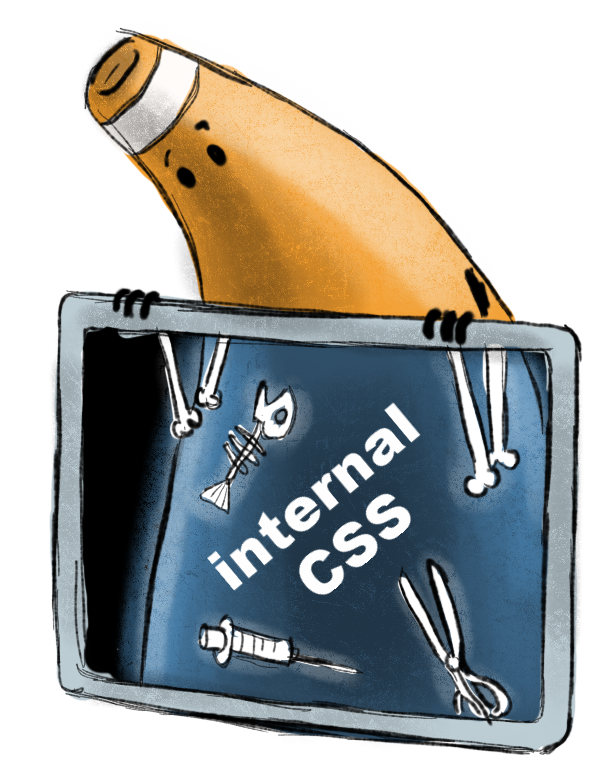
Internal CSS
Internal CSS:
This is best for single web pages.
Will load faster for single page since it will load right in the page.
This is generally easier to code since it is all in one document.
This is not really considered best practice.
- <style>
- Tells the browser this is where the style sheet starts.
- type
- Tells the browser that this is CSS code.
<style type=”text/css”>
body {
font-family: arial;
background-color: rgb(185.179.175);}
h1 {
color: rgb(255.255.255);}
</style>
CSS Rule:
Each visual description statement is a CSS rule.
CSS rule
p { font-family: arial; }
CSS Rule contains two parts: a selector and a declaration
p { font-family: arial; }
CSS Properties consist of two parts: a property and a value.
p { font-family: arial; }
CSS Rules:
Basically selectors may be an HTML element, multiples, descendants, class, or ID.
- Universal Selector:
- *
- Applies to all elements
- Type Selector:
- h1, p, ul, etc.
- Matches element names
- Class Selector:
- .note, .page, etc.
- Matches class attribute after dot(.)
- ID Selector:
- #introduction, #top, etc.
- Matches id attribute after the # symbol
- Child Selector:
- li>a, h1>p, etc.
- Matches direct child of the specified element
- Descendant Selector:
- p a, ul li, etc.
- Selects all descendants of specified element
- Adjacent Selector:
- h1+p, p+ul, etc.
- Selects the next element after the specified element
- General Sibling Selector:
- h1~p, p~ul, etc.
- Matches an element that is a sibling of another but does not have to be directly preceding it

Selecting Specific Elements:
Sometimes you may want to apply styling to multiple blocks or just a single word.
For this you can add some identifiers and group elements for that the CSS rule may select.
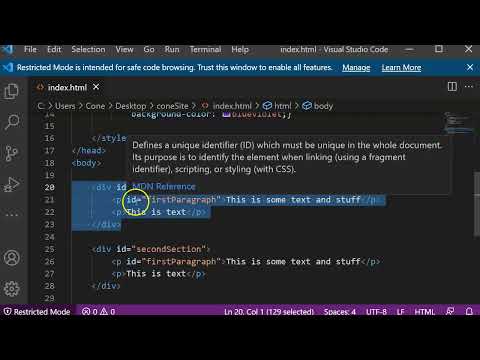
ID Attribute:
- id
- Used to uniquely identify an element from other elements. This is invaluable when using CSS to format your HTML document.
Class Attribute:
- class
- Class is similar to id except that it is meant to be used to identify multiple elements.
Grouping Elements:
You can group elements or part of elements into blocks or chunks that you can then specifically add CSS to.

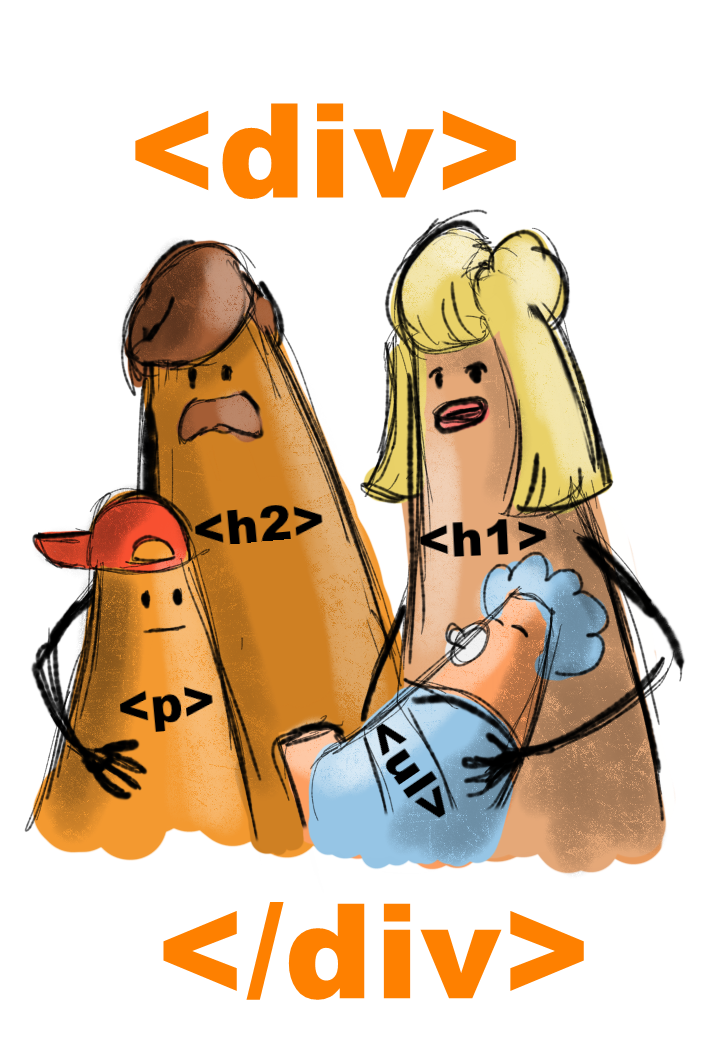
Div Element:
- <div>
- Allows you to group a set of elements together in one block-level box.
Good to use to organize your page and apply CSS to specific regions.
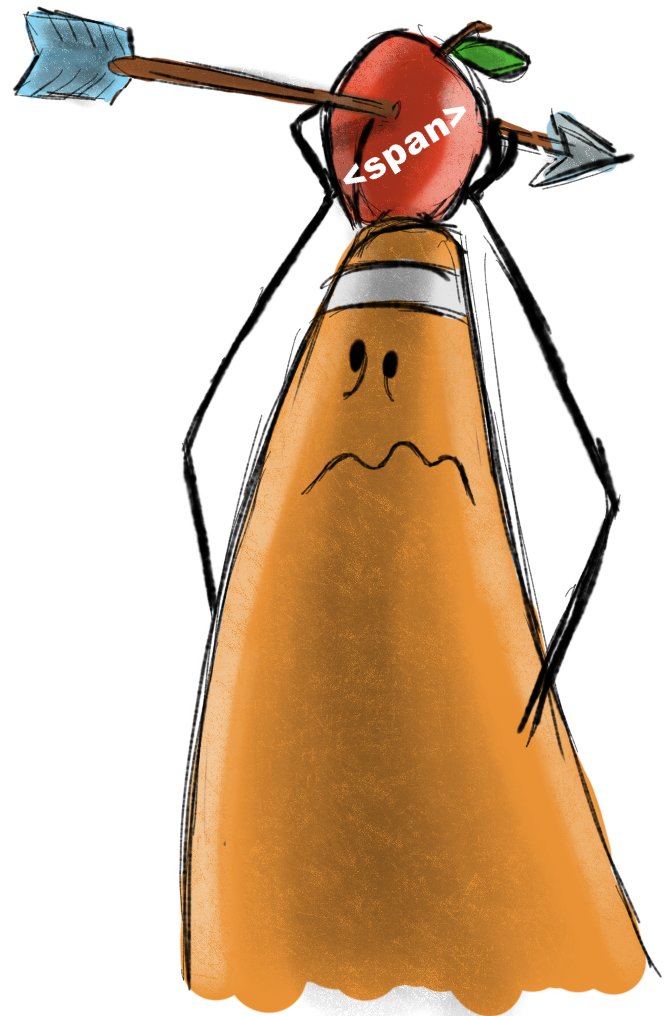
Span Element:
- <span>
- Acts as an inline equivalent to the <div> element.
Good to use to adjust or describe text inside a block.
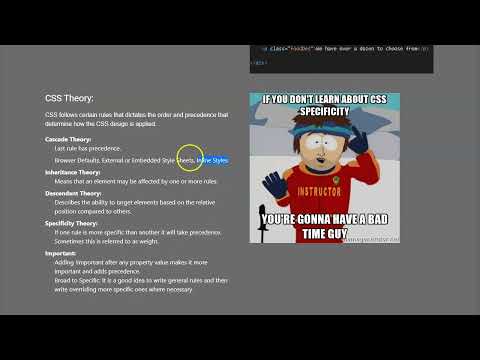
CSS Theory:
CSS follows certain rules that dictates the order and precedence that determine how the CSS design is applied.
- Cascade Theory:
- Last rule has precedence.
- Browser Defaults, External or Embedded Style Sheets, Inline Styles
- Inheritance Theory:
- Means that an element may be affected by one or more rules.
- Descendant Theory:
- Describes the ability to target elements based on the relative position compared to others.
- Specificity Theory:
- If one rule is more specific than another it will take precedence. Sometimes this is referred to as weight.
- Important:
- Adding !important after any property value makes it more important and adds precedence.
Broad to Specific: It is a good idea to write general rules and then write overriding more specific ones where necessary.

Art Elements & Design Principles
Art Elements and Design Principles:
The language we use to describe art. Generally these rules are used to describe fine art but they can also be applied to new media such as photography, graphic design, animation, and others.
In a four year art or graphic program you would be required to to 2D Comp or something similar. We will cover them here.

Art Elements:
Form
Form is the illusion of three-dimensional shape. This usually involves the utilization of linear and aerial perspective.
Line
A line is the path between two or more points. This can be either explicit or implicit.

Color
Color is specific temperature of light reflected off the piece of work. Different colors have different psychological effects.

Value
The amount of lightness and darkness ranging from pure white to pure black.

Space
Space represents a general area. Generally speaking you can define a piece of artwork in positive and negative space.
Texture
This is the physical property of how the surface would feel if touched. I would say that is more about how an area is broken up.
Design Principles:

Balance
The visual weight of the artwork that may be symmetrical or asymmetrical.
Contrast
The extreme difference in an image between elements.
Emphasis
When one element of a piece of artwork draws more attention than others.

Movement
To give the illusion of motion in a two dimensional space.
Pattern
Repeating elements in an image.

Rhythm
Much like music this is the application of varied pattern.

Unity
Unity is the coherence of the elements in a piece that make is appear as a whole.
Image Adjustment Basics
You may ignore this section:
Normally we would be in class and utlizing Photoshop. If you have Photoshop you can watch the tutorial below below but it’s directed towards beginners. The Lab Tutorial Slider will cover image editing in PhotoPea.
Adobe Photoshop:
Adobe Photoshop is the industry leading raster image editing software. It is part of the Adobe Creative Cloud, which is a subscription based service. There are full courses on Photoshop alone so we will only cover the basics necessary to edit photographs.
Basics:
- Image Size
- change the size of the image
- Cropping
- cut out the parts of the image you don’t want
- Alpha
- add transparency to your image
- Basic Enhancements
- simple color and contrast correction
- File Size
- save your image as an appropriate file format

Basic Image Editing Video Tutorials
This tutorial will guide you through basics of image editing in Adobe Photoshop.
Alternatives:
If you are serious about becoming a web designer you should definitely add Photoshop to your list of tools. I know for many (most) of you the subscription of the Adobe Creative Cloud may be prohibitive so here are some other free options:

- PhotoPea
- This a Photoshop clone that is very similar but runs right inside your browser!
- Gimp
- Shareware that has been developed for a long time as a free alternative to Photoshop.

- Logomakr
- A very simple online application that is useful for creating basic logos, icon, graphics, etc.
Week 03 Fixed-Width Page (adjustments) Lab
Week 03 Fixed-Width Page (adjustments) Lab:
In part three of your Fixed-Width Page Lab we will convert your CSS from inline to internal, fix the images (sized, crop, alpha, enhance, etc.), and make general adjustments.
You will be graded on the following:
- Basic Document & File Structure:
- Master folder created with correct sub folders.
- All files named and placed correctly.
- Basic HTML and CSS structure produced.
- Internal CSS
- All inline CSS is converted to Internal CSS.
- Additional CSS is incorporated to further enhance the web page.
- Images
- Your images should all be edited, scaled, and generally adjusted to fit the page size and style correctly.
- Graphics should be either .gif or .png. Photos should be .jpg.
- Aesthetics:
- Interesting and appealing design.
- Page that has some aesthetics incorporated.
Resources:
- Assignment Video Tutorials
- You may watch these tutorial videos below to help you complete your assignment.
- Assignment Lab Materials
- You may download the lab materials used: WD1_week03LabMaterials.
Lab Tutorial Slideshow
This tutorial will guide you through basic HTML document construction for the completion of the lab assignment.

Continuing on from last lab we will adjust the images and convert the CSS from inline to internal. These will improve the appearance of the site but more than that it will increase its efficiency.
Click on the > to start
You may use what you created in the last lab or if you would like you may use this:
Fixed-Width Page (adjustment) Lab Materials (
If you are familiar with Photoshop at all you will instantly feel at home with Photopea.
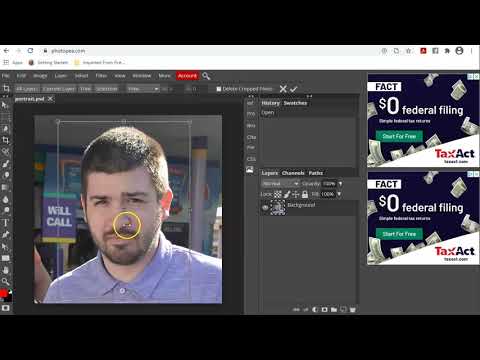
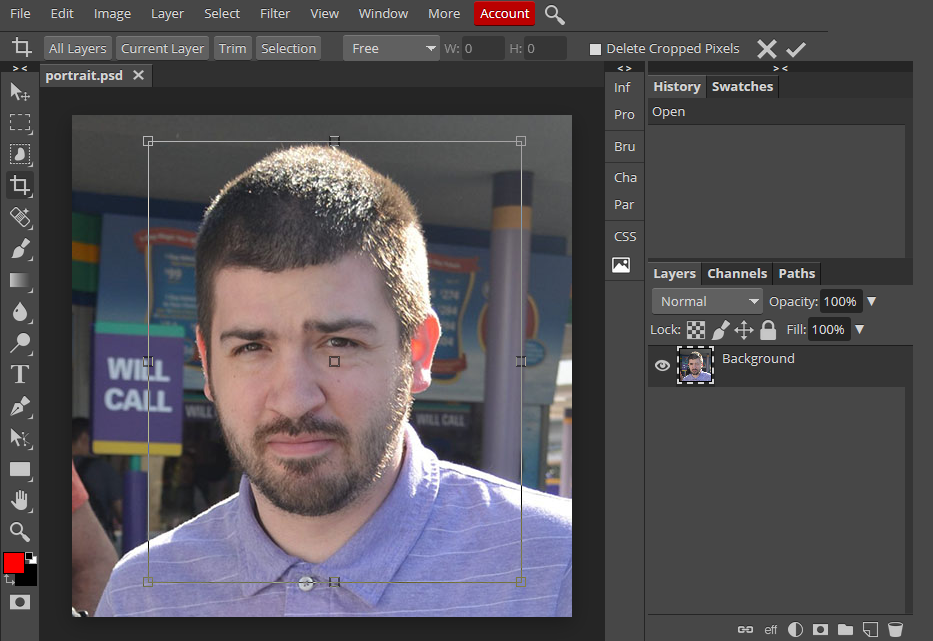
- The images used currently function but could function better. They must be scaled and adjusted. We will fix the portrait image first.
- Open Photopea in a new tab (see link below)
- In Photopea, select File>Open...Select the photo to make adjustments (in this case portrait.jpg)
- Use the crop tool
 from the tools panel to draw a box that will trim the image smaller.
 - Next select Image>Image Size...Use the popup menu to scale down the image overall.
- To make general adjustments such as brightness, contrast, saturation, etc., select Image>Adjustments> and then choose an option. Try them and see which work best for your specific image. You will probably need to use a couple.
- You may also try the Filter> and the various filters for interesting effects to apply to your image.
- When you are satisfied press File>Export as...> then JPG for most images, PNG for images with transparency, and GIF for simple graphic images. Save over your old image
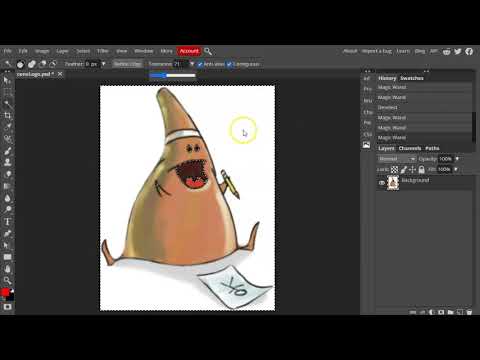
You can see what the image should look like before and after the background is removed
- The logo image needs to be scaled. Then the background will be removed.
- In Photopea, select File>Open...Select the photo to make adjustments (in this case coneLogo.png)
- Use the crop tool to trim the image if needed and Image>Image Size... to scale the image
- You may make any general adjustments you like using Image>Adjustments>and select an option
- To remove the background select and hold down on the object select
 and select the wand tool
  . Then click on the background. It should select all of the alike pixels (you may need to adjust the tolerance in the tool settings). Hit delete to erase the background.
 - More than likely your background is still not entirely gone. Let's use the eraser to remove anything remaining.
- First deselect your selection by selecting Select>Deselect
- Now grab the eraser tool
 and draw it over whatever must be removed.
 - When you are satisfied press File>Export as...> then PNG for images with transparency, and GIF for simple graphic images. Save over your old image
<!DOCTYPE html>
<html>
<head>
<title>Biography of Cone</title>
<meta charset="UTF-8" />
<meta name="description" content="a narrative about cone" />
</head>
<body style="background-color: #cab5d7; width: 960px; margin: 10px; padding: 0px; font-family: 'Franklin Gothic Medium', 'Arial Narrow', Arial, sans-serif; color: #292929; font-size: 18px;">
<div id="header">
<h1 style="font-size: 48px; text-align: center; color: rgb(78, 78, 78)">Cone</h1>
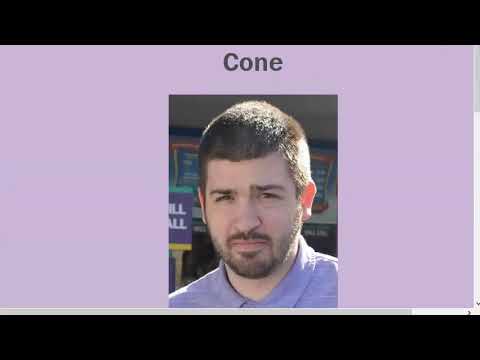
<img style="width:300px" src="images/portrait.JPG" alt="portrait of cone" />
<p style="text-align: center;">personal site: <a href="https://teachmecone.com">teachmecone.com</a></p>
<p style="text-align: center;">The man, the myth, the <strong>primitive shape</strong>.</p>
<hr style="margin-bottom: 50px;" />
</div>
<div id="content">
<h2 style="color: rgb(78, 78, 78)">In the beginning...</h2>
<p style="background-color: hsl(56, 80%, 90%); padding:20px;">He was born in upstate NY. Have you been there? No you haven't because you have no reason too. It's drab.</p>
<h2 style="color: rgb(78, 78, 78)">Presently coding this document</h2>
<p style="background-color: hsl(56, 80%, 90%); padding:20px;">Write now he is teaching this class and writing this code. Inspirational.</p>
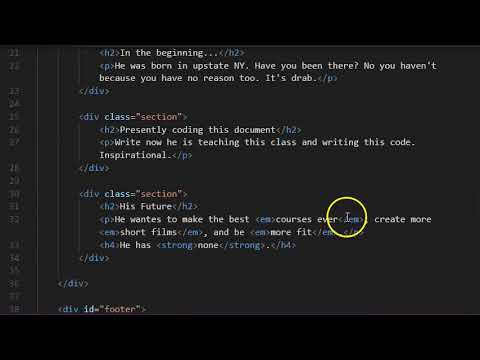
<h2 style="color: rgb(78, 78, 78)">His Future</h2>
<p style="background-color: hsl(56, 80%, 90%); padding:20px;">He wantes to make the best <em>courses ever</em>, create more <em>short films</em>, and be <em>more fit</em>.</p>
<h4>He has <strong>none</strong>.</h4>
</div>
<div id="footer">
<h3 style="color: rgb(78, 78, 78);">Things he dislikes</h3>
<ul style="border-style: solid; border-width: 2px; border-color: hsl(56, 80%, 90%);">
<li>Cats</li>
<li>Vehicles that go Vroom</li>
<li>Bug Meat</li>
</ul>
<p><a href="https://teachmecone.com"><img src="images/coneLogo.png" alt="teachmecone.com"></a></p>
</div>
</body>
</html>
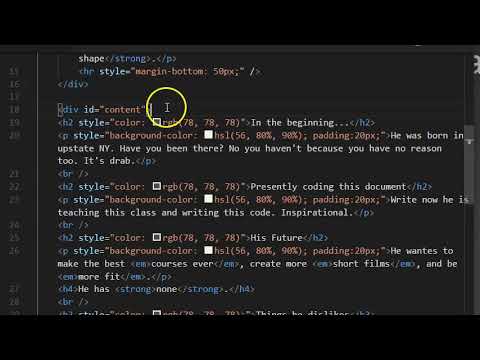
- There are a plethora of elements in the document but they are not connected in any way. For instance typically an article has a heading, body text, and images. They are all grouped together and any adjustments made would be applied to them as a whole. Divs allow us to group elements. We will create three main sections (groups) to start with; header, content, footer.
- First type the opening <div> tag on a line above <h1>Cone</h1> and the closing </div> tag on a line below <hr />.
- Add id="header" inside the opening <div> tag. We use this to label it and target it with CSS later.
- Create the second opening <div> tag after the closing </div> of the last section. Create the closing </div> tag after the <h4>He has <strong>none</strong>.</h4>
- Add id="content" inside the opening <div> tag of this section. This is the label for the "meat" of our page.
- Create the third opening <div> tag after the last </div> tag. Create the last closing </div> tag at the bottom of the document before </body>
- Add id="footer" inside the opening <div> tag of this section.
<!DOCTYPE html>
<html>
<head>
    <title>Biography of Cone</title>
    <meta charset="UTF-8" />
    <meta name="description" content="a narrative about cone" />
</head>
<body style="background-color: #cab5d7; width: 960px; margin: 10px; padding: 0px; font-family: 'Franklin Gothic Medium', 'Arial Narrow', Arial, sans-serif; color: #292929; font-size: 18px;">

    <div id="header">
        <h1 style="font-size: 48px; text-align: center; color: rgb(78, 78, 78)">Cone</h1>
        <img style="width:300px" src="images/portrait.JPG" alt="portrait of cone" />
        <p style="text-align: center;">personal site: <a href="https://teachmecone.com">teachmecone.com</a></p>
        <p style="text-align: center;">The man, the myth, the <strong>primitive shape</strong>.</p>
        <hr style="margin-bottom: 50px;" />
    </div>

    <div id="content">
        <div class="section">
            <h2 style="color: rgb(78, 78, 78)">In the beginning...</h2>
            <p style="background-color: hsl(56, 80%, 90%); padding:20px;">He was born in upstate NY. Have you been there? No you haven't because you have no reason too. It's drab.</p>
        </div>

        <div class="section">
            <h2 style="color: rgb(78, 78, 78)">Presently coding this document</h2>
            <p style="background-color: hsl(56, 80%, 90%); padding:20px;">Write now he is teaching this class and writing this code. Inspirational.</p>
        </div>

        <div class="section">
            <h2 style="color: rgb(78, 78, 78)">His Future</h2>
            <p style="background-color: hsl(56, 80%, 90%); padding:20px;">He wantes to make the best <em>courses ever</em>, create more <em>short films</em>, and be <em>more fit</em>.</p>
            <h4>He has <strong>none</strong>.</h4>
        </div>
    </div>

    <div id="footer">
        <h3 style="color: rgb(78, 78, 78);">Things he dislikes</h3>
        <ul style="border-style: solid; border-width: 2px; border-color: hsl(56, 80%, 90%);">
            <li>Cats</li>
            <li>Vehicles that go Vroom</li>
            <li>Bug Meat</li>
        </ul>
        <p><a href="https://teachmecone.com"><img src="images/coneLogo.png" alt="teachmecone.com"></a></p>
    </div>

</body>
</html>
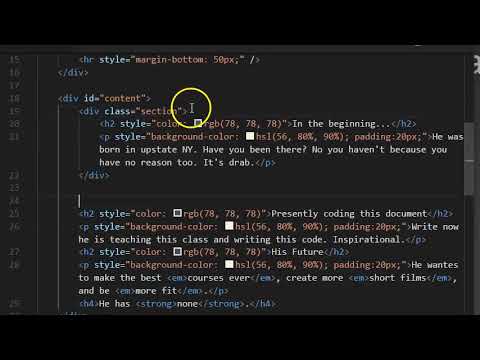
- The main sections of the document are grouped together using divs but it would be helpful to break the content section into some subsections to better control them using CSS. Three div sections will be created.
- Create opening <div> tags before each <h2> tag.
- Create the closing </div> tags after each </p> tag following the <h2>s.
- Add class="section" inside the opening <div> tag of each.
- Remove all of the <br /> tags. They are not going to be needed anymore to help separate the sections.
- It should look something like below:
<div id="content">
<div class="section">
<h2 style="color: rgb(78, 78, 78)">In the beginning...</h2>
<p style="background-color: hsl(56, 80%, 90%); padding:20px;">He was born in upstate NY. Have you been there? No you haven't because you have no reason too. It's drab.</p>
</div>
<div class="section">
<h2 style="color: rgb(78, 78, 78)">Presently coding this document</h2>
<p style="background-color: hsl(56, 80%, 90%); padding:20px;">Write now he is teaching this class and writing this code. Inspirational.</p>
</div>
<div class="section">
<h2 style="color: rgb(78, 78, 78)">His Future</h2>
<p style="background-color: hsl(56, 80%, 90%); padding:20px;">He wantes to make the best <em>courses ever</em>, create more <em>short films</em>, and be <em>more fit</em>.</p>
<h4>He has <strong>none</strong>.</h4>
</div>
</div> - We now have the document properly broken down into sections we can target with internal CSS rules.
<!DOCTYPE html>
<html>
<head>
    <title>Biography of Cone</title>
    <meta charset="UTF-8" />
    <meta name="description" content="a narrative about cone" />
    <style>
        body {
            background-color: #cab5d7;
            width: 960px;
            margin: 10px;
            padding: 0px;
            font-family: 'Franklin Gothic Medium', 'Arial Narrow', Arial, sans-serif;
            color: #292929;
            font-size: 18px;}
    </style>
</head>
<body>

    <div id="header">
        <h1>Cone</h1>
        <img src="images/portrait.JPG" alt="portrait of cone" />
        <p>personal site: <a href="https://teachmecone.com">teachmecone.com</a></p>
        <p>The man, the myth, the <strong>primitive shape</strong>.</p>
        <hr />
    </div>

    <div id="content">
        <div class="section">
            <h2>In the beginning...</h2>
            <p>He was born in upstate NY. Have you been there? No you haven't because you have no reason too. It's drab.</p>
        </div>

        <div class="section">
            <h2>Presently coding this document</h2>
            <p>Write now he is teaching this class and writing this code. Inspirational.</p>
        </div>

        <div class="section">
            <h2>His Future</h2>
            <p>He wantes to make the best <em>courses ever</em>, create more <em>short films</em>, and be <em>more fit</em>.</p>
            <h4>He has <strong>none</strong>.</h4>
        </div>
    </div>

    <div id="footer">
        <h3>Things he dislikes</h3>
        <ul>
            <li>Cats</li>
            <li>Vehicles that go Vroom</li>
            <li>Bug Meat</li>
        </ul>
        <p><a href="https://teachmecone.com"><img src="images/coneLogo.png" alt="teachmecone.com"></a></p>
    </div>

</body>
</html>
- Currently the webpage is using inline CSS exclusively. That means that CSS is written on each element where it is used. This is inefficient and difficult to work with. We will convert and adjust the CSS to be internal (embedded) which means it will be written in the head of the document.
- First add <style> and </style> before the end of the head (</head>). All of the CSS rules will be place in between these tags.
- Let's create the rules for the body first.
- Delete style="background-color: #cab5d7; width: 960px; margin: 10px; padding: 0px; font-family: 'Franklin Gothic Medium', 'Arial Narrow', Arial, sans-serif; color: #292929; font-size: 18px;" inside the <body> tag
- On the line after the opening <style> tag type:
body {
background-color: #cab5d7;
width: 960px;
margin: 10px
padding: 0px;
font-family: 'Franklin Gothic Medium', 'Arial Narrow', Arial, sans-serif;
color: #292929;
font-size: 18px;}
<!DOCTYPE html>
<html>
<head>
    <title>Biography of Cone</title>
    <meta charset="UTF-8" />
    <meta name="description" content="a narrative about cone" />
    <style>
            body {
                background-color: #cab5d7;
                width: 960px;
                margin: 10px;
                padding: 0px;
                font-family: 'Franklin Gothic Medium', 'Arial Narrow', Arial, sans-serif;
                color: #292929;
                font-size: 18px;}
            h1 {
                font-size: 48px;}
            h1, h2, h4 {
                color: rgb(78, 78, 78);}
            #header {
                text-align: center;
                margin-bottom: 50px;}
            #footer {
                background-color: rgb(97, 95, 88);
                color:white;
                padding:20px;
                border-style: solid;
                border-width: 2px;
                border-color: hsl(56, 80%, 90%);}
            .section {
                background-color: hsl(56, 80%, 90%);
                padding:20px;
                margin-bottom:20px;
                padding: 20px;}
                a {
                color: hsl(56, 80%, 90%);
                font-size: 24px;
                text-decoration: none;}
        </style>
</head>
<body>

    <div id="header">
        <h1>Cone</h1>
        <img src="images/portrait.JPG" alt="portrait of cone" />
        <p>personal site: <a href="https://teachmecone.com">teachmecone.com</a></p>
        <p>The man, the myth, the <strong>primitive shape</strong>.</p>
        <hr />
    </div>

    <div id="content">
        <div class="section">
            <h2>In the beginning...</h2>
            <p>He was born in upstate NY. Have you been there? No you haven't because you have no reason too. It's drab.</p>
        </div>

        <div class="section">
            <h2>Presently coding this document</h2>
            <p>Write now he is teaching this class and writing this code. Inspirational.</p>
        </div>

        <div class="section">
            <h2>His Future</h2>
            <p>He wantes to make the best <em>courses ever</em>, create more <em>short films</em>, and be <em>more fit</em>.</p>
            <h4>He has <strong>none</strong>.</h4>
        </div>
    </div>

    <div id="footer">
        <h3>Things he dislikes</h3>
        <ul>
            <li>Cats</li>
            <li>Vehicles that go Vroom</li>
            <li>Bug Meat</li>
        </ul>
        <p><a href="https://teachmecone.com"><img src="images/coneLogo.png" alt="teachmecone.com"></a></p>
    </div>

</body>
</html>
- You have started the process of converting the inline CSS to Internal CSS. Let's complete it.
- First, all of the remaining inline CSS must be deleted. Select and delete the style="whatever CSS is written in here" in all of the elements in the page. It should look somewhat similar to what we had after the first lab minus the divs.
- Now the CSS rules to control the HTML content must be applied inside the <style> element. It should look like below:
<style>
body {
background-color: #cab5d7;
width: 960px;
margin: 10px;
padding: 0px;
font-family: 'Franklin Gothic Medium', 'Arial Narrow', Arial, sans-serif;
color: #292929;
font-size: 18px;}
h1 {
font-size: 48px;}
h1, h2, h4 {
color: rgb(78, 78, 78);}
#header {
text-align: center;
margin-bottom: 50px;}
#footer {
background-color: rgb(97, 95, 88);
color:white;
padding:20px;
border-style: solid;
border-width: 2px;
border-color: hsl(56, 80%, 90%);}
.section {
background-color: hsl(56, 80%, 90%);
padding:20px;
margin-bottom:20px;
padding: 20px;}
a {
color: hsl(56, 80%, 90%);
font-size: 24px;
text-decoration: none;}
</style>
- You have written enough now to preview your work in the browser.
- First save your file (File > Save)
- Navigate to your file on your Desktop. It should appear as a web document. Double-click it to open
<!DOCTYPE html>
<html>
<head>
    <title>Biography of Cone</title>
    <meta charset="UTF-8" />
    <meta name="description" content="a narrative about cone" />
    <style>
            body {
                background-color: #cab5d7;
                width: 960px;
                margin: 10px;
                padding: 0px;
                font-family: 'Franklin Gothic Medium', 'Arial Narrow', Arial, sans-serif;
                color: #292929;
                font-size: 18px;}
            h1 {
                font-size: 48px;}
            h1, h2, h4 {
                color: rgb(78, 78, 78);}
            #header {
                text-align: center;
                margin-bottom: 50px;}
            #footer {
                background-color: rgb(97, 95, 88);
                color:white;
                padding:20px;
                border-style: solid;
                border-width: 2px;
                border-color: hsl(56, 80%, 90%);}
            .section {
                background-color: hsl(56, 80%, 90%);
                padding:20px;
                margin-bottom:20px;
                padding: 20px;}
                a {
                color: hsl(56, 80%, 90%);
                font-size: 24px;
                text-decoration: none;}
        </style>
</head>
<body>

    <div id="header">
        <h1>Cone</h1>
        <img src="images/portrait.JPG" alt="portrait of cone" />
        <p>personal site: <a href="https://teachmecone.com">teachmecone.com</a></p>
        <p>The man, the myth, the <strong>primitive shape</strong>.</p>
        <hr />
    </div>

    <div id="content">
        <div class="section">
            <h2>In the beginning...</h2>
            <p>He was born in upstate NY. Have you been there? No you haven't because you have no reason too. It's drab.</p>
        </div>

        <div class="section">
            <h2>Presently coding this document</h2>
            <p>Write now he is teaching this class and writing this code. Inspirational.</p>
        </div>

        <div class="section">
            <h2>His Future</h2>
            <p>He wantes to make the best <em>courses ever</em>, create more <em>short films</em>, and be <em>more fit</em>.</p>
            <h4>He has <strong>none</strong>.</h4>
        </div>
    </div>

    <div id="footer">
        <h3>Things he dislikes</h3>
        <ul>
            <li>Cats</li>
            <li>Vehicles that go Vroom</li>
            <li>Bug Meat</li>
        </ul>
        <p><a href="https://teachmecone.com"><img src="images/coneLogo.png" alt="teachmecone.com"></a></p>
    </div>

</body>
</html>
Cone's Biography
Cone

personal site: teachmecone.com
The man, the myth, the primitive shape.
In the beginning...
He was born in upstate NY. Have you been there? No you haven't because you have no reason too. It's drab.
Presently coding this document
Write now he is teaching this class and writing this code. Inspirational.
His Future
He wantes to make the best courses ever, create more short films, and be more fit.
He has none.
Things he dislikes
Cats
Vehicles that go Vroom
Bug Meat

<!DOCTYPE html>
<html>
<head>
    <title>Biography of Cone</title>
    <meta charset="UTF-8" />
    <meta name="description" content="a narrative about cone" />
    <style>
            body {
                background-color: #cab5d7;
                width: 960px;
                margin: 10px;
                padding: 0px;
                font-family: 'Franklin Gothic Medium', 'Arial Narrow', Arial, sans-serif;
                color: #292929;
                font-size: 18px;}
            h1 {
                font-size: 48px;}
            h1, h2, h4 {
                color: rgb(78, 78, 78);}
            #header {
                text-align: center;
                margin-bottom: 50px;}
            #footer {
                background-color: rgb(97, 95, 88);
                color:white;
                padding:20px;
                border-style: solid;
                border-width: 2px;
                border-color: hsl(56, 80%, 90%);}
            .section {
                background-color: hsl(56, 80%, 90%);
                padding:20px;
                margin-bottom:20px;
                padding: 20px;}
            a {
                color: hsl(56, 80%, 90%);
                font-size: 24px;
                text-decoration: none;}
            #drabText {
                color:brown;
                font-weight: bold;}
            .hiLite {
                color:orange;
                font-weight: 700;
                font-size: 24px;}
        </style>
</head>
<body>

    <div id="header">
        <h1>Cone</h1>
        <img src="images/portrait.JPG" alt="portrait of cone" />
        <p>personal site: <a href="https://teachmecone.com">teachmecone.com</a></p>
        <p>The man, the myth, the <strong>primitive shape</strong>.</p>
        <hr />
    </div>

    <div id="content">
        <div class="section">
            <h2>In the beginning...</h2>
            <p>He was born in upstate NY. Have you been there? No you haven't because you have no reason too. It's <span id="drabText">drab.</span></p>
        </div>

        <div class="section">
            <h2>Presently coding this document</h2>
            <p>Write now he is teaching this class and writing this code. <span class="hiLite">Inspirational.</span></p>
        </div>

        <div class="section">
            <h2>His Future</h2>
            <p>He wantes to make the best <em>courses ever</em>, create more <em>short films</em>, and be <em>more fit</em>.</p>
            <h4>He has <strong class="hiLite">none</strong>.</h4>
        </div>
    </div>

    <div id="footer">
        <h3>Things he dislikes</h3>
        <ul>
            <li>Cats</li>
            <li>Vehicles that go Vroom</li>
            <li>Bug Meat</li>
        </ul>
        <p><a href="https://teachmecone.com"><img src="images/coneLogo.png" alt="teachmecone.com"></a></p>
    </div>

</body>
</html>
- Divs are great to group elements and then target them. What if you want to just target a single item? That is what spans are for. We will not add a couple of spans to target specific words and apply CSS to them.
- Create the opening <span> and closing </span> tags around the word drab and Inspirational
- Next add id's and classes to target elements. Type id="drabText" inside the opening <span> before drab.
- Type class="hiLite" in the opening <span> before Inspirational.
- Type class="hiLite" in the opening <strong> before none.
- Each line should look like below:
<p>He was born in upstate NY. Have you been there? No you haven't because you have no reason too. It's <span id="drabText">drab.</span></p>
<p>Write now he is teaching this class and writing this code. <span class="hiLite">Inspirational.</span></p>
<h4>He has <strong class="hiLite">none</strong>.</h4> - Now we can apply CSS in the <head> to target the id's and classes we just wrote. The CSS rules should look like below:
#drabText {
color:brown;
font-weight: bold;}
.hiLite {
color:orange;
font-weight: 700;
font-size: 24px;}
- Before you submit you should review your code and Save your file (File > Save), navigate to your file on your Desktop, and double-click it to open
- Look for any errors. If there are any, look through your code and fix them. When you are happy, proceed
- Your site is not just the single HTML document you have created but the root folder and all contents therein. You MUST submit the ENTIRE folder
- You cannot submit folders on Blackboard. Instead we can zip the folder and submit that. Navigate to the location of your site folder. Right-click over top of it and select Send to > Compressed (zipped) folder on Windows and Compress on MacOS. A new zipped file will be created
- Lastly, log into Blackboard (Here) and click on this course. Inside the course, select Week 03, then the Week 03: Fixed-Width Page (adjustment) Lab folder, then the assignment with the same name. Finally, Attach the zipped file.
<!DOCTYPE html>
<html>
<head>
    <title>Biography of Cone</title>
    <meta charset="UTF-8" />
    <meta name="description" content="a narrative about cone" />
    <style>
            body {
                background-color: #cab5d7;
                width: 960px;
                margin: 10px;
                padding: 0px;
                font-family: 'Franklin Gothic Medium', 'Arial Narrow', Arial, sans-serif;
                color: #292929;
                font-size: 18px;}
            h1 {
                font-size: 48px;}
            h1, h2, h4 {
                color: rgb(78, 78, 78);}
            #header {
                text-align: center;
                margin-bottom: 50px;}
            #footer {
                background-color: rgb(97, 95, 88);
                color:white;
                padding:20px;
                border-style: solid;
                border-width: 2px;
                border-color: hsl(56, 80%, 90%);}
            .section {
                background-color: hsl(56, 80%, 90%);
                padding:20px;
                margin-bottom:20px;
                padding: 20px;}
            a {
                color: hsl(56, 80%, 90%);
                font-size: 24px;
                text-decoration: none;}
            #drabText {
                color:brown;
                font-weight: bold;}
            .hiLite {
                color:orange;
                font-weight: 700;
                font-size: 24px;}
        </style>
</head>
<body>

    <div id="header">
        <h1>Cone</h1>
        <img src="images/portrait.JPG" alt="portrait of cone" />
        <p>personal site: <a href="https://teachmecone.com">teachmecone.com</a></p>
        <p>The man, the myth, the <strong>primitive shape</strong>.</p>
        <hr />
    </div>

    <div id="content">
        <div class="section">
            <h2>In the beginning...</h2>
            <p>He was born in upstate NY. Have you been there? No you haven't because you have no reason too. It's <span id="drabText">drab.</span></p>
        </div>

        <div class="section">
            <h2>Presently coding this document</h2>
            <p>Write now he is teaching this class and writing this code. <span class="hiLite">Inspirational.</span></p>
        </div>

        <div class="section">
            <h2>His Future</h2>
            <p>He wantes to make the best <em>courses ever</em>, create more <em>short films</em>, and be <em>more fit</em>.</p>
            <h4>He has <strong class="hiLite">none</strong>.</h4>
        </div>
    </div>

    <div id="footer">
        <h3>Things he dislikes</h3>
        <ul>
            <li>Cats</li>
            <li>Vehicles that go Vroom</li>
            <li>Bug Meat</li>
        </ul>
        <p><a href="https://teachmecone.com"><img src="images/coneLogo.png" alt="teachmecone.com"></a></p>
    </div>

</body>
</html>
Cone's Biography
Cone
personal site: teachmecone.com
The man, the myth, the primitive shape.
In the beginning...
He was born in upstate NY. Have you been there? No you haven't because you have no reason too. It's drab.
Presently coding this document
Write now he is teaching this class and writing this code. Inspirational.
His Future
He wants to make the best courses ever, create more short films, and be more fit.
He has none.
Things he dislikes
Cats
Vehicles that go Vroom
Bug Meat

In this lab image adjustment using Photopea was briefly covered. If you plan to become a web designer you really must learn Photoshop (cecil offers this, VCP 116/117). It is the industry standard.
Div's and spans were also presented. These are priceless for organizing and targeting elements.
If you run into any issues please do not hesitate to contact me:
- jcone@cecil.edu
- (240) 466-1996

Wait! Before you go!
Did you remember to?
- Read through this webpage
- Watch the videos
- Submit Week 03 Fixed-Width Page (adjustments) Lab on Blackboard
