
Introduction to 3D Modeling and Animation
Class 11: RiggingTopics
- Character Completion
- Rigging
- Human IK
- Blend Shapes
- Week 11 Character Completion and Rigging Lab

Class 11, let’s push our horizons.
Character Completion
Character Completion:
In previous classes we completed the character’s head and body. However the character is both bald and eyeless. We will rectify this now.
Eyes:
Eyes are important. They are the first thing that the audience looks at and does a lot of the acting. An easy way to make a “cartoony” eye is to create a clear shiny sphere model over a death star looking model that has the sclera, iris, and pupil color. You can see an example to the right.
Hair:
Hair comes in endless varieties. There are actually quite a few ways to model it as well depending on your look and output.
- “Real” hair is possible using a variety of systems but basically real geometry is produced for each strand that is driven by dynamics. This is appropriate for rendered sequences looking for realistic hair. This is really difficult.
- Hair planes are used extensively in gaming. You create plane models and apply hair textures complete with alpha channels to make parts transparent. If enough of these are layered the result is rather convincing. This is a very tedius process.
- Hair shapes can be model by the same process we have modeled so far. The solid form or forms are appropriate for cartoony work and are easily the simplest to complete. We are going to produce this hair.
Teeth, Tongue, Nails, etc.:
The figure consists of other elements such as teeth and tongue. Honestly I do not model these elements unless there is a specific reason to. Most times you do not even see them. You may model them if you like but it is not required.
Rigging
Rigging:
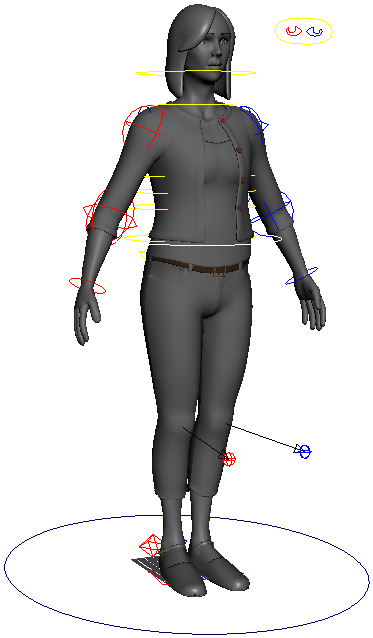
Rigging is the process by which you add deformers and controllers to a model so that it may be animate-able. This usually consists of producing joint chains, applying solvers & rigging nodes, inserting deformers, and creating controllers for the animator to use.
Without a rig a model cannot really be posed and animated.
Human IK
Human IK:
Autodesk Maya has a built in auto-rigging feature called HumanIK. You simply place some objects to determine how the skeleton of the rig should be laid out and Maya will produce a “usable” rig. The best feature of this rig is its ability to accept motion capture data.

Blend Shapes
Blend Shapes:
Blend Shapes: Blend shape deformers let you change the shape of one object into another shape by manipulating its components and storing those manipulations. Blend shapes do exactly what the name suggests. (in other software these are often referred to morphs or morph targets)
Blend shapes can be use for all sort of things:
- Transform one object into another (swan to a princess [difficult])
- Fix particular shapes (push the butt out when leg goes back)
- Use for simple animation (open/closed drawer)
- Most common for facial animation (make all of your targets for a character’s face)
- All sorts of things YOU haven’t come up with (the sky is always the limit; fie on you sky!)
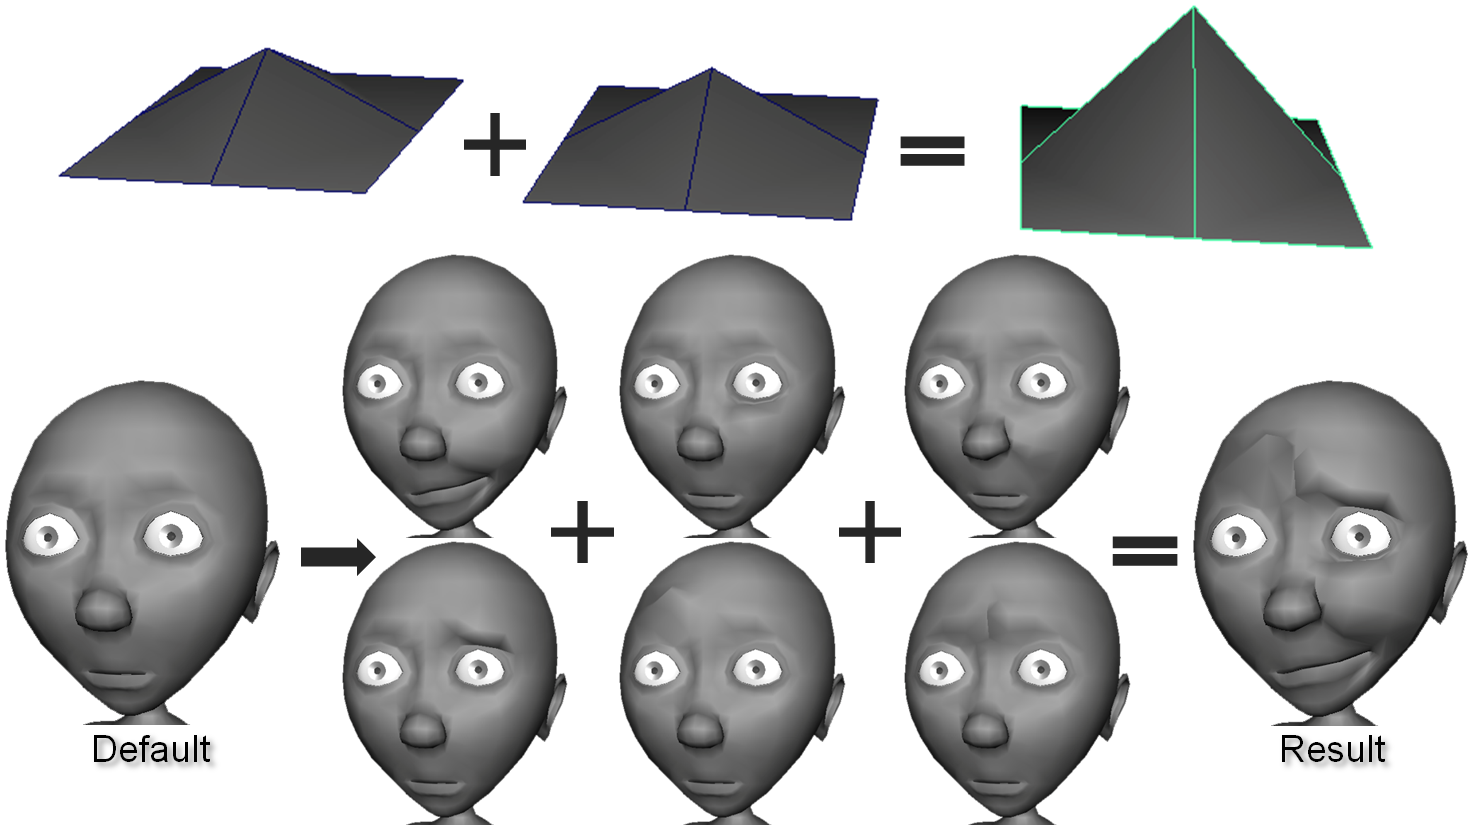
Blend shapes are added together.
In the top example two target shapes activated result in a more extreme version.
In the bottom example you may activate different face shapes that when added together result in a desired expression.
Face Blend Shapes:
Although joints have become more and more prominent for producing facial expressions blend shapes are still the preferred method since you can be more specific about them.
A basic set of target face shapes should include:
- Eyes blink
- Mouth wide (smile)
- Mouth narrow (whistle)
- Lips open (show teeth)
- Frown
- Inner brow up
- Inner brow down
- Outer brow up
- Outer brow down
- Brows squeeze
- Any others you may need…
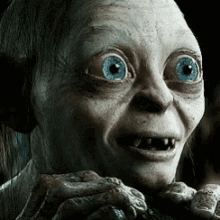
In Lord of the Rings, Gollum had over 2,000 blend shapes!
Week 11 Character Completion and Rigging Lab
Character Completion and Rigging Lab:
This week we will tie up some lose ends. First we will finish any remaining modeling touches on the character model such as eyes and hair. Then we will rig it using Human IK to make it animateable.
You will be graded on the following:
- Model Completion
-
Tweak and complete any missing elements of the character model.
-
- Human IK Rigging
-
Apply Maya’s Human IK rigging system onto the character model.
-
-
Blend Shapes
-
Create interesting and accurate blend shapes to produce a variety of character expressions.
-
-
Cleanup & Conventions
-
All nodes named properly. All history deleted. Well organized hypergraph. Correct pivots. Clean values.
-
Resources:
- Assignment Video Tutorials
- You may watch these tutorial videos below to help you complete your assignment.
- Assignment Lab Materials
- You may download the lab materials here: 3Dweek11_labMaterials .
Assignment Video Tutorials
Wait! Before you go!
Did you remember to?
- Read through this webpage
- Watch the videos
- Submit Week 11 Character Completion and Rigging Lab on Blackboard
