
Digital Imaging I
Class 02: Content Aware Tools & Image RestorationTopics
- Raster Images
- Scanning & Printing
- Destructive Editing
- Content Aware
- Photoshop Hotkeys
- Assignment 02

You made it to class two!
Raster Images
Raster/Pixel/Bitmap:
Raster graphic images are a data structure representing a generally rectangular grid of pixels, or points of color, viewable via a monitor, paper, or other display medium.
A pixel is one picture element. (like putting picture and element together).
A bitmap is the grid that contains all the pixel information (it is inherently rectangular).
Raster images are great for photos or anything with detail. They tend to be larger files so often a codec is used to lower the file size.
- DPI:
- Dots per inch.
- Used for print.
- PPI:
- Pixels per inch.
- Used for screens.
The greater number of dots/pixels, the higher the resolution the image but the larger the file size.
300 dpi is the excepted standard for printed content. 72 ppi is the standard for screens (tv, monitor, etc.) any less and things get pixelated.
Zoomed in face becomes “pixelated.”

Typically a codec will look for redundancies in order to compress the information. In the image above there is a lot of white pixels that could be stored in a block as opposed to each pixel individually for example.
Common Raster formats:
- JPEG (Joint Photographic Experts Group, they developed it):
- lossy, but are small and compatible with most computers.
- Best for images with smooth transitions (paintings, photographs, not line art).
- Very common on the internet.
- GIF (graphics interchange format):
- Very small lossy format, also supports simple animations (like those smiley face animations).
- PNG (portable network graphics):
- Made to replace GIF, very small, good for transferring images over the internet.
- TIFF (Tagged Image File):
- Not lossy and can contain an alpha channel.
- Adobe owns the rights and is often used for publishing and page layouts.
- PSD (Photoshop document)
- Adobe Photoshop’s native format. This can only be opened with Photoshop so it is not ubiquitous. It does however, store all of things you have done in the program. This should be your default format you save to.
- Camera Raw (CR2, NEF, SRF, and many more)
- When you take photos with a professional camera it is possible to save them to the camera’s native format. These are very large and difficult to work with but are high fidelity. It is generally not suggested to use this format for this course initially.


RGB (additive mixing)

CMYK (subtractive mixing)
Scanning and Printing
Update!
Obviously you do not have access to the scanners and/or printers this semester. You may skip this section if you would like.
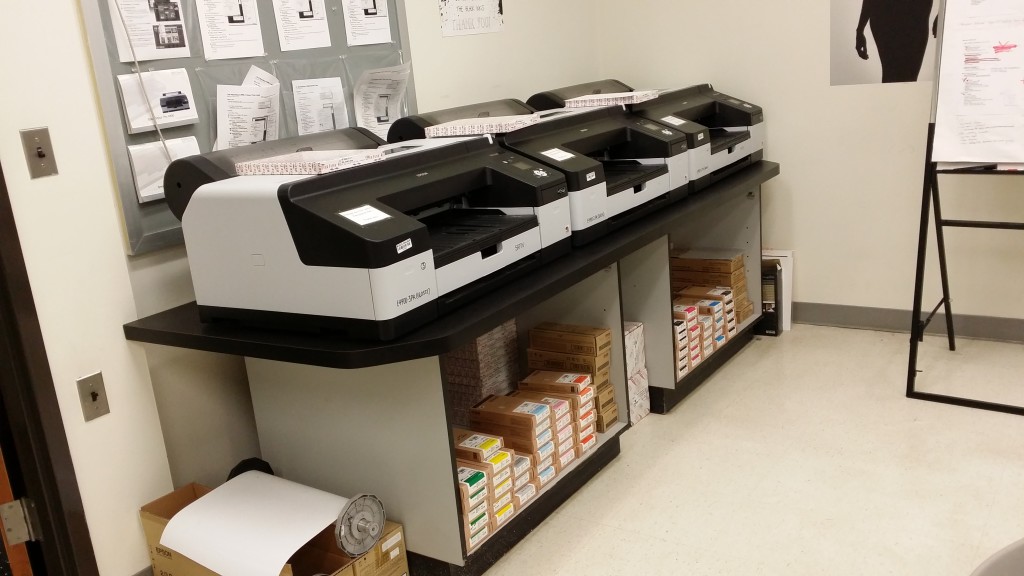
Scanners:
Flatbed image scanners are computer periphereals that capture imagery (pictures, documents, text, etc.) for use digitally. The most common scanners use the same CCD (charge coupling device) system that digital cameras use but does not contain the same lense distortion which make better suited for flat documents.

Scanner Settings:
Both the physical size of your image and the dpi/ppi settings affect the total file size of your scanned image.
To determine the scanned image size simply multiply the image you are scanning by the dpi/ppi setting you are using.
For Example: if you scan a 3″ x 4″ image at 400 dpi/ppi your scanned image will be 1200 px by 1600 px.
300 dpi/ppi is considered the standard for printing. The majority of your projects should be printed 6″ x 9″. This means 1800 px by 2700 px.
For Example: if you have a 3″ x 4″ picture you simply divide 2700 by 4 and get 675. You will need at least 675 dpi/ppi to end up with 2700 px wide.
When in doubt just scan at a higher resolution than you think you need. You can always crop and/or lower the resolution before printing.


The image above describes the process for scanning an image on the Epson flatbed scanner in the lab. Depending on the size of the image you may need to adjust the dpi setting.
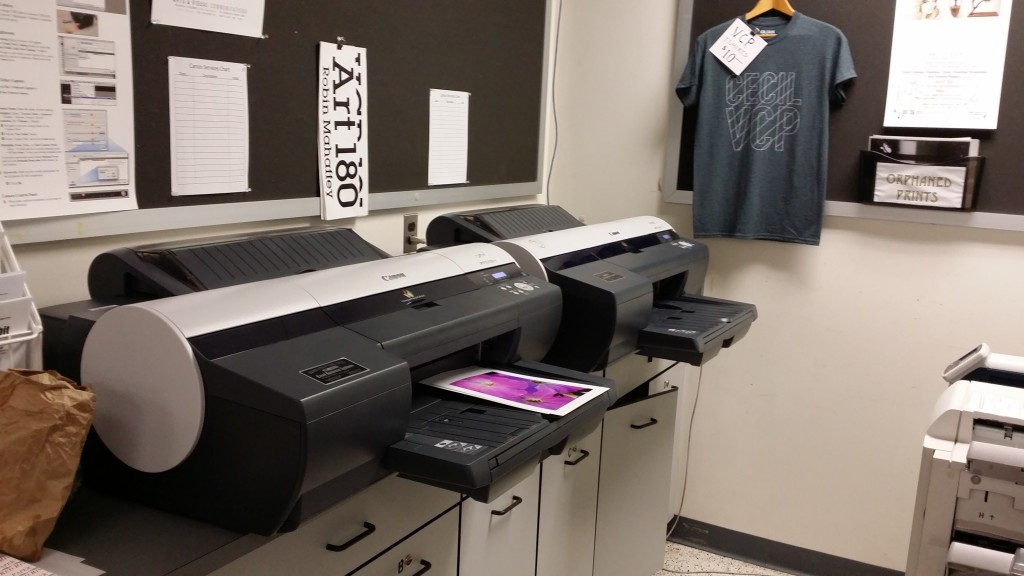
Printing:
This is obviously the process by which you convert your digital work on your computer to physical paper.

Printer Settings:
There are a variety of printers in the lab. Each have their own unique settings based on the make of the printer and the type of paper printed on. You Cannot simply hit print. You Must use specific settings.
Destructive Editing
Destructive Editing:
Broadly speaking image production workflows can be organized into two camps, destructive & non-destructive.
In a destructive workflow the edits you make to an image are permanently changing the pixels. The only way to change a previous edit is to undo all the way back to it, losing anything you may have done after.
Non-destructive workflows allow you to make change anything you have done whenever you want without losing any work. Obviously non-destructive is prefered but is not always possible with all tasks
Common Destructive Tools:
- Adjustments
- When you select Image>Adjustments these tools adjust the image or marquee selection as a whole. These adjustments include things like hue, saturation, contrast, balance, etc.
- Filters
- The functions in the Filters menu affect whole image areas and are also destructive, permanently affecting the pixels. Filters include things like blur, sharpen, warp, etc.
- Tools
- Most of the tools in the toolbox are considered destructive.
A good way to look at destructive is editing is drawing directly on a picture. Non-destructive would be drawing on glass on top of the drawing.
Content Aware
Content Aware:
Content aware is a generic term used to describe the function of multiple tools in Photoshop. Content aware tools use either an area selected or area around a selection to replace “holes” in an image caused by cutting, scaling, removal, etc.. Like the name suggests the tools are “aware” of the “content” they are used in. Using that information they will replace the holes with that content.
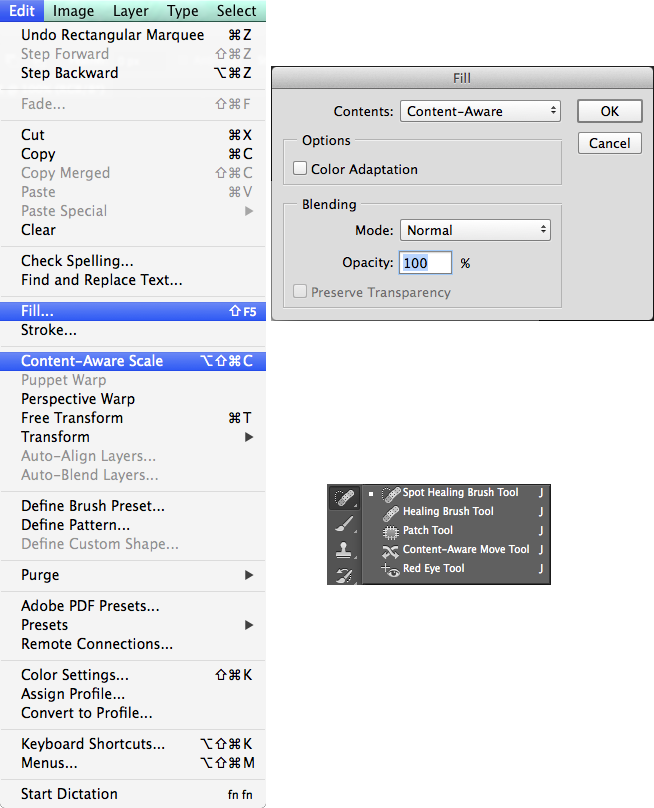
The Tools:
- Content-Aware Fill:
- Marquee select and area and replace it automatically to remove it.
- Content-Aware Scale:
- Scale an image while keeping selected areas free from distortion.
- Content-Aware Move Tool:
- Move elements in an image and automatically replace the space left behind.
- Patch Tool:
- Select an area and choose a different area that is sampled to replace it
- Healing Brush Tool:
- Use a brush to target an area to sample from then brush it where you want it.
- Spot Healing Brush Tool:
- Using a brush remove small areas automatically.
- Red Eye Tool:
- Use a brush to remove red eye.
Photoshop Hotkeys
Common Commands:
- cmd/ctrl + z:
- Undo/Redo
- cmd/ctrl + alt + z:
- Step backwards (undo)
- cmd/ctrl + shift + z:
- Step forwards (redo)
- cmd/ctrl + c:
- Copy
- cmd/ctrl + v:
- Paste
- cmd/ctrl + t:
- Free transform (move, rotate, scale)
- cmd/ctrl + j:
- Duplicate layer
- cmd/ctrl + d:
- Clear selection
- cmd/ctrl + +:
- Zoom in
- cmd/ctrl + -:
- Zoom out
- cmd/ctrl + s:
- Save
Tools:
- v:
- Selection tool
- m:
- Marquee select tool
- l:
- Lasso select tool
- w:
- Magic wand/smart select tool
- c:
- crop
- i:
- Eyedropper tool
- j:
- Healing brush tool
- b:
- Brush tool
- s:
- Clone stamp tool
- y:
- History brush tool
- e:
- Eraser tool
- g:
- Fill tool
- o:
- dodge/burn/sponge tool
- p:
- Pen tool
- t:
- Text tool
- a:
- Direct selection tool
- u:
- Rectangle tool
- spacebar:
- Hand tool (panning)
- z:
- Zoom tool
- q:
- Quick mask mode
Assignment 02
Image Restoration:
In this assignment you will restore an old photo, the worst the better. Find an old photo that needs significant repair. It should be scanned if possible but you may photograph it if you do not have a scanner. You should save two copies; one unrestored (the original) and one that you will restore. Using the various tools in Photoshop you will patch up any creases, specks, tears, etc. that need repair using the various healing tools. You will then use adjustment layers to adjust the overall quality of the photo. Using the different selection tools you will mask areas and make specific adjustments to those as well.
You will submit this digitally on Blackboard. All assignments will also include the project cover sheet. You can grab it here. Just answer the questions in the document.
Be sure to post your images on the Discussion Board for critique.
You will be graded on the following:
- Project Cover Sheet
-
Thoroughly completed and thoughtfully written with little or no grammatical errors.
-
- Basic Requirements
-
Two 6 x 9, 300 ppi, PSD images (original, restored) placed in a folder and zipped (winzip) submitted on Blackboard.
-
-
Destructive Editing (Clone Stamp, Heal Brush, Patch Tool, etc)
-
Beautifully restored. All imperfections have been removed.
-
-
Non-Destructive Editing (Adjustments Layers, Smart Filters, etc)
-
Adjustments completely removed any hint of an old photo. Both whole image and masked area adjustments are made.
-
Resources:
- Project Cover Sheet
- You may download the project cover sheet here.
- Assignment Video Tutorials
- You may watch the tutorial videos below to help you complete your assignment.
Assignment video Tutorials
This tutorial covers restoring an old/damaged photo. Download this file for the example below.
Wait! Before you go!
Did you remember to?
- Read through this webpage
- Submit Week 02 Image Restoration Assignment on Blackboard
- original image, repaired image, and project cover sheet
