
3D Character Creation
Class 11: Character AnatomyTopics
- Anatomy Drawing
- Human Anatomy (skeleton)
- Human Anatomy (muscles)
- Basic 3D Modeling
- Final Project (Hyper Realistic Humanoid)
- 3D Printing
- Class 11 Lab

Class 11 emerging
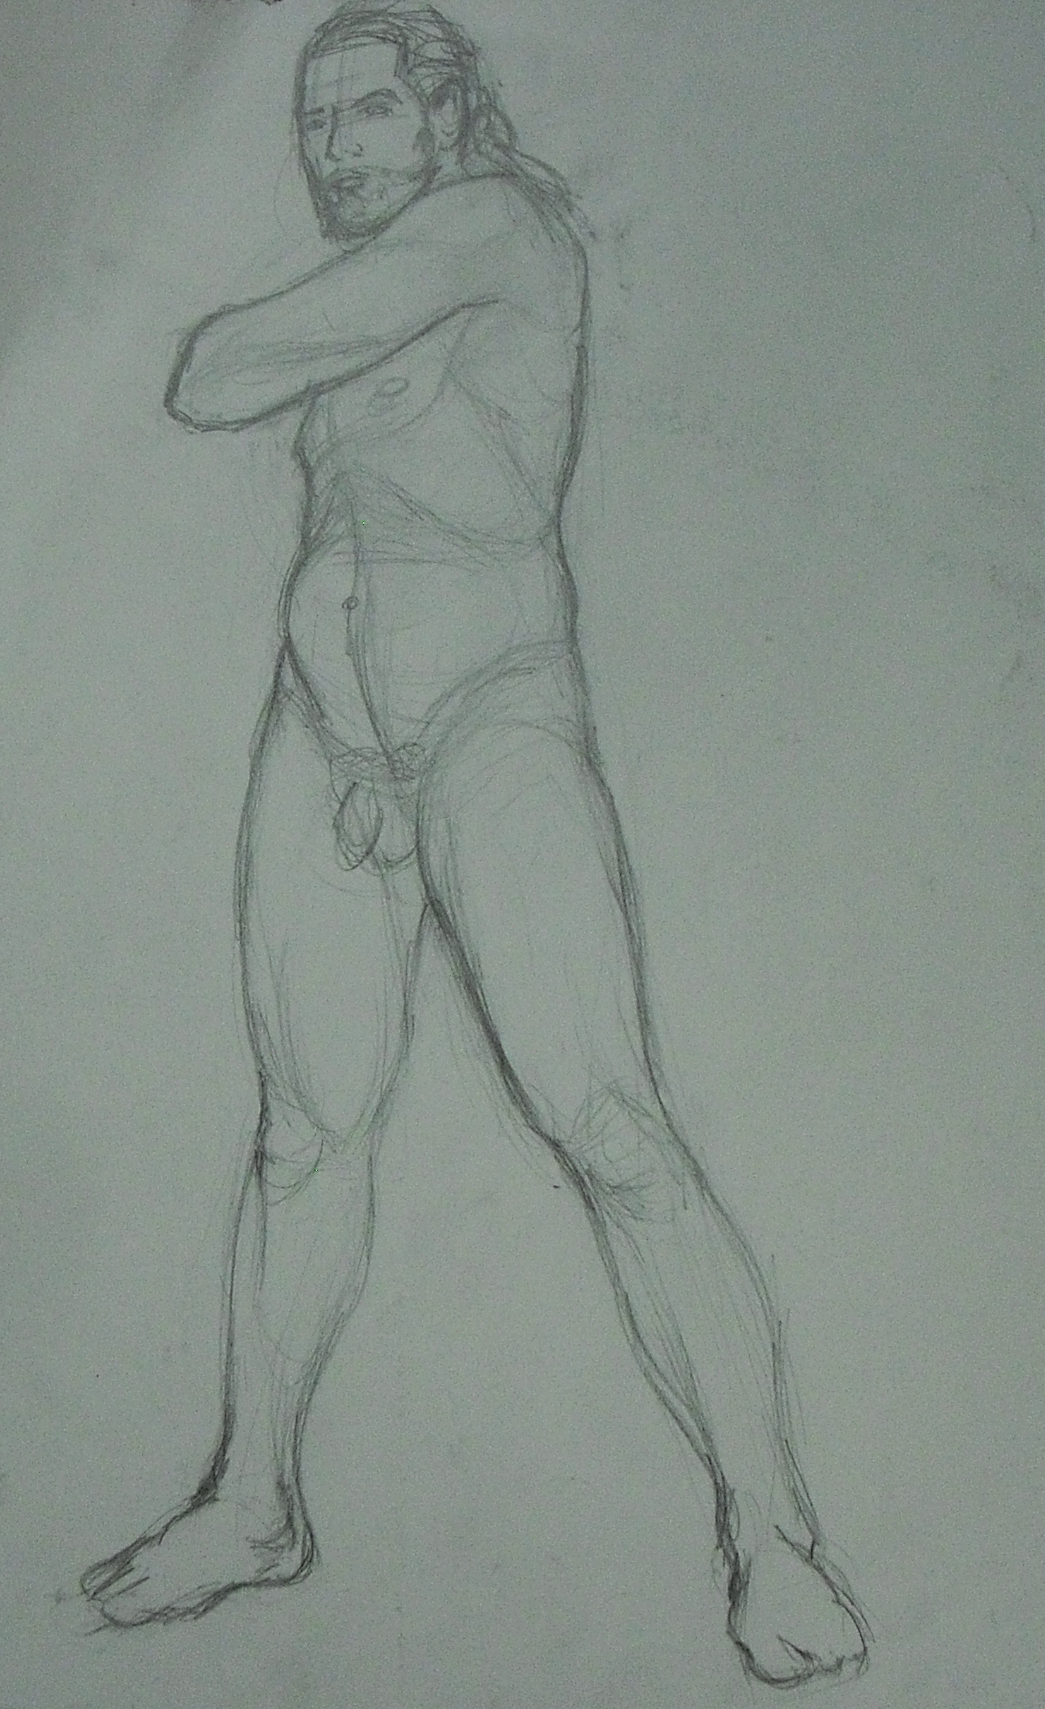
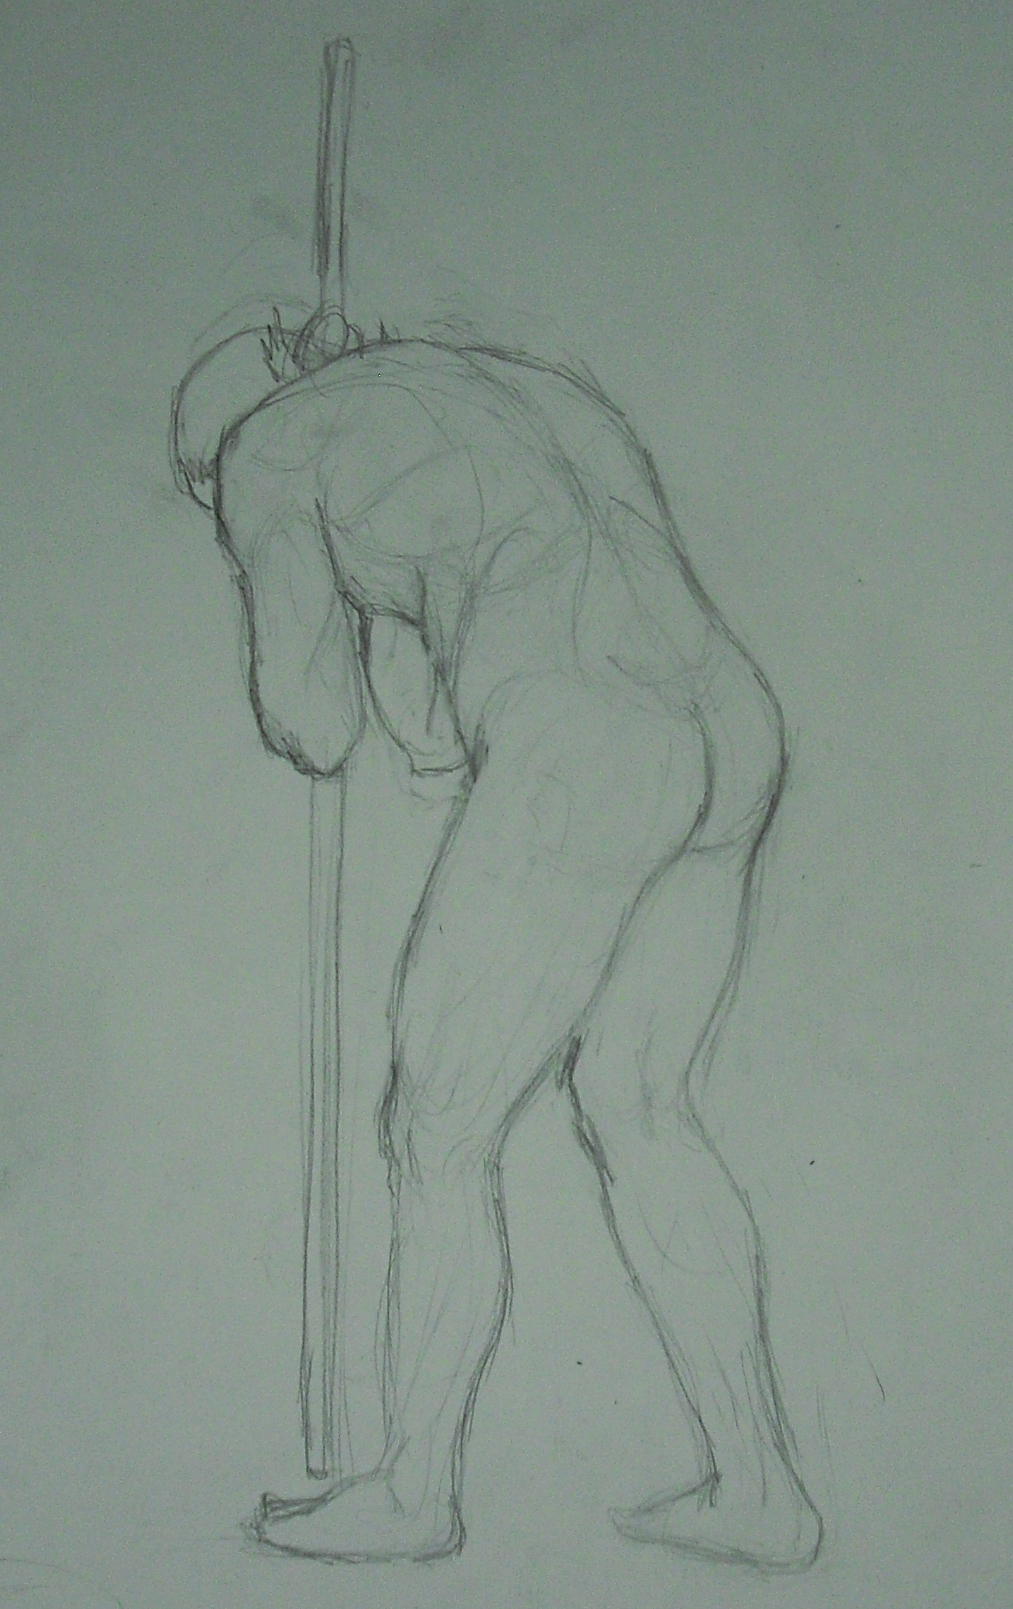
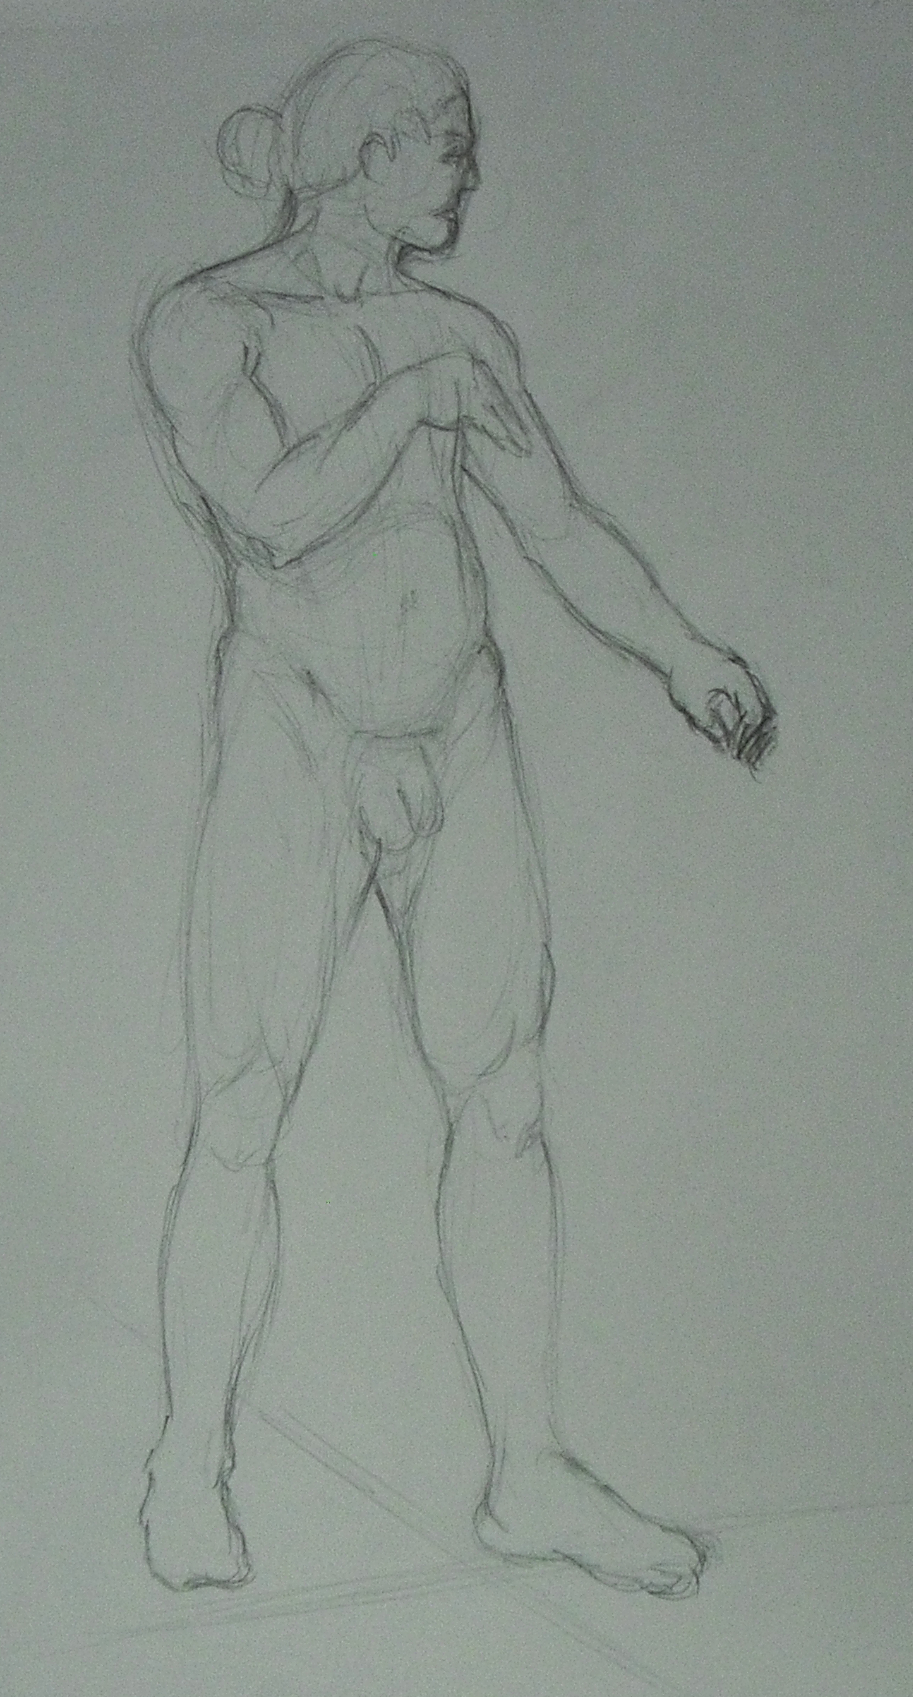
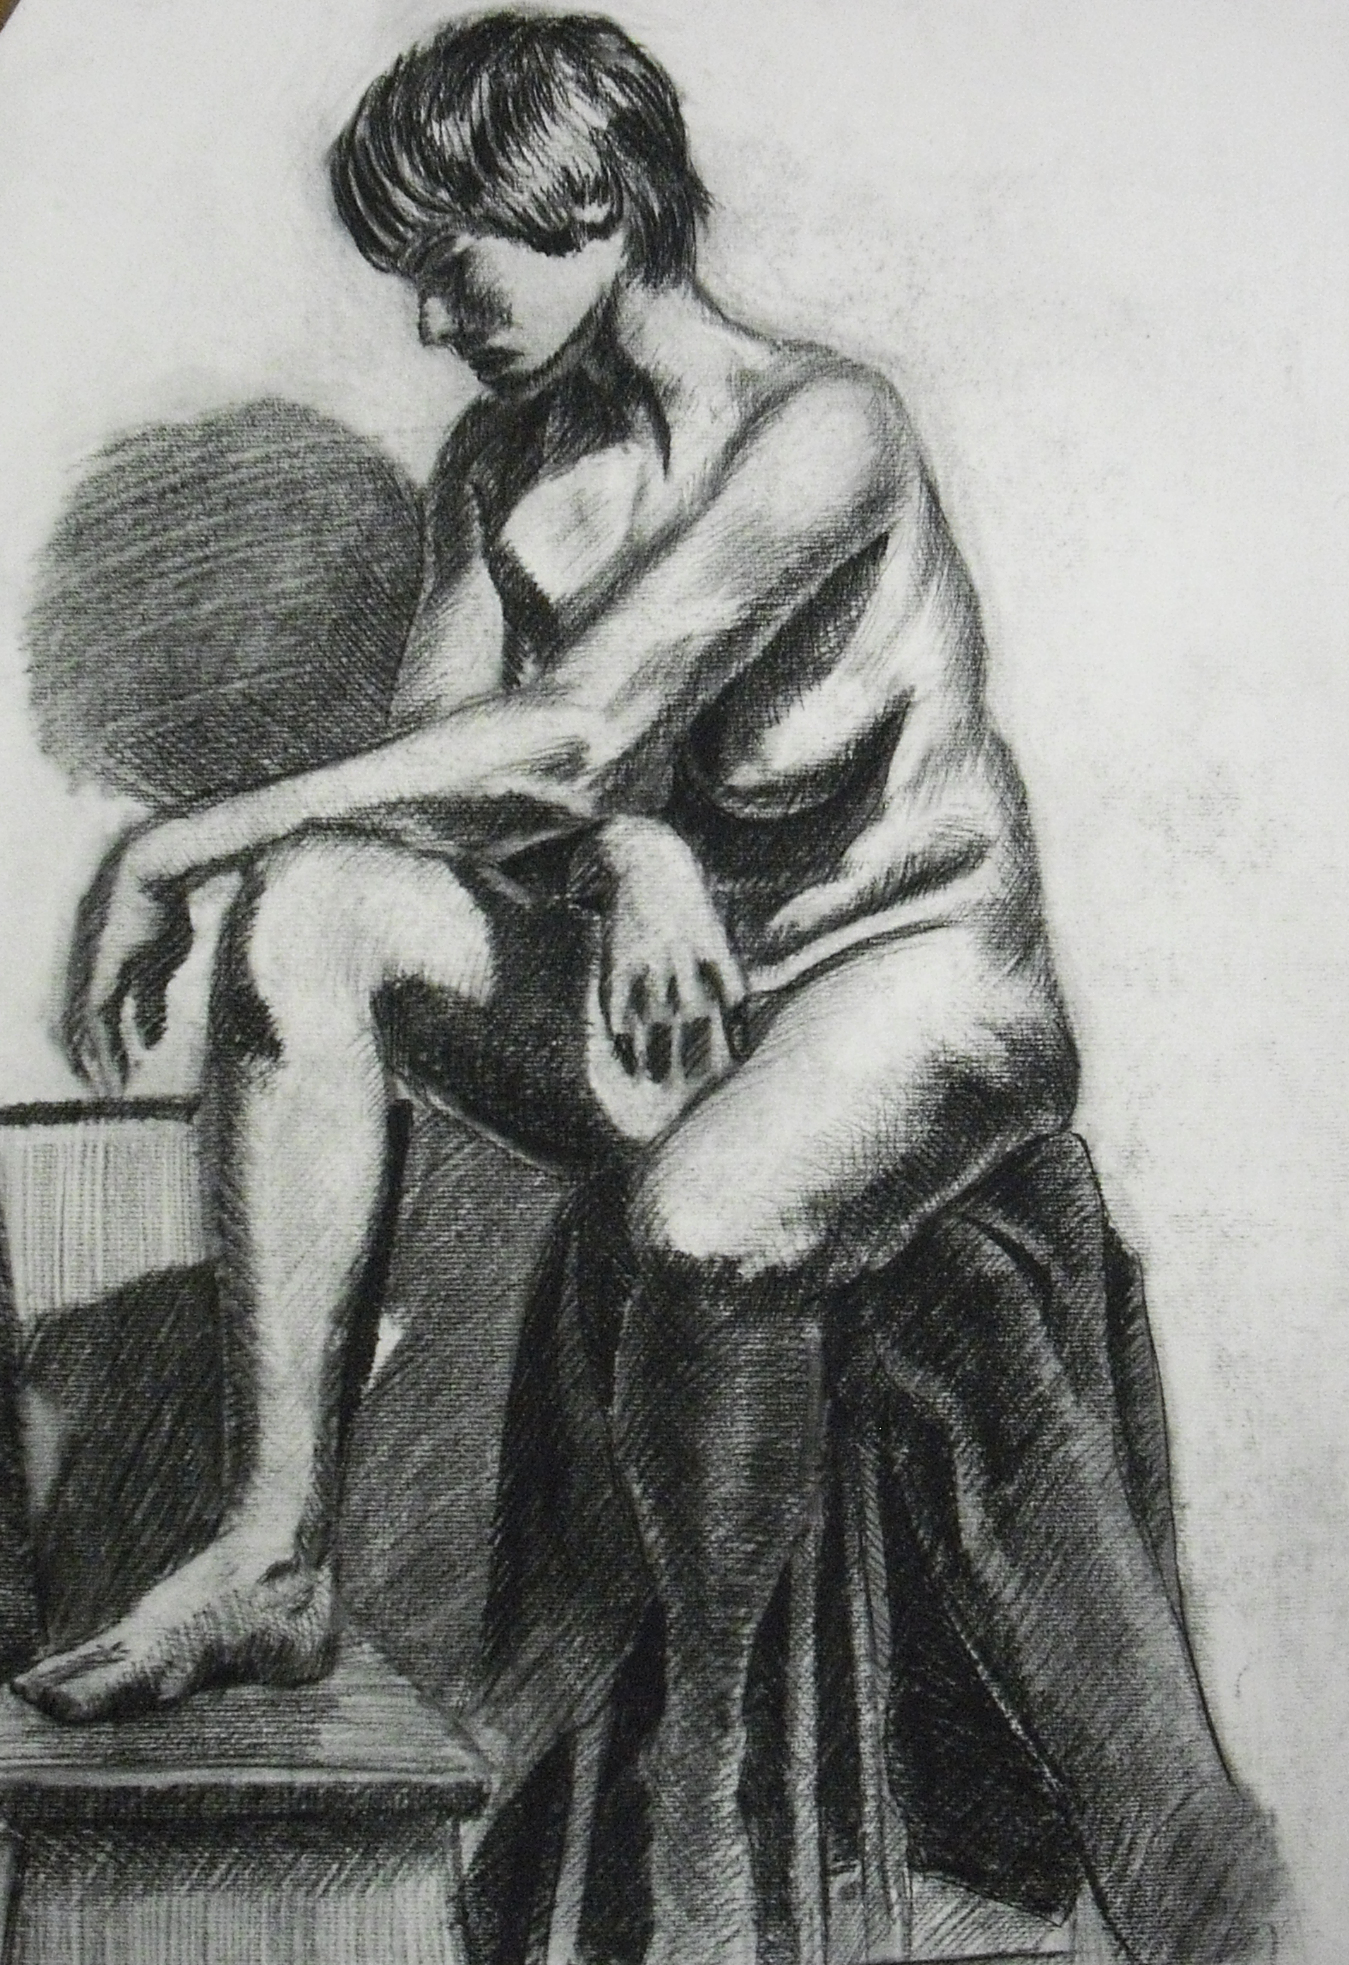
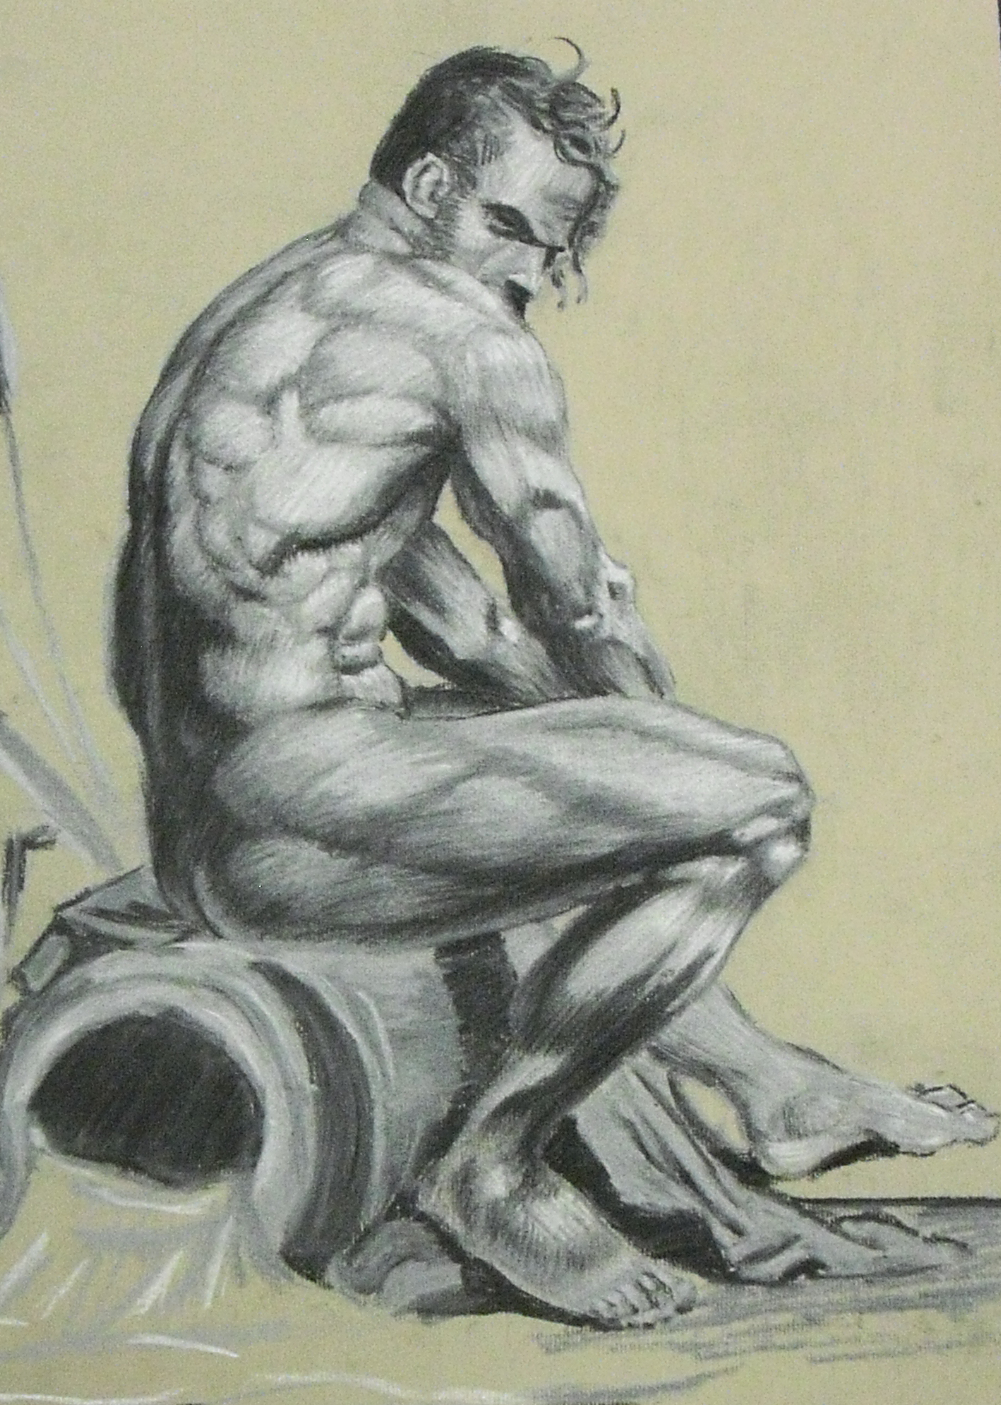
Anatomy Drawing
Drawing Anatomy:
Few things will improve your drawing skills more than drawing anatomy.
- Forces Accuracy
- Teaches drawing inside out
- The foundation of many designs are anatomical
- Non-technological skill that is applicable to many media
You can directly see how the anatomy relates to the final design.
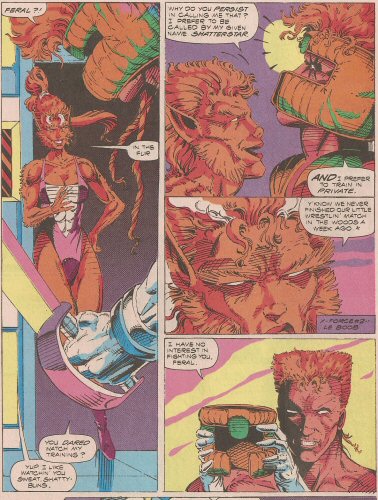
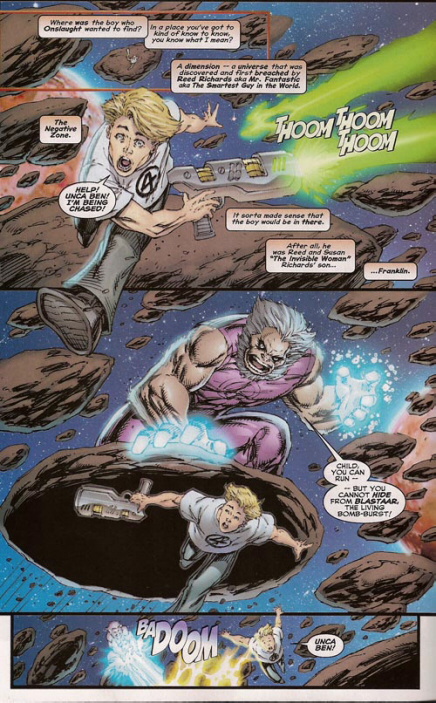
Practical Example: Rob Liefeld
Rob Liefeld is an example of having no understanding of anatomy. His lack of draftsmanship has become something of legend.
You can view a fun (and ridiculous) article on his work here
Anatomy Drawing Terms:
These are typical description words used to name and describe the various body parts.
- Abduction: Movement of a limb away from the midline.
- Adduction: Movement of a limb towards the midline.
- Anterior: Referring to the front of the form.
- Aponeurosis: Sheet-like tendinous connective tissue, associated with muscle attachment.
- Articulation: Coming together of two bones to make a joint.
- Condyle: A bony eminence which articulates with another bone.
- Costal: Pertaining to the ribs.
- Distal: A relative term, meaning that part of a limb farthest from its root.
- Dorsal: Pertaining to the back of the form.
- Extension: Straightening of a joint.
- Flexion: Bending of a joint.
- Foramen: hole in bone through which nerves and blood vessels pass.
- Fossa: Depression or groove in bone.
- Insertion: Attachment of muscle to bone or cartilage, usually at the more movable end.
- Lateral: Referring to the side of the body.
- Ligament: Tough, non-contractile tissue which connects bone to bone.
- Medial: Referring to the centerline of the body.
- Origin: Attachment of muscle to bone or cartilage, usually at the less moveable end.
- Palmar: Relating to the palm of the hand.
- Posterior: Pertaining to the back side of the body.
- Process: A bony projection.
- Pronation: Pertaining to a position; with the dorsal surface facing upwards.
- Proximal: A relative term, meaning that part of the limb closest to its root.
- Ramus: A flattened plate-like projection of bone.
- Subcutaneous: Directly beneath the skin surface; affecting the surface form.
- Supination: Pertaining to position; with the anterior or palmar surface facing upwards.
- Tendon: Tough, non-contractile tissue which connects muscle to bone.
- Tuberosity: A rough projection of bone, usually association with muscle attachment.
Measurements:
The head and trunk together is 4 heads.
From the bottom of the foot to the head of the femur is 4 heads.
The trunk and legs overlap by 1/2 head totaling 7 1/2 heads.
The great trochanter is halfway down the figure.
Across the shoulders is 2 heads long.
The Femur is 2 heads long.
From the knee joint to the bottom of the foot is 2 heads.

Types of Joints
Immovable:
- Sutures: Interlocking dovetail-like joints
- Cartilaginous: Adhesion by means of cartilage

Freely Movable:
- Hinge: Movement on transverse axis only
- Pivot: Cylindrical form moving on its vertical axis
- Ball and Socket: Radial movement, spherical head set into a cup
Hinge = humerus to ulna, Pivot = radius to ulna, Ball and Socket = femur to pelvis
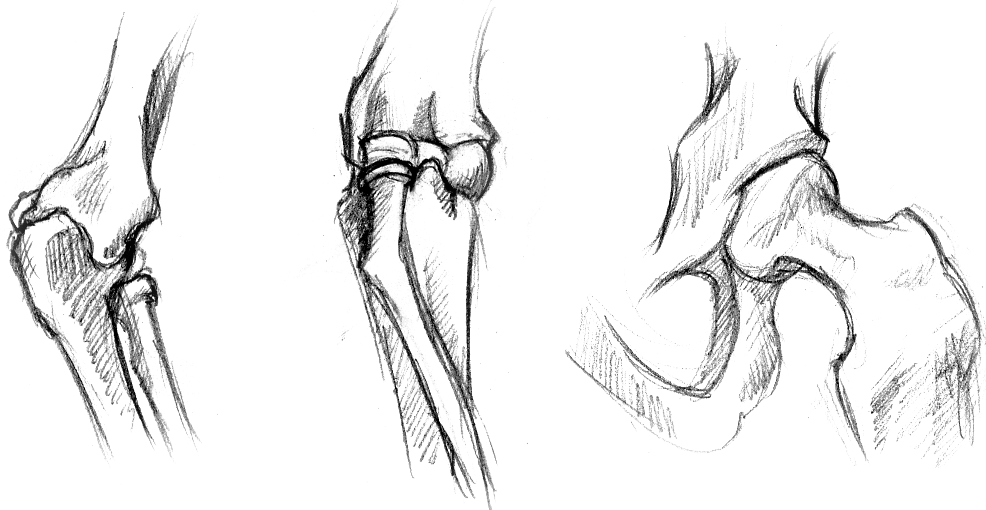
- Plane: Gliding face to face with retaining ligaments
- Saddle: Increases extent of hinge movement
- Ellipsoid: Modified ball and socket
Plane = carpals to carpals, Saddle = thumb metatarsal to carpals, Ellipsoid = carpals to ulna/radius
Slightly Movable:
- Fibro-cartilaginous: Spongy cushion between bones

Human Anatomy: Skeleton
Axial Skeleton:
The axial skeleton is more or less the trunk of the person (skull, spine, rib-cage).
Skull:
- Bones:
- Maxilla
- Mandible
- Frontal
- Parietal
- Occipital
- Temporal
- Zygomatic
- Nasal
- Lacrimal
- Sphenoid
- Ethmoid
- Features:
- Mastoid Process
- Occipital Protuberance
- Zygomatic Arch
- Auditory Canal
- Mental Protuberance
Info:
The skull has 22 bones; the only ones I am concerned that you know are the mandible, maxilla, and cranium (the rest).
I would also like you to know the following features: Mastoid Process, Occipital Protuberance, Zygomatic Arch, and Auditory Canal.
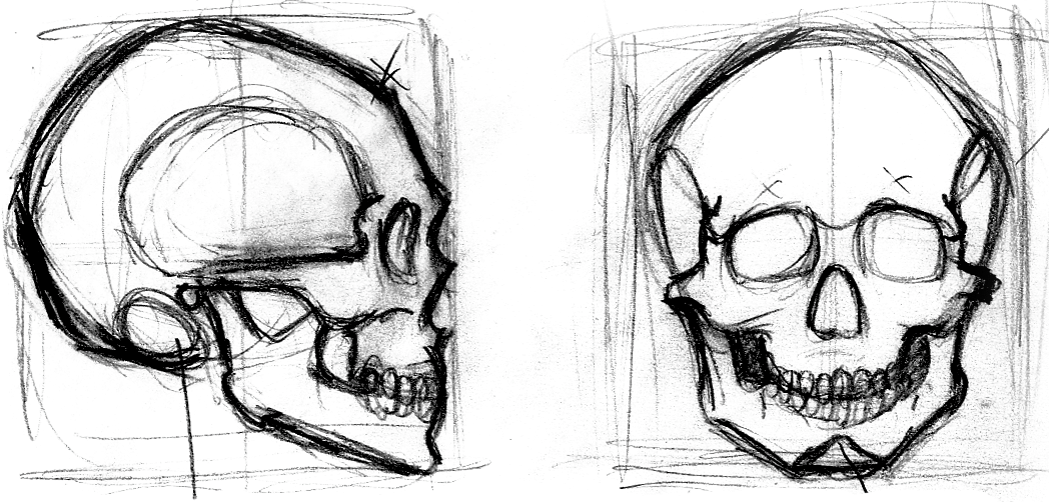
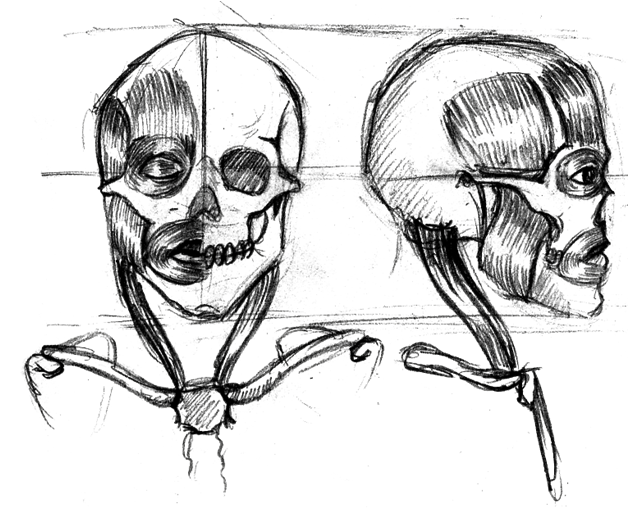
Tips:
You were probably told that the skull is an egg shape, well it’s not! There are no perfect circles in the human body.
It is best to picture the skull in a sort of box (1h x 7/8d x 3/4w). Split the box in half to fine the eye-line and auditory canal.
Be aware of eminences; frontal and parietal.
Clearly define the ramus of the mandible leading into the auditory canal.
The Front of the skull is flat.
The face is five eye widths wide. Eyes are one width from the outside and one width from each other.
The nose lies 1/3 down from the mid-line. The mouth lies 2/3 down from the mid-line.
Vertebral Column:
- 7 Cervical:
- C1: Atlas
- C2: Axis
- C7: Vertebra Prominens
- 12 Thoracic
- 5 Lumbar
- Sacrum
- 5 Fused Vertebrae
- Coccyx
- 3-5 Vestigia
Info:
All I would like you to know is that there are 7 cervical vertebrae, 12 thoracic, and 5 Lumbar.
As artists the 7th cervical vertebrae and spinous processes are visible subcutaneously.
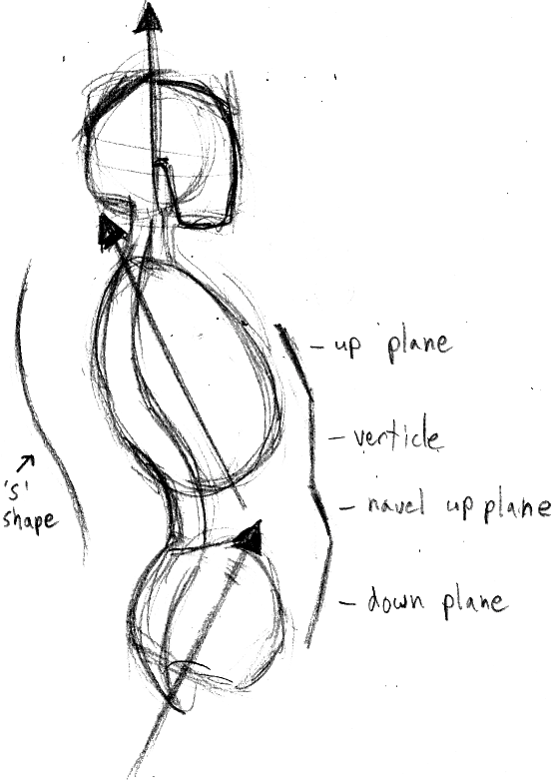
Tips:
Take note of the ‘S’ shape in the spine, it is not straight
Notice the varying axis’. These create a lovely force in the form.
Thorax:
- 7 True Ribs
- 5 False Ribs
- 2 Floating Ribs
- Sternum
- Manubrium
- Gladiolus
- Xiphoid Process
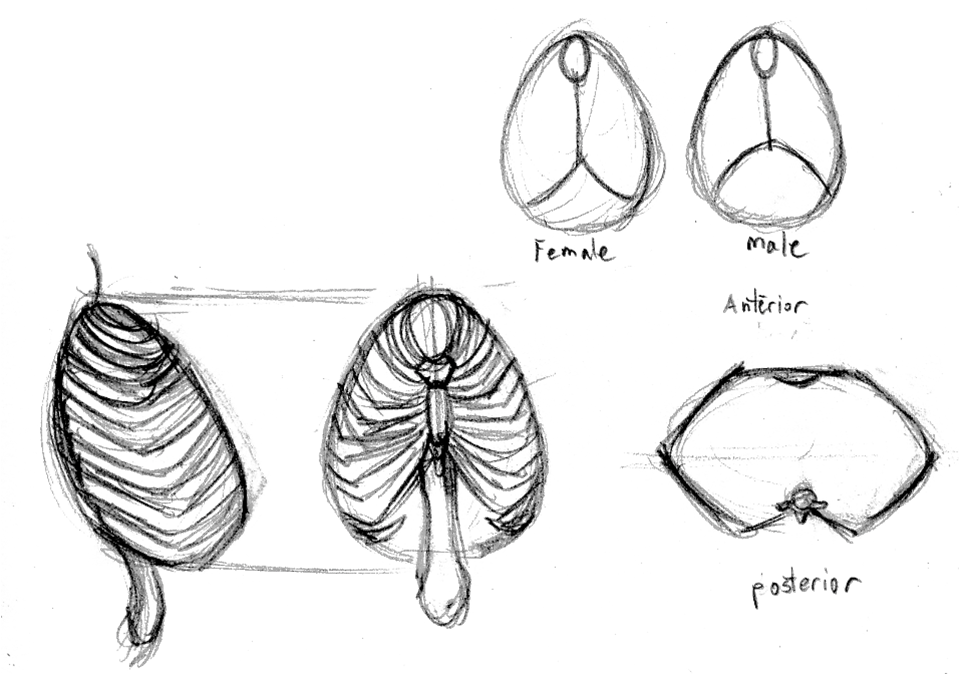
Info:
There are 24 ribs. Two for each thoracic vertebr
Tips:
It is best to draw the ribs as a simple egg shape (do not worry about individual ribs.
Notice that the ribs act like a collar and the irregular shape from the top view.
The ribcage is 1 3/4h x 1 1/4w x 3/4d (heads).
The costal arch is always present, sometimes as a protuberance, sometimes as a depression.
Pelvic Girdle:
- Ilium
- Ischium
- Pubic Bone
- Pubic Symphysis
- Acetabulum
- Foramen obturator
- Sacrum
- coccyx
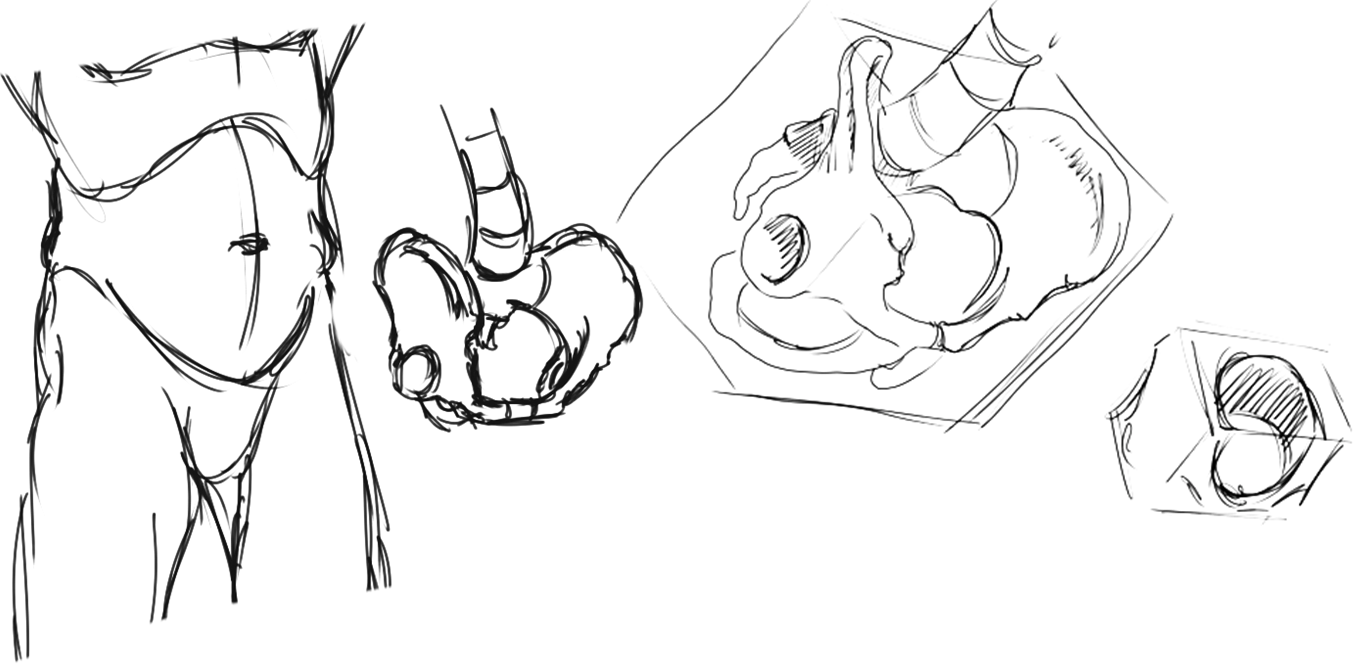
Info:
Only the sacrum and coccyx are actually part of the axial skeleton.
Note the illium are the hips, the ischium are the butt and the pubic bone lies in front.
Tips:
I try to draw a box with a hole in it like a bucket
Draw a ¾ view.
Most actions originate from the hips so it is very important to figure out where they are. You should be able to spot the anterior superior iliac spines (just under the inguinal furrow). You should also be able to landmark the posterior iliac spines.
The pelvis is 1h x 1 1/4h x 3/4d (heads).
Shoulder Girdle:
- Clavicle
- Scapula:
- Spine
- Acromion Process
- Caracoid Process
- Glenoid Fossa
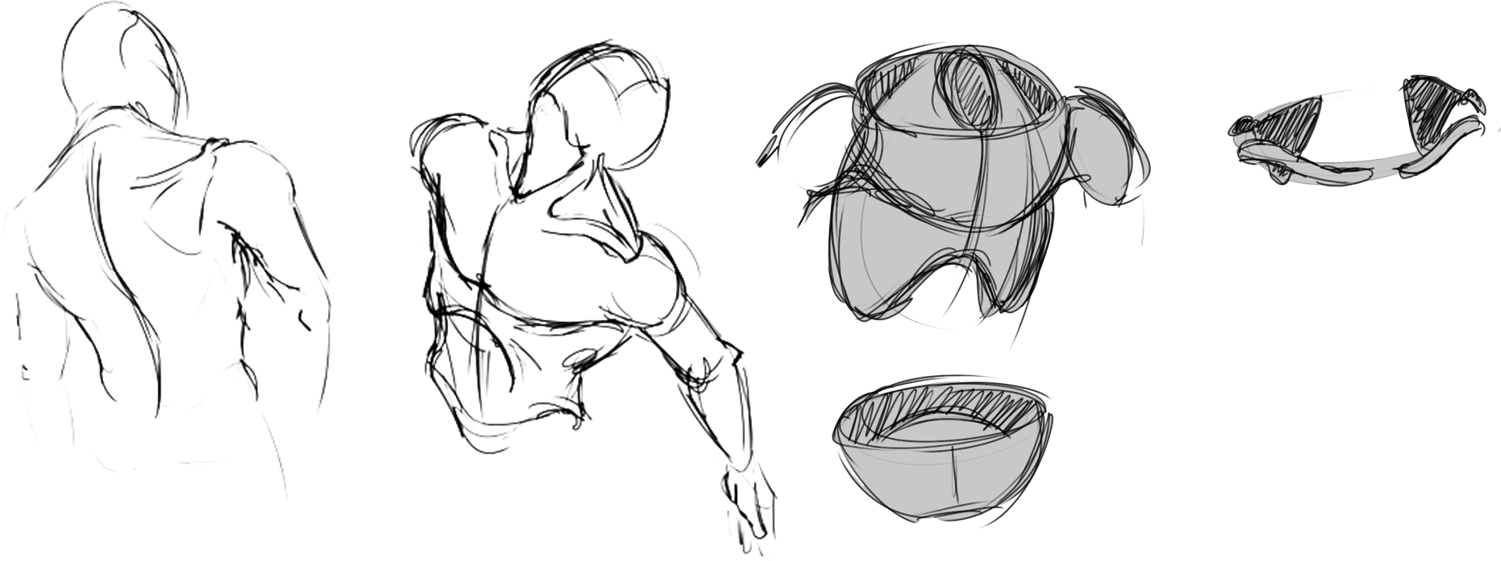
Info:
This is also not technically part of the axial skeleton.
Acromion is the process on the posterior side. Caracoid is on the anterior.
Draw the posterior view of the scapula and anterior view of the clavicle.
Note the scapula with its acromion process, and spine. Also note the clavicle.
Technically the shoulder girdle is just the area encasing each humerus.
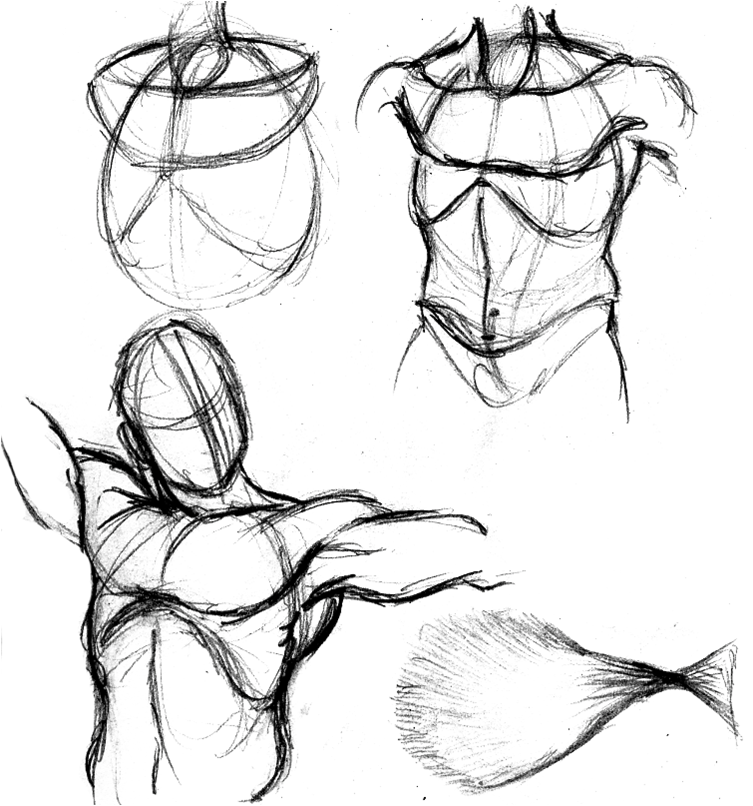
Tips:
The shoulders are one of the most common areas students mess up on. Imagine a sort of coffee cup resting on top of the ribcage. This will make up, the pectorals, as well as the clavicle and scapula.
The clavicle is an ‘S’ shape. The scapula is a downwards triangle.
Notice the clavicle and scapula come together to support the upper arm.
Appendicular Skeleton:
The appendicular skeleton consists of the arms and legs (also the pelvis).
Humerus:
- Humeral Head
- Surgical Neck
- Anatomical Neck
- Medial Epicondyle
- Lateral Epicondyle
- Deltoid Tuberosity
- Capitellum
- Trochlea
- Greater Tuberosity
- Lesser Tuberosity
Ulna:
- Olecranon Process
- Ulnar Styloid Process
Radius
- Radial Tuberosity
- Radial Styloid Process
Tips:
You need to have some strong lines in your limbs (not sloppy dough).
Be aware of the olecranon process and styloid process (primarily on ulna).
notice that the ulna makes the ridge on the forearm and radius rotates around the ulna.
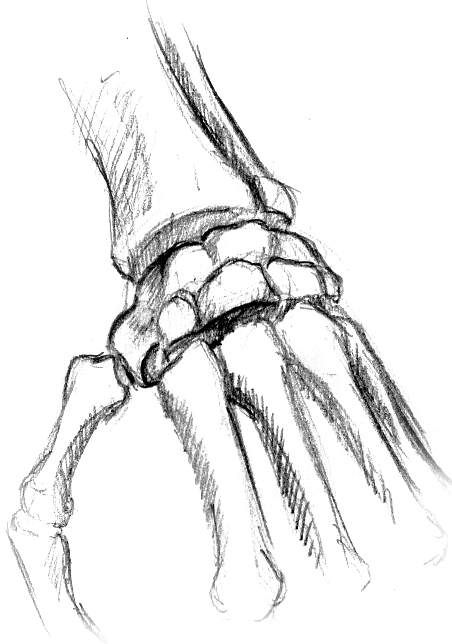
Carpals
Metacarpals
Phalanges
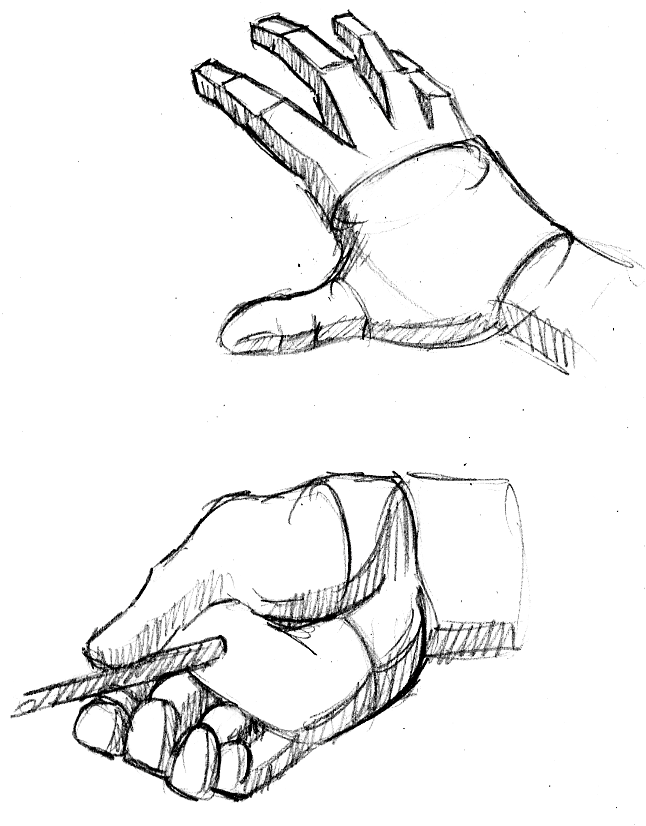
Tips:
It is best to think of the hand as a series of blocks, not round. There are obvious planes to consider
Femur:
- Femur Head
- Femur Neck
- Greater Trochanter
- Lesser Trochanter
- Medial Epicondyle
- Lateral Epicondyle
Patella
Tibia:
- Tibial Tuberosity
- Medial Malleolus
Fibula
- Lateral Malleolus
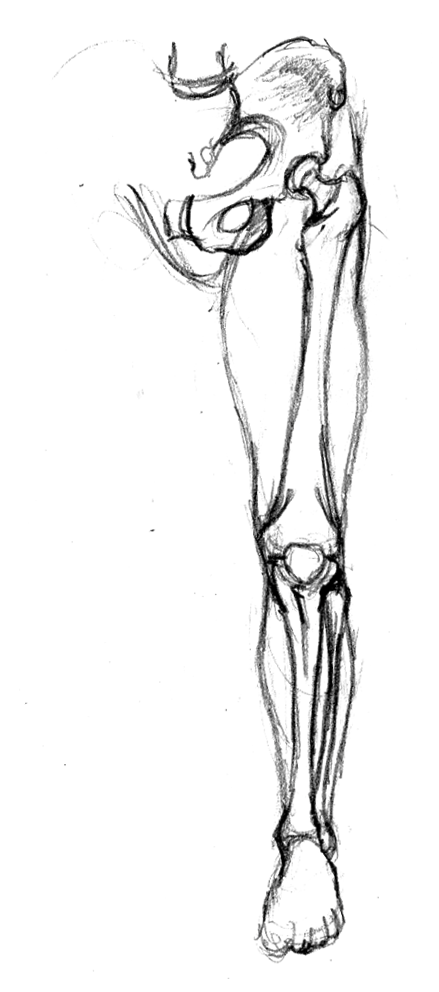
Tips:
The tibia and fibula, as well as the, tibial tuberosity, medial and lateral malleolus are the most significant visual components of the leg.
Talus
Calcaneus
Tarsals
Metatarsals
Phalanges
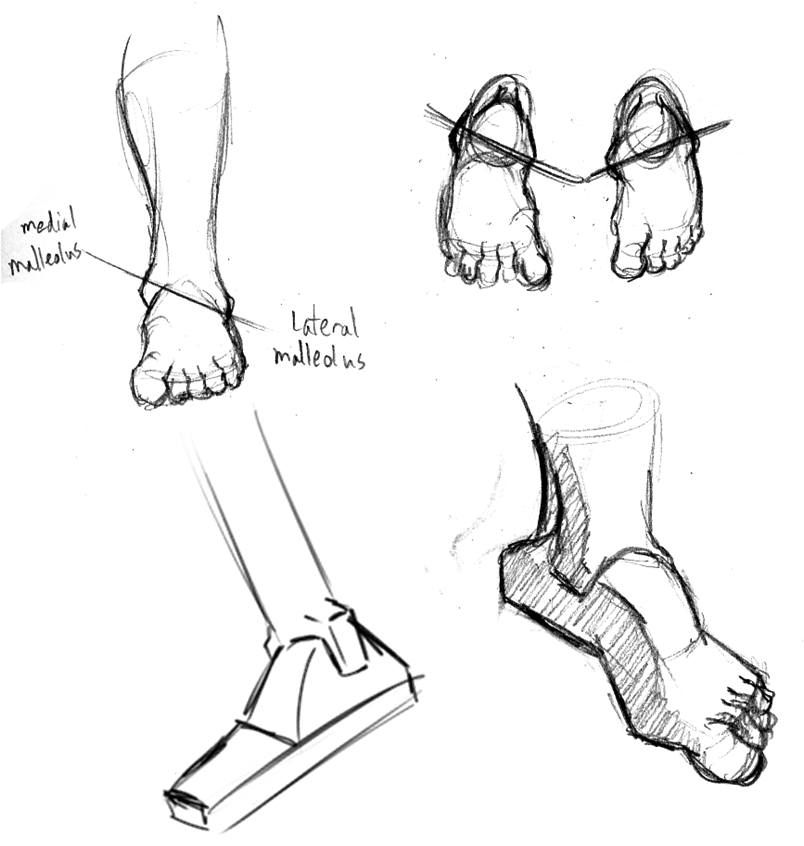
Tips:
Notice how the malleoli are offset.
Best to draw the foot based planes.
The foot is 1 1/8 long (heads).
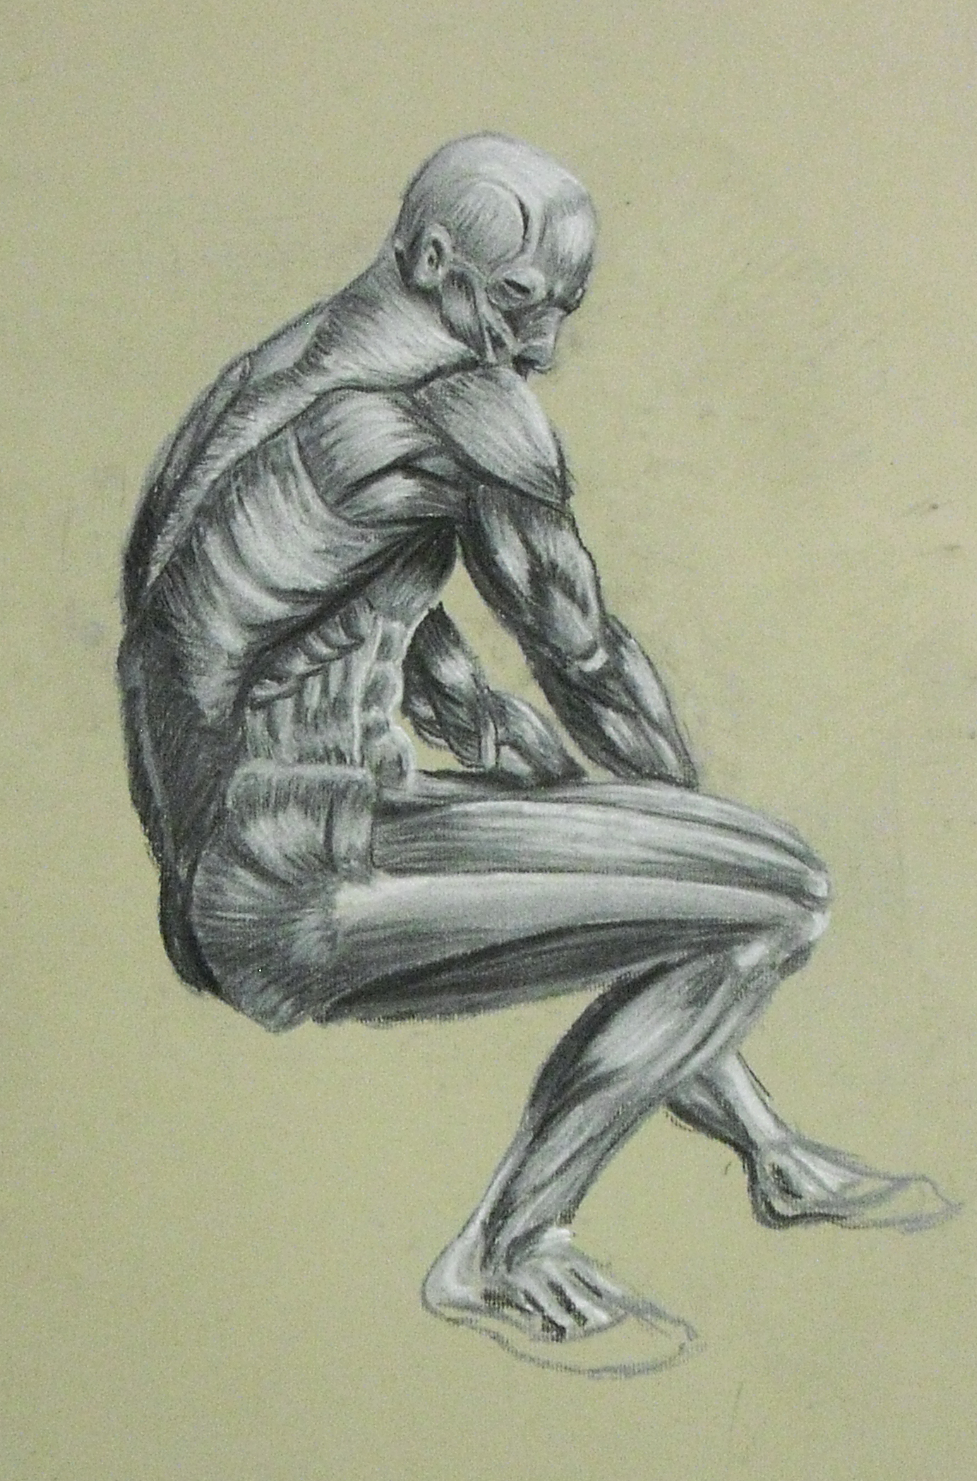
Human Anatomy: Muscles
Head:
- Temporalis
- Masseter
- Sternocliedomastoid
- Frontalis
- Orbicularis Oculi
- Orbicularis Oris
Info:
Muscles of the head are quite thin and usually not visible except for when you are specifically using one, like clenching your teeth.
Keep an eye on how the muscles “flow” into each other.
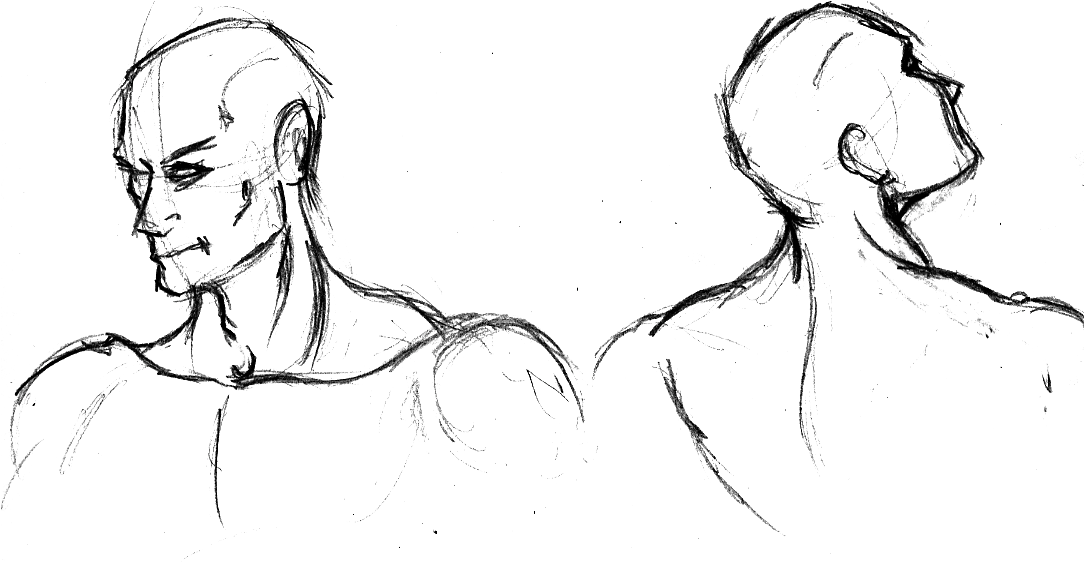
Tips:
Note the sternocliedomastoid, temporal, and masseter muscles.
Notice how the sternomastoid inserts into the sternum and clavicle to form a nice ‘V’ shape.
The trapezius inserts into the occipital bone which sort of looks like a cape.
Torso (anterior):
- Pectoralis Major
- Serratus Anterior
- External Obliques
- Rectus Abdominus
- Anterior Abdominal Aponeurosis
- Inguinal Ligament
Torso (posterior):
- Erector Spinae Group (Sacrospinalis/multifidus)
- Rhomboids
- Lattisimus Dorsi
- Trapezius
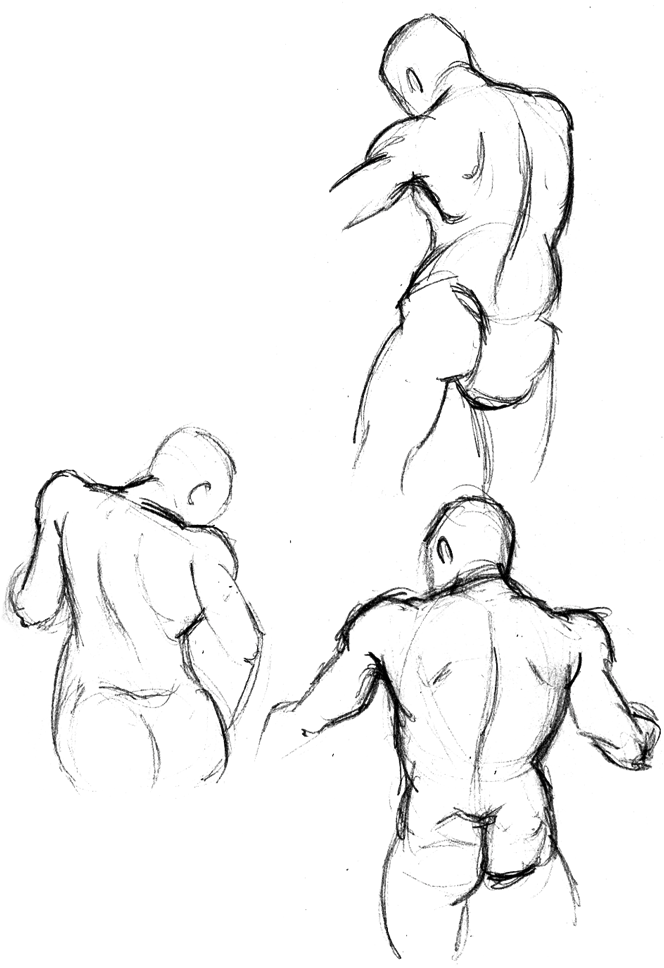
Tips:
The skeleton supports the muscles so it is very important to get the cup and egg correct.
The pectoral is actually twisted in order to run along the side of the humerus.
Note how the pectoral, deltoid, and lat all wrap around the emerging arm.
Info:
Erector Spinae group is the name of the group including the Sacrospinalis/Multifidus which ride on either side of the vertebrae creating a muscular ridge. It is actually a group of muscles and tendons, not just one. They originate at the transverse processes and insert into the spinous process.
Rhomboids attach to the medial edge of scapula and originate at c6 and c7. Rhombus shaped.
Latissiums dorsi strong shape originating at the lower lumbar and pelvis and inserting into the humerus. Kind of like an upside down pectoralis major.
Trapezius is probably the strongest shape. Attaches to the occipital, scapula, and spinous processes. Reveals the 7th cervical vertebrae.
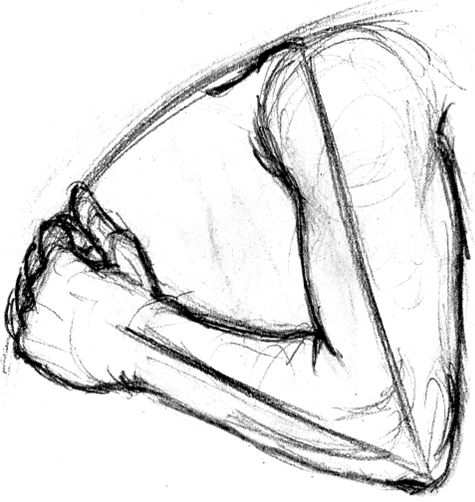
Arm:
- Deltoid
- Bicep Brachii
- Triceps Brachii
- Coracobrachialis
- Forearm Pronators/Flexors
- Forearm Extensors
- Forearm Flexors

Tips:
The arm forms a sort of ‘chain-link” pattern.
Again notice the muscle flowing into each other.
Legs and arms are great places to utilize straights
Info:
Deltoid is your shoulder, biceps brachii are your biceps, triceps brachii are your triceps, and the coracobrachialis is on the medial side of the arm.
Brachialis is between the bicep and the tricep.
Notice how the muscles weave into each other.
Brachioradialus is the largest muscle of the forearm. The remaining muscles are easiest to break into flexor, extensors, and pronators.
Leg:
- Gluteus Maximus
- Gluteus Medius
- Quadriceps:
- Vastus Lateralis
- Vastus Medialis
- Vastus Intermedius
- Rectus Femoris
- Sartorius
- Illioltibial Band
- Hamstrings
- Biceps Femoris
- Semitendonosis
- Semimembranosis
- Adductors
- Adductor longus
- Adductor Magnus
- Gracilis
- Gastrocnemius
- Tibialis Anterior
- Soleus
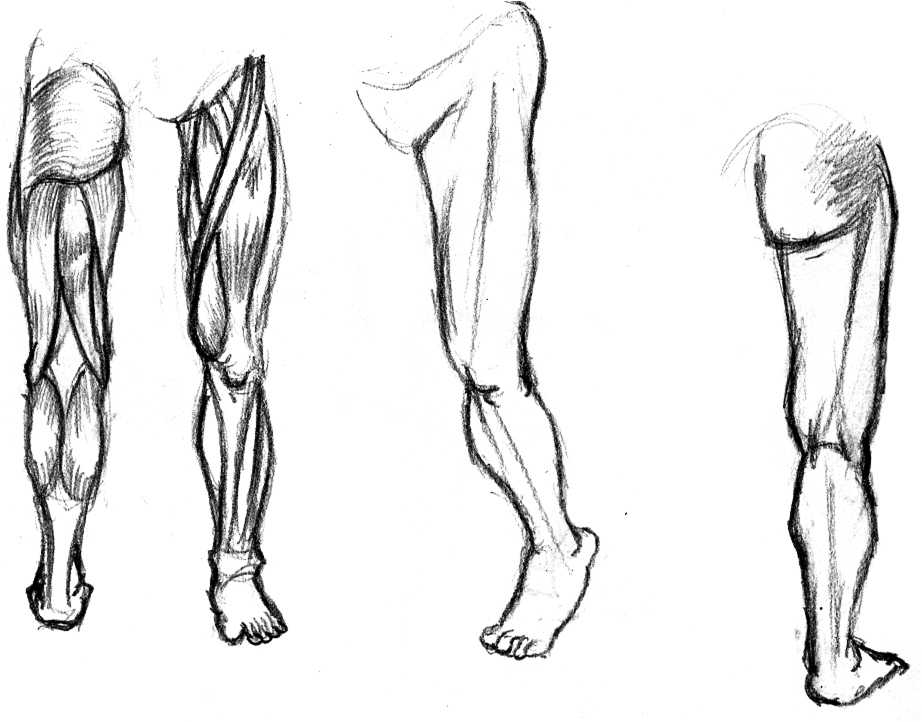
Tips:
Notice how the insertion of the hamstrings affects the form.
The Sartorius creates a curve around the vastus medialis.
Info:
Semitendinosis is on the medial side of the knee. Semimembranosis is just outside of that.
Biceps femoris is lateral.
Sartorius is a key forming muscle.
Ilialtibeal band runs on the lateral side of the leg from the ilium to the tibia.
Basic 3D Modeling
3D Printing
Final Project (hyper-realistic humanoid)
Class 11 Lab
Super Hero Lab
MCU, DECU, and other comic derived worlds are some of the highest grossing films in the world. In this assignment you will use your knowledge of human anatomy to design a novel superhero.
You will be graded on the following:
- Lab Requirements
-
Techniques and processes covered in the instructional material is followed and implemented.
-
- Creativity & Craftsmanship
-
Excellent design choices, novel & appealing, and solid clean caliber work.
-
Resources:
- Assignment Video Tutorials
- You may watch the tutorial videos below to help you complete your assignment.
Assignment Video Tutorials
Wait! Before you go!
Did you remember to?
- Read through this webpage
- Submit Super Hero Lab on Canvas
