
Outline:
- Model Preparation
- The Skeleton
- Assignment 03
Model Preparation
Fixing Mistakes:
Here are steps to take to make sure your model is ready to go:
- To automatically search for errors and repair them:
-
-
- Select the model in object mode.
- Make sure you are in the Modeling Menu Set.
- Press Mesh>Cleanup...
- Make sure the following are checked:
-
- Cleanup matching polygons
- Apply to selected objects
- Faces with more than 4 sides
- Lamina faces (faces sharing all edges)
- Nonmanifold geometry
- Edges with zero length
- Faces with zero geometry area
-
- Look for unmerged vertices and inside faces:
-
- Select your model in object mode.
- Press 3 to enter subdivision mode.
- Roll your camera around the model, and look for anything suspicious, especially hard lines.
- If it is a hard line over a small area more than likely your have unmerged vertices.
- If there are hard lines across an entire loop you may have inside faces that need to be deleted.
- Check UV's:
-
- Select the model in object mode.
- Press Windows>UV Editor.
- Review the UV's and make sure they are not wonky.
- Review topology:
-
- Select the model in object mode.
- Roll your camera around the model looking for odd topology:
-
- Excessive poles (stars above 5 points).
- Ngons (faces with more than 5 sides).
- Edgeloops that do not wrap around the figure.
- Gridflow that does not run cross-contour with the model or match deformation needed.
- Insufficient amount of geometry at areas of deformation.
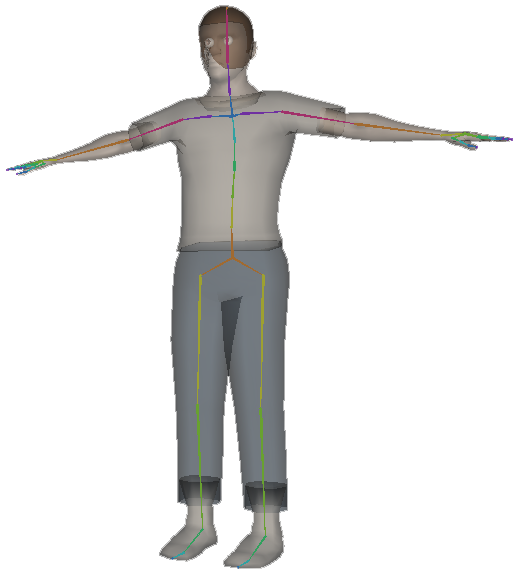
The Skeleton
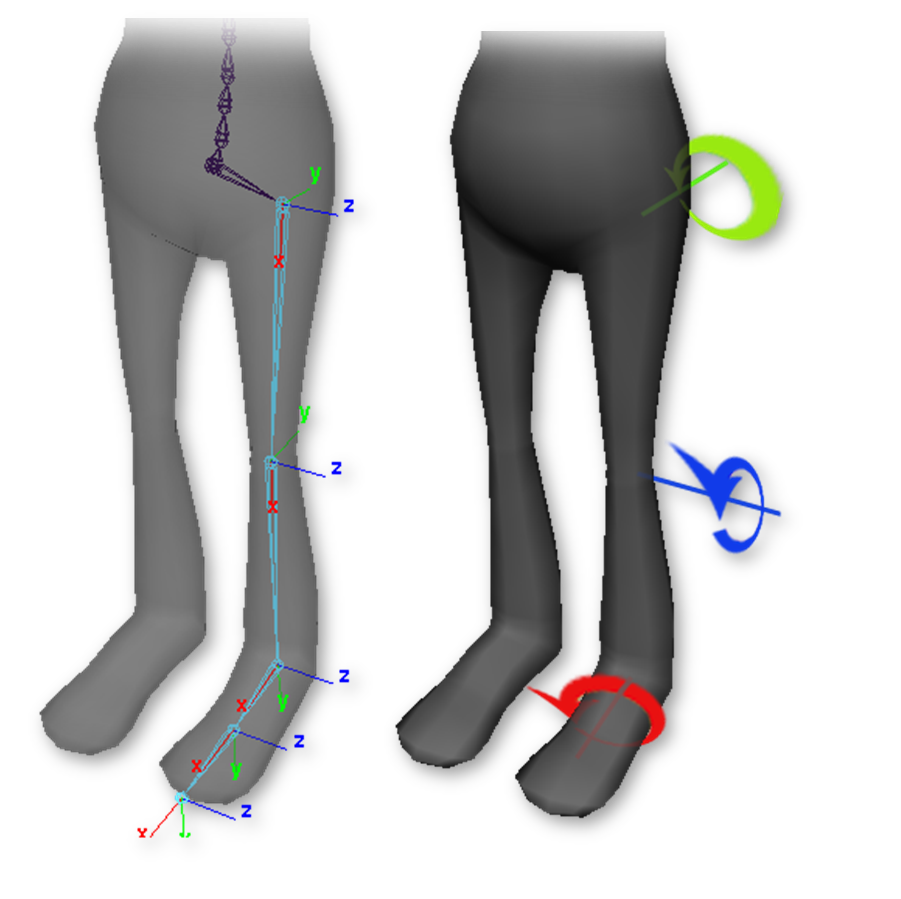
Skeleton:
Skeletons are hierarchical, articulated structures that let you pose and animate bound models. A skeleton provides a deformable model with the same underlying structure as the human skeleton gives the human body.
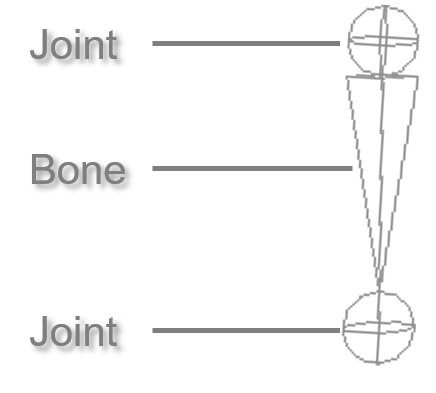
Joints:
Joints are the building blocks of skeletons. They are the points of articulation and what the mesh binds to. These are not renderable.
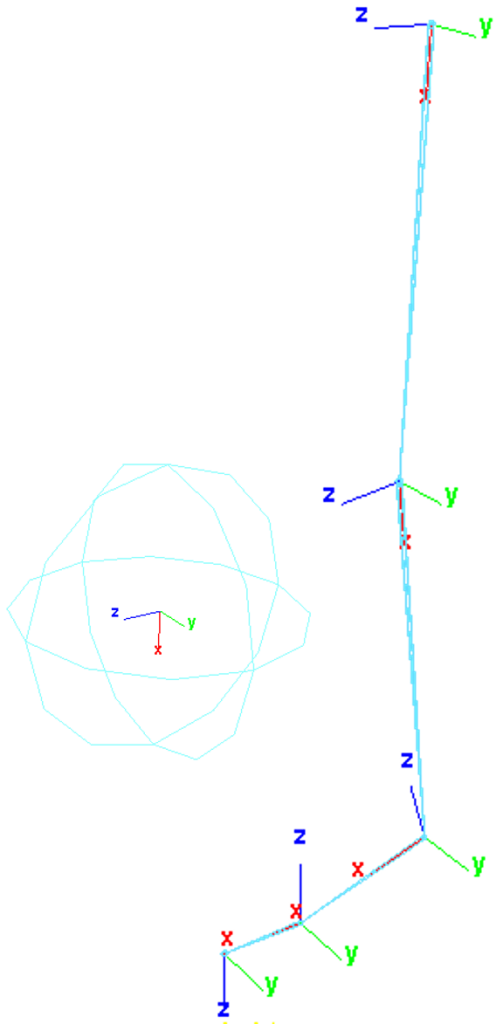
Local Rotation Axis:
Joints are unique because they have the ability define an independent orientation (local rotation axis).
They can be rotated to point in a direction that is different from their orientation.
By default the X axis is pointing down the chain towards the child joint.
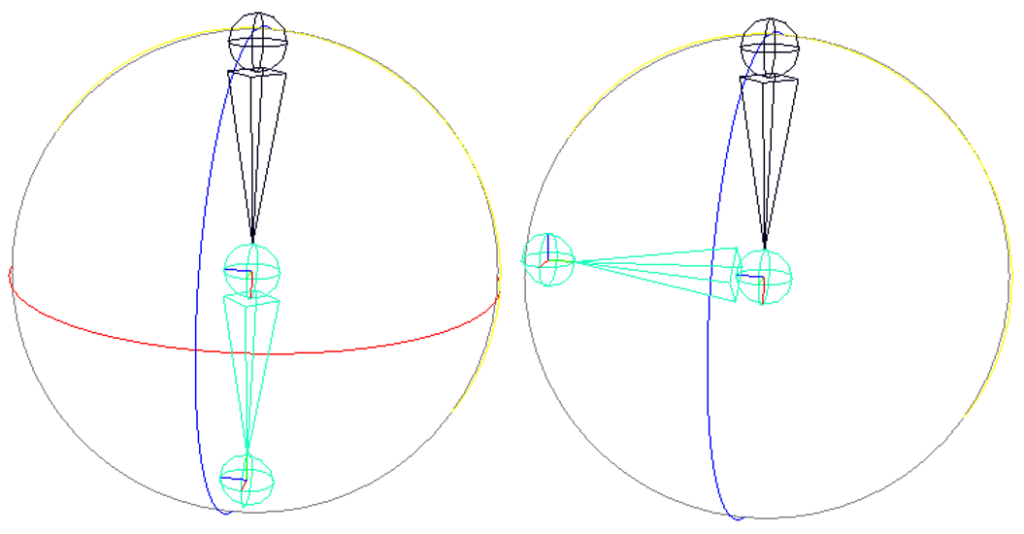
Gimbal Lock:
In animation, a situation where one rotational axis is placed over another, causing the two axes to lead to the same result when animated.
Joint Orientation:
Every joint has its own local rotation axis that affects how it responds to transformations. These local rotation axis can be manipulated so that the joints can react in a consistent and reliable manner.
Most studios use the XYZ orientation.
- X points down the chain and is the rolling axis.
- Y is used for secondary rotation (less frequent axis).
- Z is the primary axis used.
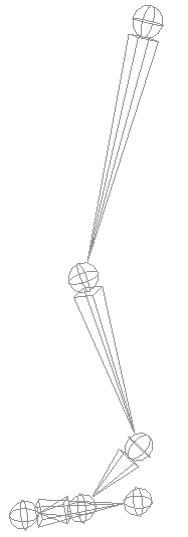
Joint Rotation Order:
The default rotation order is XYZ. This means that Z gets processed first then Y, and lastly X. Imagine that each axis is parented to the one above it. Adjusting joint orientation and joint rotation is the best way to avoid gimbal lock.
A good process:
- Think of the main movement likely to occur. That axis would be rotated first thus last in the rotation order attribute.
- Next determine the second most used axis. That will be in the middle of the rotation order attribute.
- The last attribute is whatever is left.
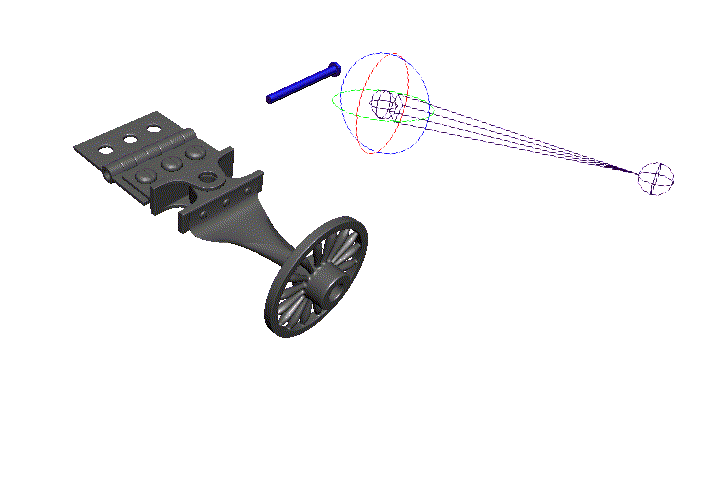
Joint Placement:
Remember there are two primary factors that determine joint placement are anatomy and topology.
- Limbs
- Place in the center of the mass (generally).
- Place joints in the center of the edge loops.
- Volumes
- For the spine or multi-jointed areas keep the number of the joint relative to the number of edge loops (1 to 1, 1 to 2, etc.)
- Fat limbs can have multiple joints to spread out deformation.
- Anatomy
- Knowing anatomy can help you place joints but don’t be overly concerned with it.
- Anatomy is a good place to start when rigging animals.
Assignment 03
Character Rig
Although auto-rigs are useful for quickly rigging characters you have little control over them. Instead it is a good idea to create custom rigs that you understand and can make adjustments to. In this next assignment you will manually produce a character rig. You may use any bipedal humanoid character you like.
For Next Class: Complete the skeleton
You will be graded on the following:
- Model Prep & Skeleton Placement
- Evaluate and correct any problems in the model and create the skeleton.
- Weight Painting
- Adjust the default bind weights to develop more aesthetically desirable deformations.
- Rigging
- Create the rigging such as FK, IK, and Spline solvers with curves for controllers.
- Blend Shapes
- Design a variety of blend shapes to allow for facial movements.
Resources:
- You can find the rubric under the Assignments content folder in Canvas.
Assignment 03 Tutorial Videos