
Outline:
- Pose Design
- Layout & Blocking
- Traditional Animation Process
- Assignment 04
Pose Design
Pose Design:
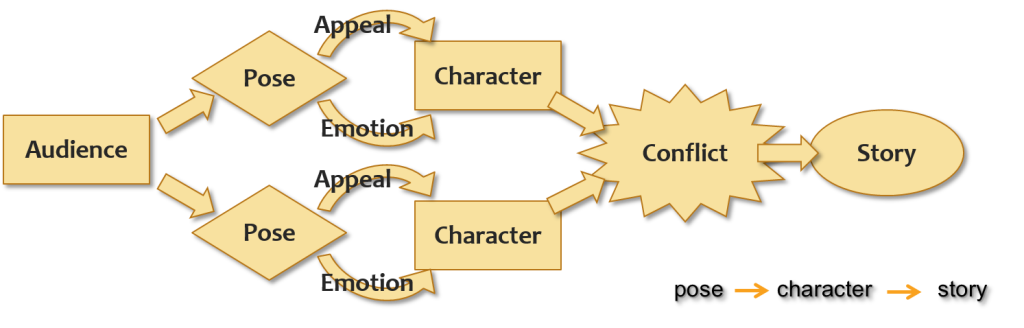
The most important aspect of an animated performance is the pose design.
Story is not most important element! Character is! Without emotive characters we don’t care about their stories. The only way the audience connects to the character is through the character’s posing.
The pose reveals the character through appeal and emotion.
- Appeal: allow the audience to easily access the soul of the character for a quick understanding of what the character is feeling.
- Emotion: clearly express the true feels in the heart of the character for that given moment.
Good Pose Design:
- Good Poses allow the audience to see inside the character’s soul. Pose is the reaction to the characters thought.
- You want the audience to “feel” the body language, but not focus on it. It is like sound effects, without them it seems wrong but you are never saying “that was an awesome sound!”
- There should be a visual flow that leads the audience to the focus of the scene.
- Good poses instantly communicate character.
- Each pose should have the ability to work as a single frame illustration.
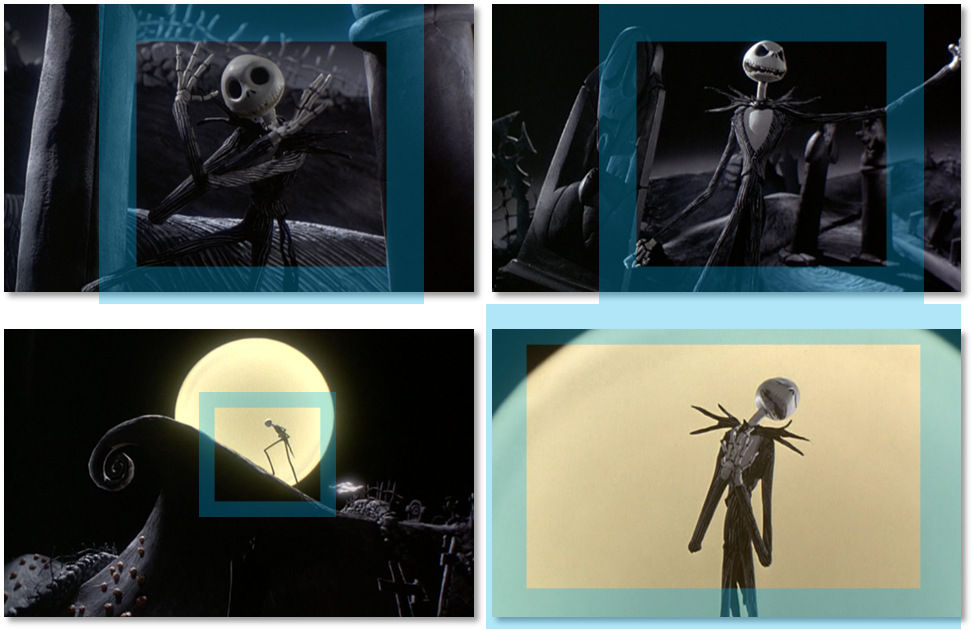
Framing:
The first thing when deciding on pose design is to think about the framing of the shot. Generally speaking you should use the background to frame your characters.
- Make sure your backgrounds are not distracting but supporting your characters.
- These go from shot to shot of Jack. Even in a difficult medium like stop-motion the composition is very controlled.
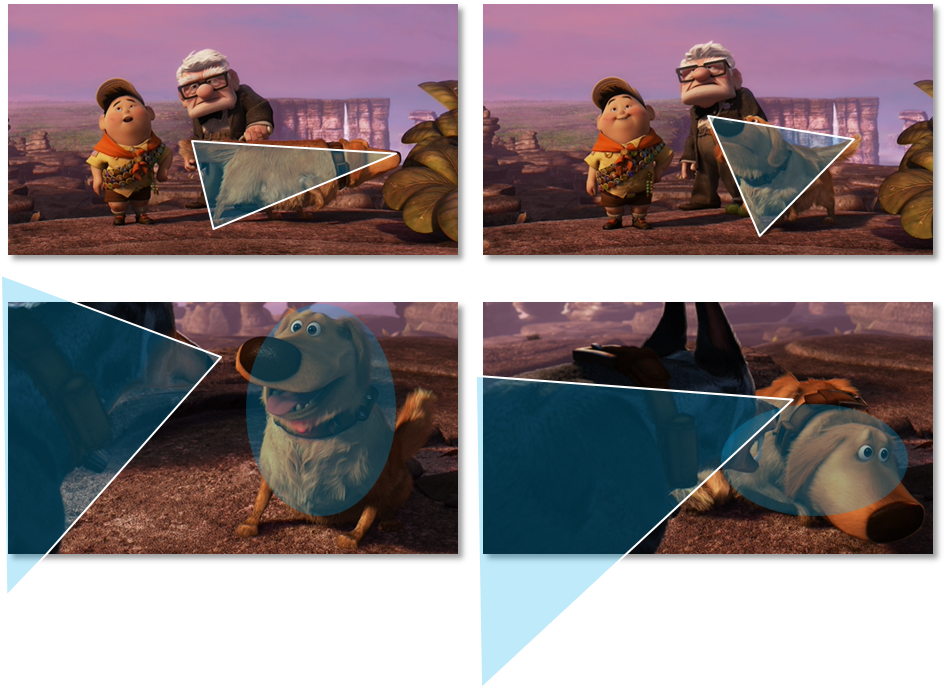
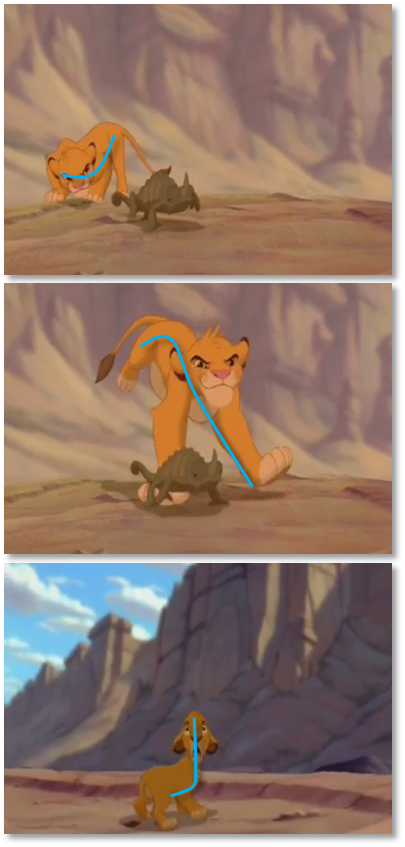
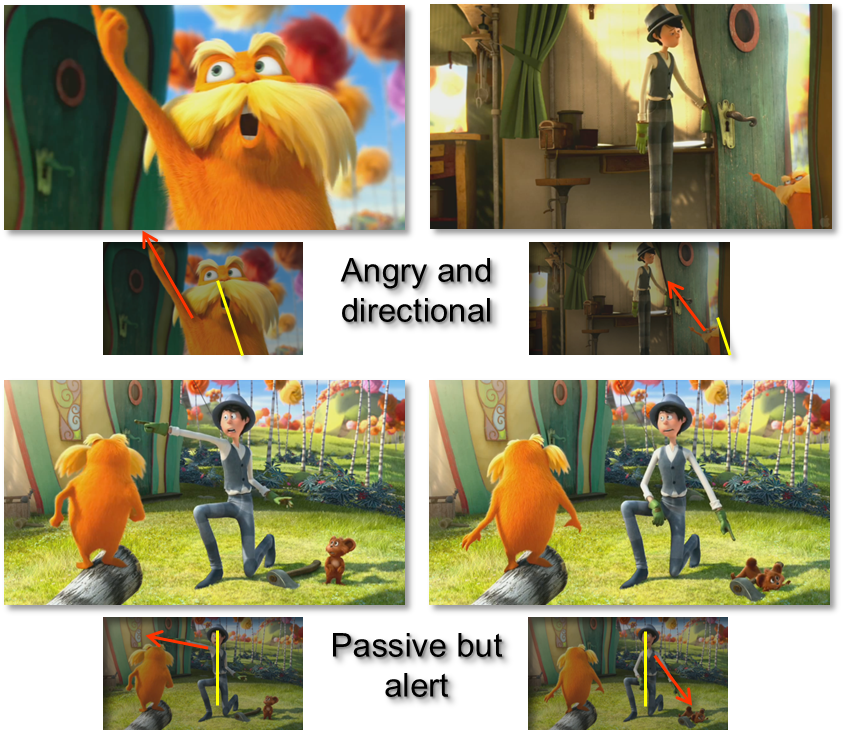
Silhouette:
When viewing an object the first thing a person sees is the silhouette. Then the eye will scan the interior of the shape.
- Look for abstract shapes to create direction, tension, emotion, etc.
- Clearly dug forms a triangle to point.
- You can see dug’s change of emotion as well as the tension when the frame is pushed
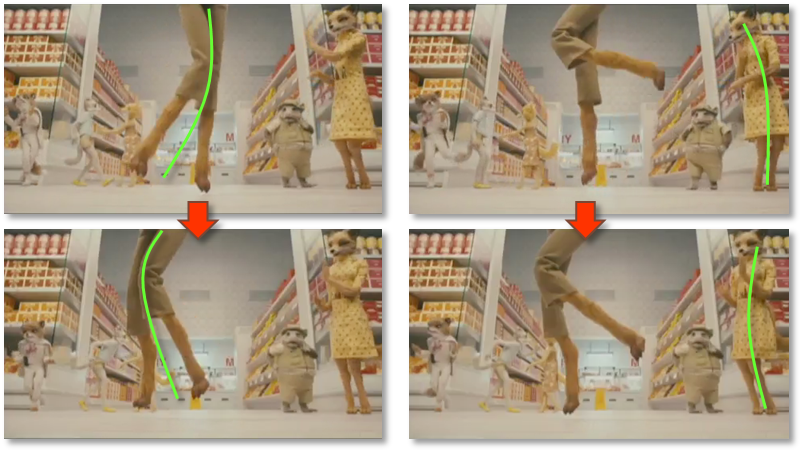
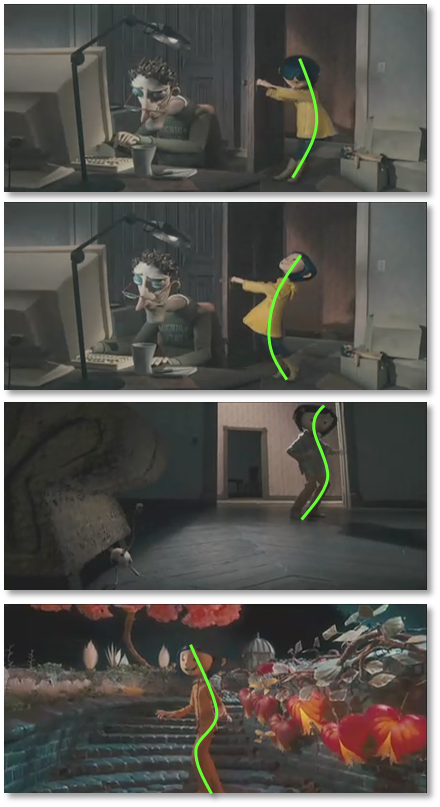
Line of Action:
The line of action is an imaginary line through the character’s body that shows the primary force of a pose, indicating direction and energy (kinetic or stored) of the character’s pose.
Accenting Flow Lines:
These are secondary lines that help direct the eye to the area of emphasis. It is very often directing towards the eyes.
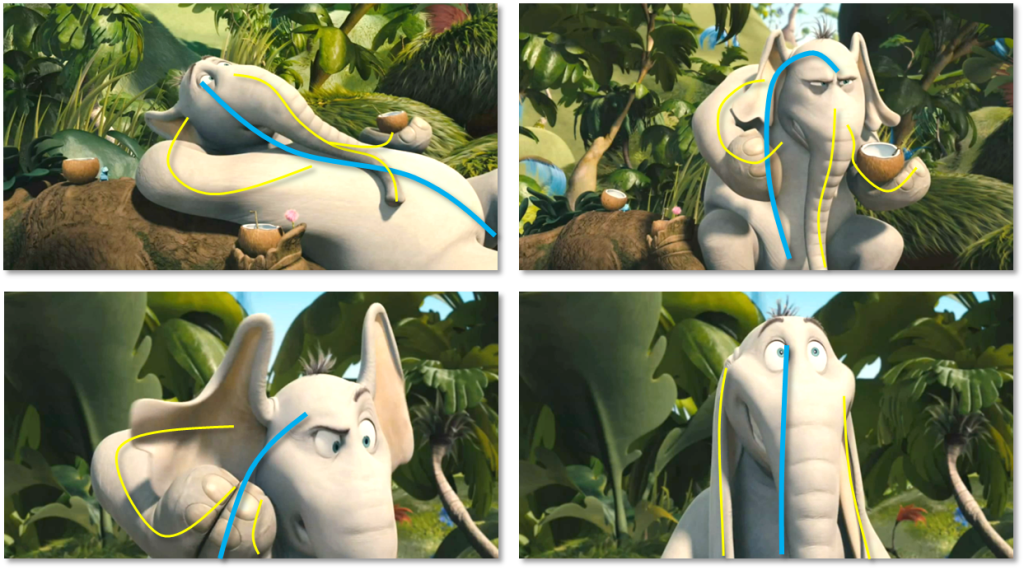
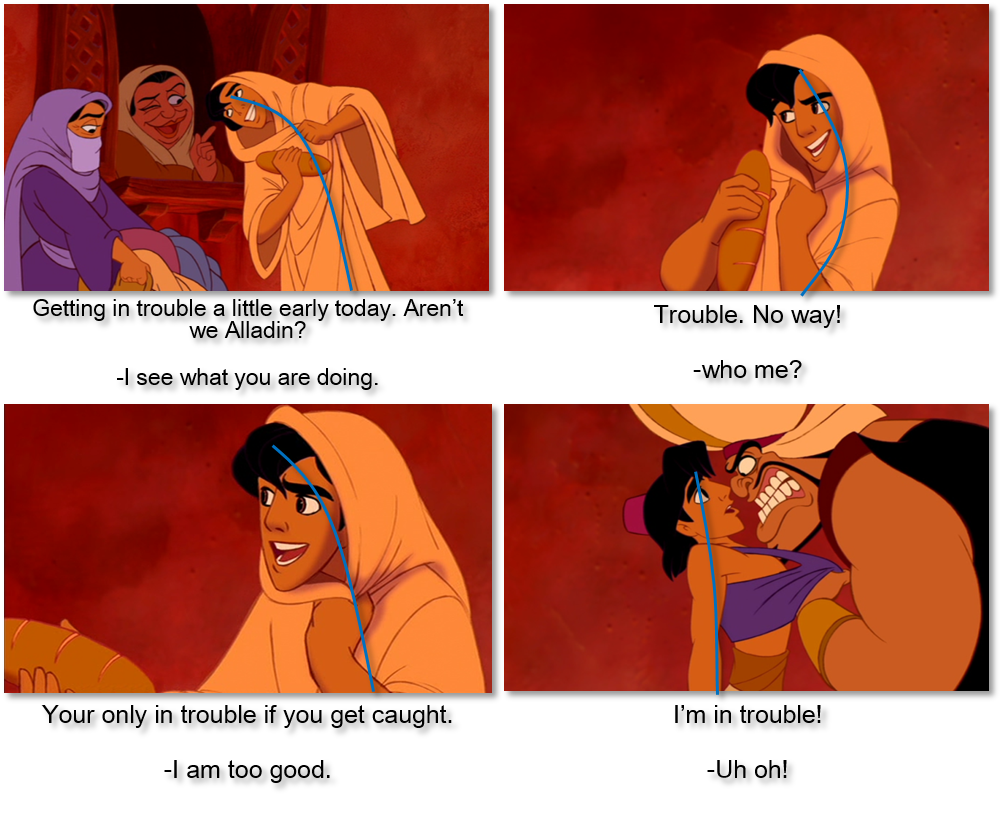
Eye Line:
The eye line is extremely strong.
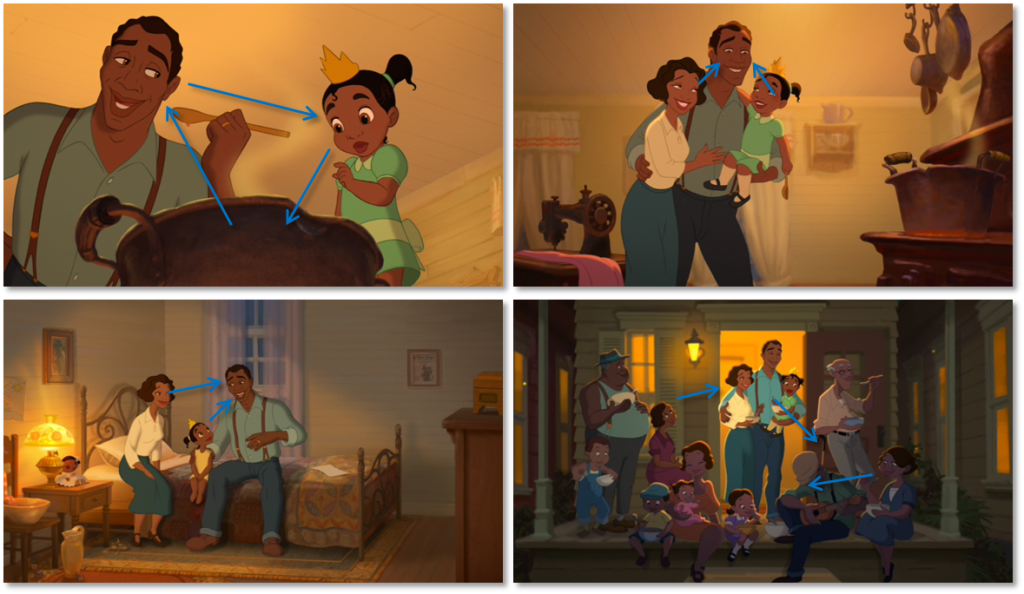
Notice in these how your eye moves around the composition.
Also notice where the father is always looking. Why?
Variety & Contrast in Poses:
Reverse lines of action and accenting flow lines where possible. This shows build up and release of energy.
Vary the intensities of your poses and lines of action. If everything is loud nothing is. Decide on your key story-telling pose, that should be the strongest.
Be careful about using too much contrast. Don Bluth’s animation exaggerates too often and too even.
Straight and Curves in Poses:
You should use both straight and curves in both character outlines, as well as internal primary & secondary lines of action.
- Do not create curves more complicated than ‘C’ or ‘S.’
- The more eccentric the arc the larger the energy potential.
- Vertical lines of action, when contrasted against other strong directional lines are like exclamation points. Use for emphasis.
Simple vs. Complex:
Producing asymmetry in a pose is important to create appeal. One way to achieve this is to include simple forms against complex ones. Simple versus complex involves creating more texture on one side and less on the other.

Weight:
You want your poses to hold weight. Remember characters are generally a series of scaffolding supporting the body.
These will help force you to create better poses:
- Create a twist in the pose to create a less symmetrical design.
- Use head tilts. We do not naturally keep our heads straight. Good indicator of attitude and emotion.
- Create an uneven distribution of weight for better posing. Shift hips and feet around.
Character:
Do not simply go for what looks good. Go for what is right based on the emotion.
Each character will pose differently.
Resources:
Here are some excellent papers and articles on pose design that are an interesting read:
Layout & Blocking
Layout:
In 3D animation the layout artist reference all assets into a single scene file. They then create cameras and produce really basic blocking animation that mimics the approved animatic. The final results of their work is preview rendered and edited together to form a 3D animatic. More importantly, the purpose of the layout artist is to setup scenes for animation.
Blocking:
Blocking in stage and film is simply the positioning of the actors in the scene. In the case of animation it is basically the same thing except you also place strong story-telling poses as well.
Traditional Animation Process
Stepped Keys
When animating in the traditional hand-drawn method animators draw out their key poses first and will actually shoot them in the correct timing. They will then preview their animation before drawing their inbetweens. This gives them a good idea their pose design as well as rough timing.
In 3D computer animation the computer will automatically "tween" your keys. This is actually not very helpful since this interpolation is usually very poor. It actually makes it more difficult to determine your timing. Some animators will set their default out tangents to "stepped."
Stepped tangents "turn off" the auto interpolation of the computer
Tween Machine:
This script for Maya will automatically create inbetween keyframes using a slider.
Character Sets/Quick Select Sets:
In Maya you can add all of the animateable attributes to a character select set to make it easier to create keys on all items. You may also create quick select sets to only select certain objects or components.
Assignment 04
Lip-Sync Animation
The last assignment you will produce a character performance based off of a pre-recorded vocal track. This vocal track may be whatever you like but you must build an entire self-contained scene out of it. You are basically making a mini short film. You must find a small audio clip (roughly 10 sec), block out the main key story-telling poses, develop facial poses & lip-sync, and render the results.
For Next Class: Complete the layout & blocking
You will be graded on the following:
- Scene Setup (vocal track, character rig, environment, cameras, etc.)
- Create a Maya project folder with all necessary assets incorporated. In a Maya scene reference your rig, environment and establish lighting & cameras.
- Animation Posing
- Apply strong story-telling poses that add subtext to the vocal track.
- Animation Timing
- Develop snappy, interesting, believable movement.
- Lip-Sync
- Match the vocal track with mouth and face features to give the impression the character is talking.
Resources:
- You can find the rubric under the Assignments content folder in Canvas.
Assignment 04 Tutorial Videos