
Web Design I
Class 04: Web Specific Text EditorsTopics
- External CSS
- Navigation
- Web Text Editor
- Week 04 Fixed-Width Page (polish) Lab

Class Fore!


External CSS
External CSS:
This is best for multi-page websites.
All pages can use same style sheet so it is less coding and creates more consistency.
This is actually less loading time because the user just downloads the initial CSS sheet instead of one for each page.
This is generally considered best practice regardless of scenario.
- <link>
- May be used to tell the browser where the CSS file is
- href
- Specifies the path to the CSS file
- type
- Determines the type of file being linked, in this case text/css
- rel
- Specifies the relationship between the HTML page and the file it is linked to, in this case stylesheet
<link href=”css/styles.css” type=”text/css” rel=”stylesheet” />

CSS Properties:
There are loads of CSS properties. We will cover some of the ones you are mostly likely to use. If you want to see all of the available CSS properties I suggest visiting W3 Schools
Background Image:
- background-image
- url(“images/images”);
- background-repeat
- repeat, repeat-x, repeat-y
- background-attachment
- fixed, scroll
- background-position
- left top, left center, left bottom, center top,center center, center bottom, right top, right center, right bottom
- background
- background-color, background-image, background-repeat, background-attachment, background-position
browser view
Background Shorthand:
It is possible to write all of the background properties on a single line instead of adding individual properties for each. You write it out as background-color, background-image, background-repeat, background-attachment, background-position.
example: background: pink url(“images/smiley.jpg”) no-repeat fixed center center;}
#bgImage {
background-image:ur l(“images/textureTile.jpg”);}
#bgRepeatX {
background-image: url(“images/textureTile.jpg”);
background-repeat:repeat-x;}
#bgRepeatY {
background-image: url(“images/textureTile.jpg”);
background-repeat:repeat-y;}
#bgRepeatNo {
background-image: url(“images/textureTile.jpg”);
background-repeat:no-repeat;}
#bgScroll {
background-image: url(“images/textureTile.jpg”);
background-attachment:fixed;}
#bgPosition {
background-image: url(“images/textureTile.jpg”);
background-repeat:no-repeat;
background-position:right top;}
List Style Properties:
- list-style-type
-
- For Unordered Lists:
- none, disc, circle, square
-
- For Ordered Lists:
- decimal, decimal-leading-zero, lower-alpha, upper-alpha, lower-roman, upper-roman
- list-style-image
- url(“images/bullet.png”);
- list-style-position
- outside, inside
browser view
- item 01
- item 02
- item 03
- item 01
- item 02
- item 03
- item 01
- item 02
- item 03
- item 01: this is longer so that you can see the difference between an inside and outside list style position.
- item 02: this is longer so that you can see the difference between an inside and outside list style position.
- item 03: this is longer so that you can see the difference between an inside and outside list style position.
#listStyleOrdered {
list-style-type:upper-roman;}
#listStyleUnordered {
list-style-type:square;}
#listStyleImage {
list-style-image:url(“images/cone.png”);}
#listStyleOutside {
list-style-position:outside;}
#listStyleInside {
list-style-position:inside;}

Normal Flow:
Thus far the layout of the pages you have created have been determined by the elements you use, inline or block-level. This default browser interpretation is called normal flow.
For better control you utilize containing, div and span, or parent, table, ul, etc., elements that we leverage with CSS box model and position properties.
Position Properties:
- position
- Controls the positioning of the selected element.
-
- static
- Produces normal flow.
- relative
- Makes the position of the element relative to normal flow.
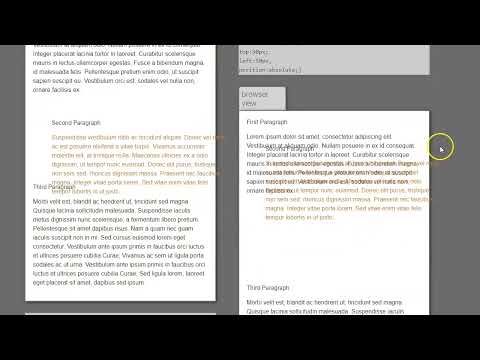
- absolute
- Positions the element in an exact position regardless of normal flow
- fixed
- Like absolute the element is positioned in an exact position but is based on the browser window. This is how you make a “sticky” header and footer.
- z-index
- Using a number from 0-? you may place elements in front or behind other elements
#relativeExample {
top:50px;
left:50px;
position:relative;}
browser view
First Paragraph
Lorem ipsum dolor sit amet, consectetur adipiscing elit. Vestibulum at aliquam odio. Nullam posuere in ex id consequat. Integer placerat lacinia tortor in laoreet. Curabitur scelerisque mauris in lectus ullamcorper egestas. Fusce a bibendum magna, id malesuada felis. Pellentesque pretium enim odio, ut suscipit sapien suscipit eu. Vestibulum orci est, sodales vel nulla non, ornare facilisis ex.
Second Paragraph
Suspendisse vestibulum nibh ac tincidunt aliquet. Donec vel risus ac est posuere eleifend a vitae turpis. Vivamus accumsan molestie elit, at tristique nulla. Maecenas ultricies ex a odio dignissim, ut tempor nunc euismod. Donec elit purus, tristique non sem sed, rhoncus dignissim massa. Praesent nec faucibus magna. Integer vitae porta lorem. Sed vitae enim vitae felis tempor lobortis in ut justo.
Third Paragraph
Morbi velit est, blandit ac hendrerit ut, tincidunt sed magna. Quisque lacinia sollicitudin malesuada. Suspendisse iaculis metus dignissim nunc scelerisque, a fermentum libero pretium. Pellentesque sit amet dapibus risus. Nam a quam nec quam iaculis suscipit non in mi. Sed cursus euismod lorem eget consectetur. Vestibulum ante ipsum primis in faucibus orci luctus et ultrices posuere cubilia Curae; Vivamus ac sem ut ligula porta sodales ac ut urna. Vestibulum ante ipsum primis in faucibus orci luctus et ultrices posuere cubilia Curae; Sed ligula lorem, laoreet eget placerat sit amet, dapibus sed ipsum.
#fixedExample {
top:0px;
position:fixed;}
browser view
* {
position:static;}
browser view
First Paragraph
Lorem ipsum dolor sit amet, consectetur adipiscing elit. Vestibulum at aliquam odio. Nullam posuere in ex id consequat. Integer placerat lacinia tortor in laoreet. Curabitur scelerisque mauris in lectus ullamcorper egestas. Fusce a bibendum magna, id malesuada felis. Pellentesque pretium enim odio, ut suscipit sapien suscipit eu. Vestibulum orci est, sodales vel nulla non, ornare facilisis ex.
Second Paragraph
Suspendisse vestibulum nibh ac tincidunt aliquet. Donec vel risus ac est posuere eleifend a vitae turpis. Vivamus accumsan molestie elit, at tristique nulla. Maecenas ultricies ex a odio dignissim, ut tempor nunc euismod. Donec elit purus, tristique non sem sed, rhoncus dignissim massa. Praesent nec faucibus magna. Integer vitae porta lorem. Sed vitae enim vitae felis tempor lobortis in ut justo.
Third Paragraph
Morbi velit est, blandit ac hendrerit ut, tincidunt sed magna. Quisque lacinia sollicitudin malesuada. Suspendisse iaculis metus dignissim nunc scelerisque, a fermentum libero pretium. Pellentesque sit amet dapibus risus. Nam a quam nec quam iaculis suscipit non in mi. Sed cursus euismod lorem eget consectetur. Vestibulum ante ipsum primis in faucibus orci luctus et ultrices posuere cubilia Curae; Vivamus ac sem ut ligula porta sodales ac ut urna. Vestibulum ante ipsum primis in faucibus orci luctus et ultrices posuere cubilia Curae; Sed ligula lorem, laoreet eget placerat sit amet, dapibus sed ipsum.
#absoluteExample {
top:50px;
left:50px;
position:absolute;}
browser view
First Paragraph
Lorem ipsum dolor sit amet, consectetur adipiscing elit. Vestibulum at aliquam odio. Nullam posuere in ex id consequat. Integer placerat lacinia tortor in laoreet. Curabitur scelerisque mauris in lectus ullamcorper egestas. Fusce a bibendum magna, id malesuada felis. Pellentesque pretium enim odio, ut suscipit sapien suscipit eu. Vestibulum orci est, sodales vel nulla non, ornare facilisis ex.
Second Paragraph
Suspendisse vestibulum nibh ac tincidunt aliquet. Donec vel risus ac est posuere eleifend a vitae turpis. Vivamus accumsan molestie elit, at tristique nulla. Maecenas ultricies ex a odio dignissim, ut tempor nunc euismod. Donec elit purus, tristique non sem sed, rhoncus dignissim massa. Praesent nec faucibus magna. Integer vitae porta lorem. Sed vitae enim vitae felis tempor lobortis in ut justo.
Third Paragraph
Morbi velit est, blandit ac hendrerit ut, tincidunt sed magna. Quisque lacinia sollicitudin malesuada. Suspendisse iaculis metus dignissim nunc scelerisque, a fermentum libero pretium. Pellentesque sit amet dapibus risus. Nam a quam nec quam iaculis suscipit non in mi. Sed cursus euismod lorem eget consectetur. Vestibulum ante ipsum primis in faucibus orci luctus et ultrices posuere cubilia Curae; Vivamus ac sem ut ligula porta sodales ac ut urna. Vestibulum ante ipsum primis in faucibus orci luctus et ultrices posuere cubilia Curae; Sed ligula lorem, laoreet eget placerat sit amet, dapibus sed ipsum.
Display Properties:
- display
-
- inline
- causes a block level element to act like an inline-level element.
- block
- causes a inline element to act like a block-level element.
- inline-block
- causes a block-level element to flow like an inline element while retaining other block-level element features.
- none
- hides the element as though it does not exist.
- visibility
-
- hidden
- hides the element but leaves a space where it existed.
- visible
- visible – makes the element visible.
li {
display: inline;}
a {
display: block;}
Pseudo Classes:
Act like an extra value for a class attribute. Written as “selector:pseudo-class”
- :link
- Sets the style for links that have not yet been visited.
- :visited
- Sets the style for links that have been visited.
- :hover
- Sets the style for elements that the user hovers over.
- :active
- Sets the style for elements the user activates.
- :focus
- Sets the style for elements the user is focused on. This happens when the browser determines you are ready to interact with the element.
a:link {
color:blue;}
a:visited {
color:orange;}
a:hover {
color:green;}
a:active {
color:red;}
a:focus {
color:yellow;}
browser view
Navigation
Navigation:
This could be called the defining feature of HTML and the internet. This is one area where there isn’t really as much room for invention. The user must know how to interact with your site. There are a variety of accepted canons when it comes to navigation.
Navigation Lists:
The navigation links are usually created as unordered lists. This is a very organized way of laying them out that even works if for some reason the CSS malfunctions.
<ul>
<li><a href=”#”>Page 01</a></li>
<li><a href=”#”>Page 02</a></li>
<li><a href=”#”>Page 03</a></li>
<li><a href=”#”>Page 04</a></li>
<li><a href=”#”>Page 05</a></li>
</ul>
Top Horizontal Bar:
The top horizontal bar is obviously located at the top of the page. It is often near or attached to the site logo. The links are typically text, buttons, or tabs.
- Advantages:
- Common and thus well recognized.
- Works on all devices.
- Negatives:
- There are a limited number of upper-level links possible.

ul {
position: relative;
top: 0px;
list-style-type: none;
margin: 0;
padding: 0; }
li {
display:inline;
margin:0px;
padding:0px;}
a:link, a:visited {
font-weight: bold;
color:hsla(0,0%,100%,1.00);
background-color:hsla(0,0%,53%,1.00);
width: 120px;
text-align: center;
margin:0px;
padding: 4px;
text-decoration: none;}
Vertical/Sidebar:
This may be placed at either the right or left side of the page but is typically on the left. You typically see many links since the height of the page is not fixed like the width. The links are usually text or buttons.
- Advantages:
- Allows for many links.
- Negatives:
- It is easy to place too many links which may be overwhelming for the user.
ul {
position: relative;
top: 0px;
list-style-type: none;
margin: 0;
padding: 0; }
li {
margin:10px;
padding:0px;}
a:link, a:visited {
font-weight: bold;
color:hsla(0,0%,100%,1.00);
background-color:hsla(0,0%,53%,1.00);
width: 120px;
text-align: center;
margin:0px;
padding: 4px;
text-decoration: none;}
Breadcrumb:
The links are dynamic in that it leaves a “trail” back to where you started. Usually this is a horizontal list. Normally you will see this as text and occasionally as buttons.
- Advantages:
- Keeps the user oriented as to where they are in the site.
- Negatives:
- Not great for primary navigation or simple sites that do not have that many sub-pages.
browser view
Tags:
Usually these are a group of links in a cloud. Mostly seen as buttons and also text.
- Advantages:
- Directs user towards the most popular pages.
- Negatives:
- This does not work as a primary navigation style.
- This usually has to be generated by code.
- The design cannot be easily controlled.
Search:
Almost always located at the top of the page and is located on all sub-pages. It is obviously a text fill-in box.
- Advantages:
- Awesome for sites that have loads of information.
- Great for users that are searching for specific information.
- Negatives:
- This is not useful for primary navigation.
browser view
Fly-Out/Drop-Down Menu:
A drop-down is for horizontal menus. Fly-outs are for vertical menus. This allows for a multi-level navigation.
- Advantages:
- Good way to create sub-menus which prevents clutter.
- Negatives:
- Can be complicated/difficult to setup since it normally takes JavaScript.
- May not be explicitly obvious there are drop-down/fly-outs.
- Does not work well on mobile devices since it is normally based off of the hover feature of links.
browser view
Footer:
Almost as common as the top horizontal bar/header menu. Obviously located at the bottom of the page. Very commonly displayed as text.
- Advantages:
- A nice way to add links that don’t fit into the main menu.
- Negatives:
- Pretty much considered a secondary navigation.
- Mostly useful as a catch all for items that don’t make it into the main menu.
Web Text Editor
We have been using Visual Studio Code up to this point. This is a totally valid text editor to code web languages with but there are some text editors that are designed specifically for writing web documents.
Below are two popular examples:
Adobe Dreamweaver:
Dreamweaver: is a proprietary web development tool originally created by Macromedia and acquired by Adobe in 2005.
Dreamweaver facilitates writing the code used for the web. It also has some templates, shortcuts, and visual interfaces that make the whole process more efficient and user friendly. This is a very robust piece of software with loads of aides but like the rest of the Adobe Creative Cloud applications it is subscription based.
Liveweave
There are a slew of web focused text editor websites that let you code right in the browser window. This is particularly useful since it instantly displays your work since it is already in the browser. There are many options. You can see some below. You can try them out if you like but I have embedded Liveweave into the lab area at the bottom of this page.
Others Editors
Here are a list of other web browser web editors. Feel free to try them:
Week 04 Fixed-Width Page (polish) Lab
Week 04 Fixed-Width Page (polish) Lab:
In the fourth and final lab of the fixed-width series we will “pizazz” up the page. Using the information covered in class you we will further develop the look of the page to make it more professional. There will be a true navbar, columns, and background image/s.
You will be graded on the following:
- Basic Document & File Structure:
- Master folder created with correct sub folders.
- All files named and placed correctly.
- Basic HTML and CSS structure produced.
- Navigation
- True navbar is produced utilizing the unordered list and various CSS rules.
- Additional CSS
- More elaborate CSS is included to further enhance the overall appearance of the site such as a background image.
- Aesthetic:
- Interesting and appealing design.
- Professional quality.
Resources:
- Assignment Video Tutorials
- You may watch these tutorial videos below to help you complete your assignment.
- Assignment Lab Materials
- You may download the lab materials used: WD1_week04LabMaterials.
Assignment Tutorial Slideshow
This tutorial will guide you through lab. You may download the lab materials used: WD1_week04LabMaterials.
This is the last lab in the Fixed-Width Page series. We will convert our CSS code to an external sheet (from internal), apply some new CSS, and utilize a web specific text editor.
Click on the > to start
You may use what you created in the last lab or if you would like you may use this:
Fixed-Width Page (polish) Lab Materials (
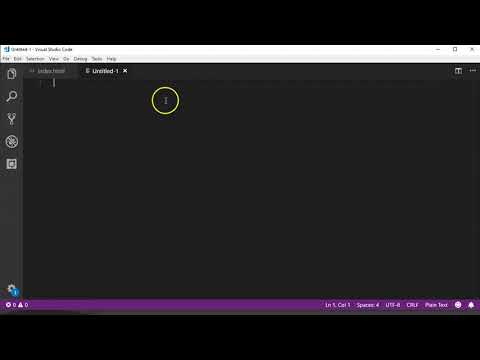
- First we will make our internal CSS into external. Open the index.html in visual studio code.
- Select all of the CSS rules inside the <style> & </style> tags. Press ctrl + x (or cmd + x on mac) to cut them (and store in your clipboard).
- Select File>New File. Press ctrl + v (or cmd + v on mac) to paste the CSS rules in this blank file. Press File>Save As.... Navigate to the CSS folder and save the document as style.css.
- Next this must be linked to the index file. First remove the <style> & </style> tags in the index.html document. Add
<link href="css/style.css" rel="stylesheet" type="text/css">
before the </head> tag. - Voila, your internal CSS is now external!
<!DOCTYPE html>
<html>
<head>
    <title>Biography of Cone</title>
    <meta charset="UTF-8" />
    <meta name="description" content="a narrative about cone" />
    <link href="css/style.css" rel="stylesheet" type="text/css" />
</head>
<body>

    <div id="header">
        <h1>Cone</h1>
        <img src="images/portrait.JPG" alt="portrait of cone" />
        <p>personal site: <a href="https://teachmecone.com">teachmecone.com</a></p>
        <p>The man, the myth, the <strong>primitive shape</strong>.</p>
        <hr />
    </div>

    <div id="content">
        <div class="section">
            <h2>In the beginning...</h2>
            <p>He was born in upstate NY. Have you been there? No you haven't because you have no reason too. It's <span id="drabText">drab.</span></p>
        </div>

        <div class="section">
            <h2>Presently coding this document</h2>
            <p>Write now he is teaching this class and writing this code. <span class="hiLite">Inspirational.</span></p>
        </div>

        <div class="section">
            <h2>His Future</h2>
            <p>He wantes to make the best <em>courses ever</em>, create more <em>short films</em>, and be <em>more fit</em>.</p>
            <h4>He has <strong class="hiLite">none</strong>.</h4>
        </div>
    </div>

    <div id="footer">
        <h3>Things he dislikes</h3>
        <ul>
            <li>Cats</li>
            <li>Vehicles that go Vroom</li>
            <li>Bug Meat</li>
        </ul>
        <p><a href="https://teachmecone.com"><img src="images/coneLogo.png" alt="teachmecone.com"></a></p>
    </div>

</body>
</html>
body {
    background-color: #cab5d7;
    width: 960px;
    margin: 10px;
    padding: 0px;
    font-family: 'Franklin Gothic Medium', 'Arial Narrow', Arial, sans-serif;
    color: #292929;
    font-size: 18px;}
h1 {
    font-size: 48px;}
h1, h2, h4 {
    color: rgb(78, 78, 78);}
#header {
    text-align: center;
    margin-bottom: 50px;}
#footer {
    background-color: rgb(97, 95, 88);
    color:white;
    padding:20px;
    border-style: solid;
    border-width: 2px;
    border-color: hsl(56, 80%, 90%);}
.section {
    background-color: hsl(56, 80%, 90%);
    padding:20px;
    margin-bottom:20px;
    padding: 20px;}
a {
    color: hsl(56, 80%, 90%);
    font-size: 24px;
    text-decoration: none;}
#drabText {
    color:brown;
    font-weight: bold;}
.hiLite {
    color:orange;
    font-weight: 700;
    font-size: 24px;}
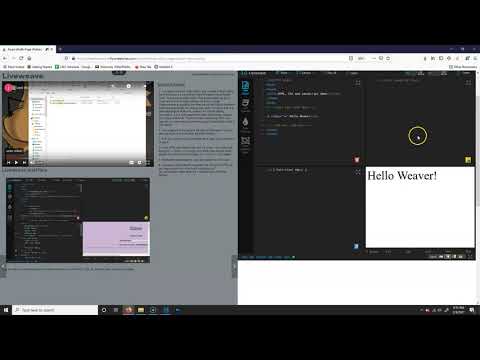
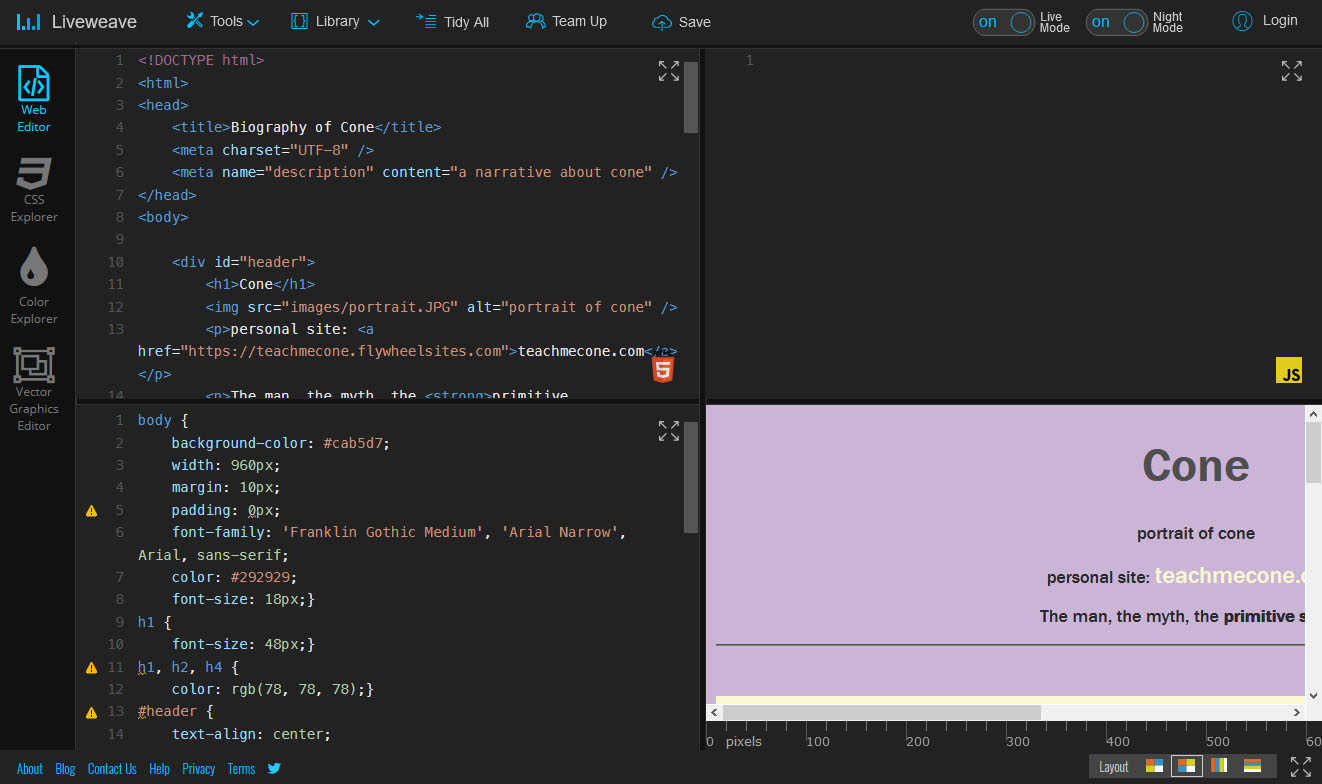
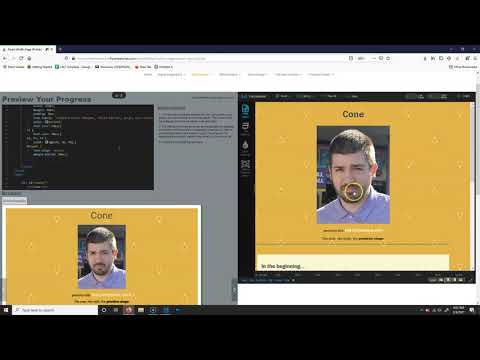
This is what you should have at the moment. Notice how the HTML, CSS, JS, and browser view are all visible.
- You may write your web code in any number of text editors. Up to this point we have been using Microsoft Visual Studio Code. This is an excellent editor That is personally my go to. There are however other options out there. Adobe Dreamweaver is arguably the most powerful industry standard software specifically for writing web code. However this is a paid subscription software. Instead we will be utilizing Liveweave. It is a web based text editor specifically created for writing web code. There are many others out there you may try. You may also just continue using Visual Studio Code if you desire.
- I have placed Liveweave to the right of this panel. You can also just open it up in another panel by clicking here.
- First you need to copy and paste all of code into Liveweave to use it.
- In the HTML document press ctrl + a (cmd + a) to select all, then ctrl + c (cmd + c) to copy, and finally click into the HTML section in Liveweave and press ctrl + v (cmd + v) to paste it.
- Repeat the same steps to copy and paste the CSS rules.
- Liveweave automatically connects the CSS to the HTML so you may remove the <link href="css/style.css" rel="stylesheet" type="text/css"> element from the HTML section.


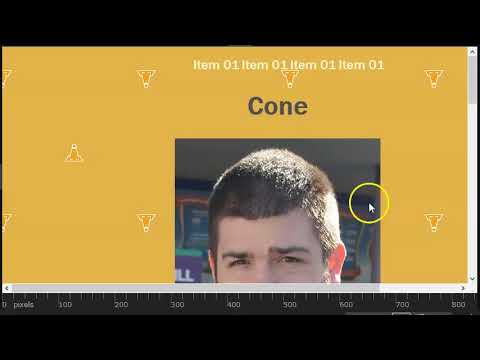
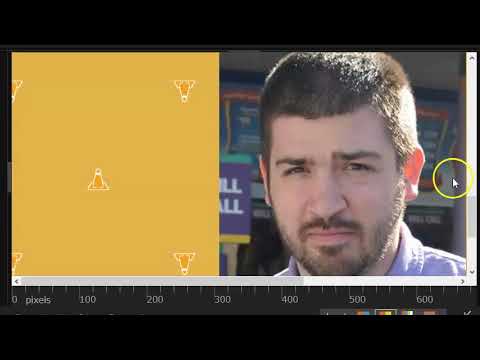
You can see what the image should look like before and after the background is removed
- You have probably noticed that the images are no longer connected. This is because we setup relative URL's and they no longer work on Liveweave which is on the internet and not in our root folder locally. We must connect images that are on the internet and can be connected with an absolute URL.
- I uploaded the images needed on my site. Right-click on the portrait image (bottom right) and select Copy Image Location or whatever your browser says to copy the image path. Then remove the filepath in <img src="images/portrait.JPG" alt="portrait of cone" /> and paste in the copied path. It should look like
<img src="https://teachmecone.com/wp-content/uploads/2020/08/picOfMe.jpg" alt="portrait of cone" />
Repeat the same process for the logo image. - Let's add a background image. Add:
background-image: url(../images/wallPaper.gif);
background-repeat: repeat;
background-attachment: fixed;
in the body rule. Like the other images this relative URL will not work. Replace the filepath with https://teachmecone.com/wp-content/uploads/2021/02/wallPaper.gif or just copy the path from the image (bottom right). - You now have images attached with absolute URL's. If you want to use your own images feel free. You just need to upload them somewhere (google drive, instagram, facebook, etc.).
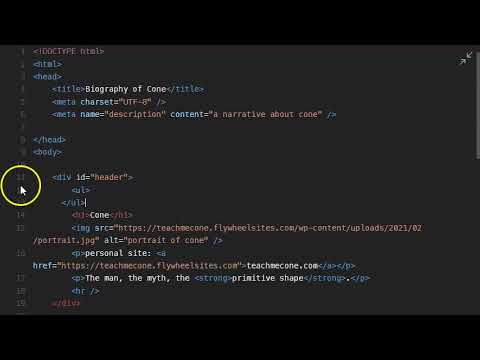
- You may view the code below and double-check that yours is similar.
Check your code
<!DOCTYPE html>
<html>
<head>
    <title>Biography of Cone</title>
    <meta charset="UTF-8" />
    <meta name="description" content="a narrative about cone" />
</head>
<body>

    <div id="header">
        <h1>Cone</h1>
        <img src="https://teachmecone.com/wp-content/uploads/2021/02/portrait.jpg" alt="portrait of cone" />
        <p>personal site: <a href="https://teachmecone.com">teachmecone.com</a></p>
        <p>The man, the myth, the <strong>primitive shape</strong>.</p>
        <hr />
    </div>

    <div id="content">
        <div class="section">
            <h2>In the beginning...</h2>
            <p>He was born in upstate NY. Have you been there? No you haven't because you have no reason too. It's <span id="drabText">drab.</span></p>
        </div>

        <div class="section">
            <h2>Presently coding this document</h2>
            <p>Write now he is teaching this class and writing this code. <span class="hiLite">Inspirational.</span></p>
        </div>

        <div class="section">
            <h2>His Future</h2>
            <p>He wantes to make the best <em>courses ever</em>, create more <em>short films</em>, and be <em>more fit</em>.</p>
            <h4>He has <strong class="hiLite">none</strong>.</h4>
        </div>
    </div>

    <div id="footer">
        <h3>Things he dislikes</h3>
        <ul>
            <li>Cats</li>
            <li>Vehicles that go Vroom</li>
            <li>Bug Meat</li>
        </ul>
        <p><a href="https://teachmecone.com"><img src="https://teachmecone.com/wp-content/uploads/2021/02/coneLogo.png" alt="teachmecone.com"></a></p>
    </div>

</body>
</html>
body {
    background-color: #cab5d7;
    width: 960px;
    margin: 10px;
    padding: 0px;
    font-family: 'Franklin Gothic Medium', 'Arial Narrow', Arial, sans-serif;
    color: #292929;
    font-size: 18px;
    background-image: url(https://teachmecone.com/wp-content/uploads/2021/02/wallPaper.gif);
    background-repeat: repeat;
    background-attachment: fixed;}
h1 {
    font-size: 48px;}
h1, h2, h4 {
    color: rgb(78, 78, 78);}
#header {
    text-align: center;
    margin-bottom: 50px;}
#footer {
    background-color: rgb(97, 95, 88);
    color:white;
    padding:20px;
    border-style: solid;
    border-width: 2px;
    border-color: hsl(56, 80%, 90%);}
.section {
    background-color: hsl(56, 80%, 90%);
    padding:20px;
    margin-bottom:20px;
    padding: 20px;}
a {
    color: hsl(56, 80%, 90%);
    font-size: 24px;
    text-decoration: none;}
#drabText {
    color:brown;
    font-weight: bold;}
.hiLite {
    color:orange;
    font-weight: 700;
    font-size: 24px;}
- You may have probably noticed that you can preview your site as you are working on it in Liveweave. This is one of the advantages of a browser based web text editor.
- The interface in Liveweave can be manipulated by dragging the borders of the panelss or expanding a section by click on the maximize bottom at the bottom right of each panel. Try expanding the preview panel to see what you have thus far.
- It should look something like below.
Cone's Biography
Cone

personal site: teachmecone.com
The man, the myth, the primitive shape.
In the beginning...
He was born in upstate NY. Have you been there? No you haven't because you have no reason too. It's drab.
Presently coding this document
Write now he is teaching this class and writing this code. Inspirational.
His Future
He wants to make the best courses ever, create more short films, and be more fit.
He has none.
<!DOCTYPE html>
<html>
<head>
    <title>Biography of Cone</title>
    <meta charset="UTF-8" />
    <meta name="description" content="a narrative about cone" />
</head>
<body>

    <div id="header">
        <ul id="navbar">
            <li><a href="#">item 01</a></li>
            <li><a href="#">item 01</a></li>
            <li><a href="#">item 01</a></li>
            <li><a href="#">item 01</a></li>
        </ul>
        <h1>Cone</h1>
        <img src="images/portrait.JPG" alt="portrait of cone" />
        <p>personal site: <a href="https://teachmecone.com">teachmecone.com</a></p>
        <p>The man, the myth, the <strong>primitive shape</strong>.</p>
        <hr />
    </div>

    <div id="content">
        <div class="section">
            <h2>In the beginning...</h2>
            <p>He was born in upstate NY. Have you been there? No you haven't because you have no reason too. It's <span id="drabText">drab.</span></p>
        </div>

        <div class="section">
            <h2>Presently coding this document</h2>
            <p>Write now he is teaching this class and writing this code. <span class="hiLite">Inspirational.</span></p>
        </div>

        <div class="section">
            <h2>His Future</h2>
            <p>He wantes to make the best <em>courses ever</em>, create more <em>short films</em>, and be <em>more fit</em>.</p>
            <h4>He has <strong class="hiLite">none</strong>.</h4>
        </div>
    </div>

    <div id="footer">
        <h3>Things he dislikes</h3>
        <ul>
            <li>Cats</li>
            <li>Vehicles that go Vroom</li>
            <li>Bug Meat</li>
        </ul>
        <p><a href="https://teachmecone.com"><img src="images/coneLogo.png" alt="teachmecone.com"></a></p>
    </div>

</body>
</html>
- Most every website has a central navigation point, usually a navbar. These are built as unordered lists that are formatted using CSS to look the way you are used to.
- Under the <div id="header"> tag, write the opening and closing <ul> and </ul>.
- In the opening <ul> insert id="navbar".
- Between the <ul> and </ul> add four <li><a href="#">item 01</a></li> elements.
- You should have something like this:
<ul id="navbar">
<li><a href="#">item 01</a></li>
<li><a href="#">item 01</a></li>
<li><a href="#">item 01</a></li>
<li><a href="#">item 01</a></li>
</ul>

body {
    background-color: #cab5d7;
    width: 960px;
    margin: 10px;
    padding: 0px;
    font-family: 'Franklin Gothic Medium', 'Arial Narrow', Arial, sans-serif;
    color: #292929;
    font-size: 18px;
    background-image: url(../images/wallPaper.gif);
    background-repeat: repeat;
    background-attachment: fixed;
}
h1 {
    font-size: 48px;}
h1, h2, h4 {
    color: rgb(78, 78, 78);}
#header {
    text-align: center;
    margin-bottom: 50px;}
#footer {
    background-color: rgb(97, 95, 88);
    color:white;
    padding:20px;
    border-style: solid;
    border-width: 2px;
    border-color: hsl(56, 80%, 90%);}
.section {
    background-color: hsl(56, 80%, 90%);
    padding:20px;
    margin:20px;}
a {
    color: hsl(56, 80%, 90%);
    font-size: 24px;
    text-decoration: none;}
#drabText {
    color:brown;
    font-weight: bold;}
.hiLite {
    color:orange;
    font-weight: 700;
    font-size: 24px;}

#navbar ul {
    list-style-type: none;}
#navbar li {
    display: inline}
#navbar a:link, #navbar a:visited {
    font-weight: bold;
    color: hsl(56, 80%, 90%);
    background-color: rgb(97, 95, 88);
    width:120px;
    text-align: center;
    padding: 5px;
    text-decoration: none;}
#navbar a:hover {
    color:rgb(97, 95, 88);
    background-color: hsl(56, 80%, 90%);}
- The navigation is just a list. With a little CSS we can make it a proper navbar.
- To remove the bullet points and to make the list items display in a row add the two CSS rules:
#navbar ul {
list-style-type: none;}
#navbar li {
display: inline} - To make the links default button appearance add the CSS rule:
#navbar a:link, #navbar a:visited {
font-weight: bold;
color: hsl(56, 80%, 90%);
background-color: rgb(97, 95, 88);
width:120px;
text-align: center;
padding: 5px;
text-decoration: none;} - To format the hover appearance of the links add the CSS rule:
#navbar a:hover {
color:rgb(97, 95, 88);
background-color: hsl(56, 80%, 90%);} - Voila! You have a navbar.
body {
    background-color: #cab5d7;
    width: 960px;
    margin: 10px;
    padding: 0px;
    font-family: 'Franklin Gothic Medium', 'Arial Narrow', Arial, sans-serif;
    color: #292929;
    font-size: 18px;
    background-image: url(../images/wallPaper.gif);
    background-repeat: repeat;
    background-attachment: fixed;
}
h1 {
    font-size: 48px;}
h1, h2, h4 {
    color: rgb(78, 78, 78);}
#header {
    text-align: center;
    margin-bottom: 50px;}
#footer {
    background-color: rgb(97, 95, 88);
    color:white;
    padding:20px;
    border-style: solid;
    border-width: 2px;
    border-color: hsl(56, 80%, 90%);}
#content {
    background-color: rgb(97, 95, 88);}
.section {
    background-color: hsl(56, 80%, 90%);
    padding:20px;
    margin:20px;
    display: inline-block;
    width: 220px;
    height: 200px;
    vertical-align: top;}
a {
    color: hsl(58, 95%, 7%);
    font-size: 24px;
    text-decoration: none;}
#drabText {
    color:brown;
    font-weight: bold;}
.hiLite {
    color:orange;
    font-weight: 700;
    font-size: 24px;}
#navbar ul {
    list-style-type: none;}
#navbar li {
    display: inline}
#navbar a:link, #navbar a:visited {
    font-weight: bold;
    color: hsl(56, 80%, 90%);
    background-color: rgb(97, 95, 88);
    width:120px;
    text-align: center;
    padding: 5px;
    text-decoration: none;}
#navbar a:hover {
    color:rgb(97, 95, 88);
    background-color: hsl(56, 80%, 90%);}
#footer h3, #footer p, #footer ul{
    width:200px;
    margin-left: auto;
    margin-right: auto;}
- Currently the sections of the site are stacked. This makes for wide paragraphs. This is unappealing and difficult to read. These sections are block level, which means each one starts on a new line. Inline elements start on the same line. This can be unpredictable. We will use CSS to force these paragraphs to be inline block which will result in three columns.
- First lets just add a background color to the content area to make it look nicer:
#content {
background-color: rgb(97, 95, 88);} - Add the following CSS rules under the .section selector:
display: inline-block;
width: 220px;
height: 200px;
vertical-align: top;}
This will make each section a column. - Now let's center the footer section:
#footer h3, #footer p, #footer ul{
width:200px;
margin-left: auto;
margin-right: auto;} - You are done.

Inline blocks (you love it).
- Before you submit you should review your code and visual preview.
- Look for any errors. If there are any, fix them. When you are happy, proceed .
- One of the nice aspects of Liveweave is that it allows you to download the site as a single zipped folder with all of the text documents and folders organized correctly.
- In Liveweave click on Download (top center of window). This is the entire site zipped that you can just submit to Blackboard.
- Lastly, log into Blackboard (Here) and click on this course. Inside the course, select Week 04, then the Week 04: Fixed-Width Page (polish) Lab folder, then the assignment with the same name. Finally, Attach the zipped file.
Cone's Biography
item 01
item 01
item 01
item 01
Cone
personal site: teachmecone.com
The man, the myth, the primitive shape.
In the beginning...
He was born in upstate NY. Have you been there? No you haven't because you have no reason too. It's drab.
Presently coding this document
Write now he is teaching this class and writing this code. Inspirational.
His Future
He wants to make the best courses ever, create more short films, and be more fit.
He has none.
Things he dislikes
Cats
Vehicles that go Vroom
Bug Meat

You have completed the lab series! You now have a solid foundation in hand-coding a site. There is still plenty more to learn (and we are going to cover much more) but you have a good launching spot.
Next week you will create your own site with not guide. You will be asked to create a biography about yourself much like this lab but you can make it however you like. Think about what you might want to add.
If you run into any issues please do not hesitate to contact me:
- jcone@cecil.edu
- (240) 466-1996

Wait! Before you go!
Did you remember to?
- Read through this webpage
- Watch the videos
- Submit Week 04 Fixed-Width Page (polish) Lab on Blackboard
