Web Design I
Class 03: Links and ImagesTopics
- Links
- Week 03 Fixed-Width Page (links) Lab
- Internal CSS
- Art Elements and Design Principles
- Imaging Editing Basics
Links
Directory Structure
So far, everything we have produced has existed on a single page. However if you want to include links to other pages, images, or other files you have to tell the browser where it is located. This is where file/folder structure really matters.
There are two methods of links:
- Absolute URL
- Directs the browser to the exact location on the web.<a href=”http:www.google.com”>Google</a>
- Relative URL
- Directs the browser to a location in relation to the current document.
-
- same folder
- <img src=”c_image.png” />
- folder below (child)
- <img src=”lowerFolder/d_image.png” />
- folder above(parent)
- <img src=”../b_image.png” />
- two folders below (grandchild)
- <img src=”lowerFolder/lowestFolder/e_image.png” />
- two folders above (grandparent)
- <img src=”../../a_image.png” />
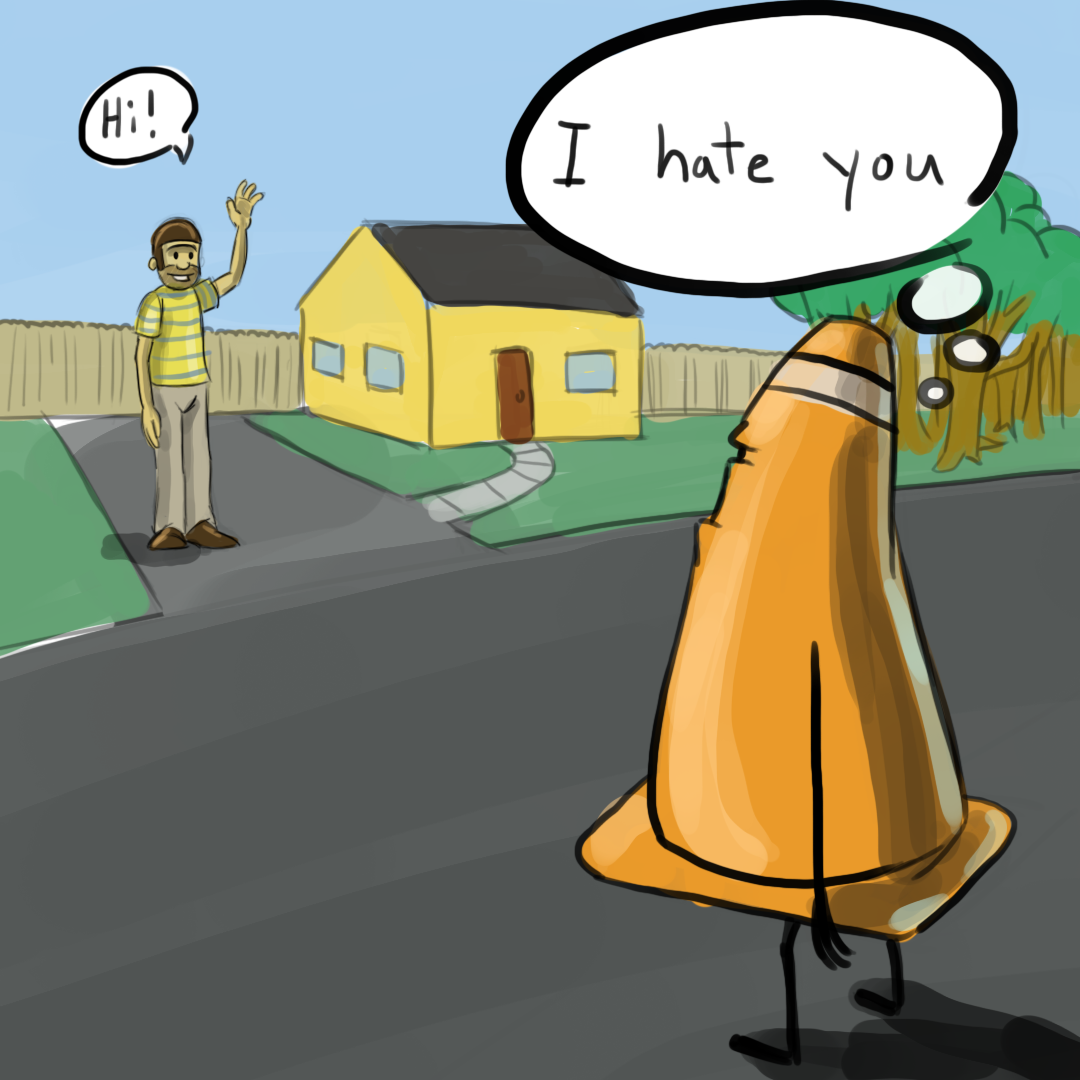
An example of relative URL would be hating your neighbor that lives across the street from you. An example of absolute URL would be hating somebody that lives at a specific address.
03 Fixed-Width Page (links) Lab
Week 03 Fixed-Width Page (links) Lab:
In part three of your Fixed-Width Page Lab we will convert your CSS from inline to internal, create links (hyperlinks, images), apply some new CSS, and adjust images (sized, crop, alpha, enhance, etc.).
You will be graded on the following:
- File/Folder & Document Structure
- Master folder created with correct sub folders.
- All files named and placed correctly.
- Basic HTML and CSS structure produced.
- Code is formatted properly (indents, spacing, caps, etc.).
- Lab Specific Requirements
- Internal CSS.
- Links.
- Image Adjustments.
-
Craftsmanship
-
Clean, professional quality work.
- Descriptive and well-written informative text.
- Properly formatted images incorporated.
-
-
Creativity
-
Appealing, interesting and novel.
- Text is captivating.
- Images draw attention.
-
Hyperlinks Make it a Site
Hyperlinks are the defining feature of the web that allows the user to navigate from one page to another, known as web browsing or surfing (connected together like strands in a web).
- You can link:
- website to webstite
- page to page
- one area of a page to another area of a page
- open a new window
- open a program
Links
- <a>
- (anchor) Creates a link element.
- href
- attribute that specifies the page that is linked.
<a href="https://theuselessweb.com/">theUselessWeb</a>Creating Hyperlinks
Instructions:
Let’s create some hyperlinks. After <h1>Cone</h1> enter a new line and type <a href=“https://teachmecone.com/nojcone/”>Demo Reel</a>. This will create new text as a hyperlink.
Let’s convert some text we already have as a hyperlink. In the third paragraphy wrap class with the anchor tag like so, <p>Right now he is teaching this <a href=“https://teachmecone.com/web-design-i/wd-i-class-03/”>class</a> and writing this crummy biography</p>.
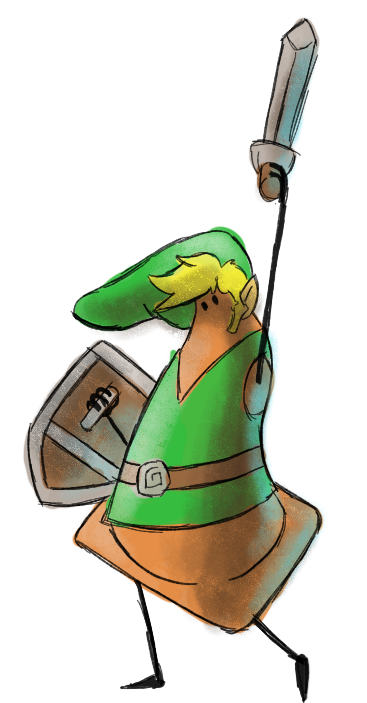
Hyper-Link. You get it? (I know, awful)
<!DOCTYPE html>
<html>
    <head>
        <title>Cone's Biography</title>
        <meta charset="UTF-8">
        <meta name="description" content="All about Jon Cone's life">
        <meta name="keywords" content="Handsome, Smart, Cool Guy">
        <meta name="author" content="Jonathan Cone">
        <meta name="viewport" content="width=device-width, initial-scale=1.0">
    </head>
    <body style="background-color: orange; width: 960px; font-family: Verdana, Geneva, Tahoma, sans-serif; font-size: .85em;">
        <div style="background-color: #ffffff; margin: 20px; padding: 20px; border-right-style: solid; border-bottom-style: solid; border-color: #0000004c; border-width: 5px;">
            <div style="margin-bottom: 40px; text-align: center;">
                <h1>Cone</h1>
                <a href="https://teachmecone.com/nojcone/">Demo Reel</a>
                <p>The man, <em>the myth</em>, <strong style="color: #fa8e13;">the primitive form</strong>.</p>
                <hr />
            </div>
            <div style="margin-bottom: 40px;">
                <h2>In the beginning...</h2>
                <p>He was born in <span style="font-weight: 700;">Upstate NY</span>. Have you been there? No you haven't because it is drab.</p>
            </div>
            <div style="margin-bottom: 40px;">
                <h2>Presently coding this document</h2>
                <p>Right now he is teaching this <a href="https://teachmecone.com/web-design-i/wd-i-class-03/">class</a> and writing this crummy biography</p>
            </div>
            <div style="margin-bottom: 40px;">
                <h2>His future</h2>
                <p>He has <span style="text-decoration: line-through;">none</span>.</p>
            </div>
        </div>
        <div style="color: #ffffff; width: 480px; margin-left: 240px; border: 3px dotted #000000;">
            <h3>List of likes:</h3>
            <ol>
                <li>Puppies</li>
                <li>Animation</li>
                <li>Indian Food</li>
            </ol>
            <h3>List of dislikes:</h3>
            <ul>
                <li>Cats</li>
                <li>Vehicles that go Vroom</li>
                <li>Bug meat</li>
            </ul>
            <h3>Table of favorite video games</h3>
            <table>
                <tr> <th>Genre</th> <th>RPG</th> <th>RTS</th> <th>FPS</th> </tr>
                <tr> <th>Game</th> <td>Diablo</td> <td>StarCraft</td> <td>Halo</td> </tr>
            </table>
        </div>
    </body>
</html>
browser view
In the beginning…
He was born in Upstate NY. Have you been there? No you haven’t because it is drab.
Presently coding this document
Right now he is teaching this class and writing this crummy biography
His future
He has none.
List of likes:
- Puppies
- Animation
- Indian Food
List of dislikes:
- Cats
- Vehicles that go Vroom
- Bug meat
Table of favorite video games
| Genre | RPG | RTS | FPS |
|---|---|---|---|
| Game | Diablo | StarCraft | Halo |
Images
- <img>
- Empty element for images.
- src
- Tells the browser where the image is located.
- alt
- Provides a description of the image if it is not seen.
- title
- Adds additional information to the user if they hover over the image.
- height
- Specifies height.
- width
- Specifies width.
<img src="images/paco.jpg" alt="paco hugging a stuffed animal" title="paco" width="600" height="400" />browser view

Using Images as Links:
Instead of using text inside the opening and closing tags use an image.
<a href="http:www.bing.com"><img src="images/bingLogo.png" /></a>Other Links:
- mailto:
- Opens up the user’s email application and enters the provided email address.
- <a href=”mailto:jon@example.org”>Email Jon</a>
- target:
- Opens up the provided link in a new window.
- <a href=”http://www.imbd.com” target=”_blank”>Internet Movie Database</a>
- #:
- Directs the user to a specified identifier. (two part system)
- <h1 id=”top”>
- <a href=”#top”>Top</a>
Linking images
Instructions:
So far we have only included text in our page. Images draw much more attention from users. Let’s embed some now.
After <h1>Cone</h1> and before the link we created in the previous section write, <img src=“images/FullSizeR.jpg” alt=“photograph of jonatha cone” width=“240px” />.
You will notice that the Demo Reel link is directly after the image, inline with it. It’s not very appleaing. To put it on a new line enter a <br /> after the <img> element and before the link.
We can use another image as a link towards the bottom of the page. Enter a new line after the bottom section opening <div> (where we have our lists and table). Type <a href=“https://teachmecone.com/”><img src=“images/coneImage.png” alt=“teachmecone logo” width=“180px” /></a>. Images as links stick out more than plain text.
<!DOCTYPE html>
<html>
    <head>
        <title>Cone's Biography</title>
        <meta charset="UTF-8">
        <meta name="description" content="All about Jon Cone's life">
        <meta name="keywords" content="Handsome, Smart, Cool Guy">
        <meta name="author" content="Jonathan Cone">
        <meta name="viewport" content="width=device-width, initial-scale=1.0">
    </head>
    <body style="background-color: orange; width: 960px; font-family: Verdana, Geneva, Tahoma, sans-serif; font-size: .85em;">
        <div style="background-color: #ffffff; margin: 20px; padding: 20px; border-right-style: solid; border-bottom-style: solid; border-color: #0000004c; border-width: 5px;">
            <div style="margin-bottom: 40px; text-align: center;">
                <h1>Cone</h1>
                <img src="images/FullSizeR.jpg" alt="photograph of jonatha cone" width="240px" />
                <br />
                <a href="https://teachmecone.com/nojcone/">Demo Reel</a>
                <p>The man, <em>the myth</em>, <strong style="color: #fa8e13;">the primitive form</strong>.</p>
                <hr />
            </div>
            <div style="margin-bottom: 40px;">
                <h2>In the beginning...</h2>
                <p>He was born in <span style="font-weight: 700;">Upstate NY</span>. Have you been there? No you haven't because it is drab.</p>
            </div>
            <div style="margin-bottom: 40px;">
                <h2>Presently coding this document</h2>
                <p>Right now he is teaching this <a href="https://teachmecone.com/web-design-i/wd-i-class-03/">class</a> and writing this crummy biography</p>
            </div>
            <div style="margin-bottom: 40px;">
                <h2>His future</h2>
                <p>He has <span style="text-decoration: line-through;">none</span>.</p>
            </div>
        </div>
        <div style="color: #ffffff; width: 480px; margin-left: 240px; border: 3px dotted #000000;">
            <a href="https://teachmecone.com/"><img src="images/coneImage.png" alt="teachmecone logo" width="180px" /></a>
            <h3>List of likes:</h3>
            <ol>
                <li>Puppies</li>
                <li>Animation</li>
                <li>Indian Food</li>
            </ol>
            <h3>List of dislikes:</h3>
            <ul>
                <li>Cats</li>
                <li>Vehicles that go Vroom</li>
                <li>Bug meat</li>
            </ul>
            <h3>Table of favorite video games</h3>
            <table>
                <tr> <th>Genre</th> <th>RPG</th> <th>RTS</th> <th>FPS</th> </tr>
                <tr> <th>Game</th> <td>Diablo</td> <td>StarCraft</td> <td>Halo</td> </tr>
            </table>
        </div>
    </body>
</html>
browser view
In the beginning…
He was born in Upstate NY. Have you been there? No you haven’t because it is drab.
Presently coding this document
Right now he is teaching this class and writing this crummy biography
His future
He has none.

List of likes:
- Puppies
- Animation
- Indian Food
List of dislikes:
- Cats
- Vehicles that go Vroom
- Bug meat
Table of favorite video games
| Genre | RPG | RTS | FPS |
|---|---|---|---|
| Game | Diablo | StarCraft | Halo |
Video and audio on the Web
HTML5 natively supports video and audio. Before video would have to be inserted using JavaScript or Flash.
HTML5 Accepts three video formats
- MP4
- WebM
- Ogg
Right now MP4 is the only universally accepted format on all major browsers.
Due to the size of videos it is a much better idea to embed a video from another site such as Youtube than to host it yourself. We will cover this later in the course.
Video:
- <video>
- Encapsulates video content.
- src
- Used to specify the video source.
- controls
- Turns the video playback controls on.
- height, width
- Determines the size of the video.
<video width="320" height="240" controls src="bioTut.mp4" type="video/mp4">Your browser does not support the video</video>browser view
Audio:
- <audio>
- Encapsulates audio content.
- src
- Used to specify the audio source.
- controls
- Turns the audio playback controls on.
<!-- Although HTML5 does support audio I would not use explicitly. It is very annoying to have music or other sounds that you cannot turn off. -->Internal CSS
Internal CSS
This is best for single web pages.
Will load faster for single page since it will load right in the page.
This is generally easier to code since it is all in one document.
This is not really considered best practice.
- <style>
- Tells the browser this is where the style sheet starts.
<style>
  body {
    font-family: arial;
    background-color: rgb(185.179.175);}
  h1 {
    color: rgb(255.255.255);}
</style>
Each visual description statement is a CSS rule.
CSS rule
p { font-family: arial; }
CSS Rule contains two parts: a selector and a declaration
p { font-family: arial; }
CSS Properties consist of two parts: a property and a value.
p { font-family: arial; }

CSS Selectors
Basically selectors may be an HTML element, multiples, descendants, class, or ID.
- Universal Selector:
- *
- Applies to all elements
- Type Selector:
- h1, p, ul, etc.
- Matches element names
- Class Selector:
- .note, .page, etc.
- Matches class attribute after dot(.)
- ID Selector:
- #introduction, #top, etc.
- Matches id attribute after the # symbol
- Child Selector:
- li>a, h1>p, etc.
- Matches direct child of the specified element
- Descendant Selector:
- p a, ul li, etc.
- Selects all descendants of specified element
- Adjacent Selector:
- h1+p, p+ul, etc.
- Selects the next element after the specified element
- General Sibling Selector:
- h1~p, p~ul, etc.
- Matches an element that is a sibling of another but does not have to be directly preceding it

CSS Theory:
CSS follows certain rules that dictates the order and precedence that determine how the CSS design is applied.
- Cascade Theory:
- Last rule has precedence.
- Browser Defaults, External or Embedded Style Sheets, Inline Styles
- Inheritance Theory:
- Means that an element may be affected by one or more rules.
- Descendant Theory:
- Describes the ability to target elements based on the relative position compared to others.
- Specificity Theory:
- If one rule is more specific than another it will take precedence. Sometimes this is referred to as weight.
- Important:
- Adding !important after any property value makes it more important and adds precedence.
Broad to Specific: It is a good idea to write general rules and then write overriding more specific ones where necessary.
Internal CSS Application
Instructions:
Currently all of our CSS is written inline. This is a useful application but it is not a preferred method. We should convert our styles into internal embedded CSS.
First we need to create our style tags. Inside the <head> section enter <style> opening and </style> closing tags.
Let’s take the inline CSS out of the body tag and place them inside the <style> tags. Select the style attributes inside the body after style=”, press ctrl + x to cut them. Leave <body>, but delete the remaing style=””.
After the opening <style>, type body as the selector. Add { and } after it. Paste the CSS you cut out of the body tag earlier between the {} by pressing ctrl + v. It should look like this:
<style>
body {
background-color: orange;
width: 960px;
font-family: Verdana, Geneva, Tahoma, sans-serif;
font-size: .85em;}
</style>
We can create a rule that will apply CSS to all divs so we can remove some of it from the divs. After the body CSS rules enter, div { margin-bottom: 40px;}. Remove margin-bottom: 40px; from all of the divs that currently have it written inside, inline. They are no longer needed since we have an internal rule now. It will look slightly different than before since it is applying it to all divs when all did not have them originally but it is a close approximation for now.
<!DOCTYPE html>
<html>
    <head>
        <title>Cone's Biography</title>
        <meta charset="UTF-8">
        <meta name="description" content="All about Jon Cone's life">
        <meta name="keywords" content="Handsome, Smart, Cool Guy">
        <meta name="author" content="Jonathan Cone">
        <meta name="viewport" content="width=device-width, initial-scale=1.0">
        <style>
            body {
                background-color: orange;
                width: 960px;
                font-family: Verdana, Geneva, Tahoma, sans-serif;
                font-size: .85em;}
            div {
                margin-bottom: 40px;}
        </style>
    </head>
    <body>
        <div style="background-color: #ffffff; margin: 20px; padding: 20px; border-right-style: solid; border-bottom-style: solid; border-color: #0000004c; border-width: 5px;">
            <div style="text-align: center;">
                <h1>Cone</h1>
                <img src="images/FullSizeR.jpg" alt="photograph of jonatha cone" width="240px" />
                <br />
                <a href="https://teachmecone.com/nojcone/">Demo Reel</a>
                <p>The man, <em>the myth</em>, <strong style="color: #fa8e13;">the primitive form</strong>.</p>
                <hr />
            </div>
            <div>
                <h2>In the beginning...</h2>
                <p>He was born in <span style="font-weight: 700;">Upstate NY</span>. Have you been there? No you haven't because it is drab.</p>
            </div>
            <div>
                <h2>Presently coding this document</h2>
                <p>Right now he is teaching this <a href="https://teachmecone.com/web-design-i/wd-i-class-03/">class</a> and writing this crummy biography</p>
            </div>
            <div>
                <h2>His future</h2>
                <p>He has <span style="text-decoration: line-through;">none</span>.</p>
            </div>
        </div>
        <div style="color: #ffffff; width: 480px; margin-left: 240px; border: 3px dotted #000000;">
            <a href="https://teachmecone.com/"><img src="images/coneImage.png" alt="teachmecone logo" width="180px" /></a>
            <h3>List of likes:</h3>
            <ol>
                <li>Puppies</li>
                <li>Animation</li>
                <li>Indian Food</li>
            </ol>
            <h3>List of dislikes:</h3>
            <ul>
                <li>Cats</li>
                <li>Vehicles that go Vroom</li>
                <li>Bug meat</li>
            </ul>
            <h3>Table of favorite video games</h3>
            <table>
                <tr> <th>Genre</th> <th>RPG</th> <th>RTS</th> <th>FPS</th> </tr>
                <tr> <th>Game</th> <td>Diablo</td> <td>StarCraft</td> <td>Halo</td> </tr>
            </table>
        </div>
    </body>
</html>
browser view
In the beginning…
He was born in Upstate NY. Have you been there? No you haven’t because it is drab.
Presently coding this document
Right now he is teaching this class and writing this crummy biography
His future
He has none.

List of likes:
- Puppies
- Animation
- Indian Food
List of dislikes:
- Cats
- Vehicles that go Vroom
- Bug meat
Table of favorite video games
| Genre | RPG | RTS | FPS |
|---|---|---|---|
| Game | Diablo | StarCraft | Halo |
ID Attribute:
- id
- Used to uniquely identify an element from other elements. This is invaluable when using CSS to format your HTML document.
<h1 id="mainHeading">Super Awesome Sandwiches</h1>Class Attribute:
- class
- Class is similar to id except that it is meant to be used to identify multiple elements.
<h1 id="mainHeading">Super Awesome Sandwiches</h1>
<p class="foodDes subs">We have great subs!</p>
<h2>Check out all of our options</h2>
<p class="foodDes">We have over a dozen to choose from</p>
Using id’s and classes
Instructions:
In order to apply CSS to specific elements inside our document we have to create id’s and class’s that allows to select them. This will take some time.
First we should create id’s for each of the elements we wish to target.
Add id=”topSection” inside the first div so it looks like this, <div id=”topSection” style=“background-color: #ffffff; margin: 20px; padding: 20px; border-right-style: solid; border-bottom-style: solid; border-color: #0000004c; border-width: 5px;”>. Do the same for the bottom section that contains the lists and table by adding “id=”bottomSection” inside the opening div.
Now we can add some CSS rules that target those id’s. Inside the <style> element, after div CSS rules type #topSection { } and #bottomSection { }. Select the CSS attributes inside the divs in the body, and cut & paste them after the corresponding selectors, inside the { }. Delete the remaing style=”” text. It should look this:
#topSection {
background-color: #ffffff;
margin: 20px;
padding: 20px;
border-right-style: solid;
border-bottom-style: solid;
border-color: #0000004c;
border-width: 5px;}
#bottomSection {
color: #ffffff;
width: 480px;
margin-left: 240px;
border: 3px dotted #000000;}
We will need a specific id to target the none element. Create an id named strikethrough inside the span and apply the same process so you end up with something like this inside the <style>:
#strikethrough {
text-decoration: line-through;}
We can create classes to target multiple elements and apply CSS. Inside of each div that resides in the top section div create a class like this, <div class=”subsection”>. Replace the div selector with the class name by entering .subsection. It should look like this:
.subsection {
margin-bottom: 40px;}
Let’s create some more classes. Inside <style> add the following:
.orangeColor {
color: #fa8e13;}
.bolder {
font-weight: 700;}
We can apply these classes to multiple elements. Add the orangeColor and bolder classes to the <strong> element. Add the bolder class to the span around Upstate NY. Lastly add the orangeColor class to the span around none.
The last thing we need to do is format the images. Currently they have width attributes but it would better to use CSS. We can use the id’s we already have to target them. Inside the <style> tags enter:
#topSection img {
width: 240px;}
#bottomSection img {
width: 180px;}
This will scale our images appropriately.
<!DOCTYPE html>
<html>
    <head>
        <title>Cone's Biography</title>
        <meta charset="UTF-8">
        <meta name="description" content="All about Jon Cone's life">
        <meta name="keywords" content="Handsome, Smart, Cool Guy">
        <meta name="author" content="Jonathan Cone">
        <meta name="viewport" content="width=device-width, initial-scale=1.0">
        <style>
            body {
                background-color: orange;
                width: 960px;
                font-family: Verdana, Geneva, Tahoma, sans-serif;
                font-size: .85em;}
            #topSection {
                background-color: #ffffff;
                margin: 20px;
                padding: 20px;
                border-right-style: solid;
                border-bottom-style: solid;
                border-color: #0000004c;
                border-width: 5px;}
            #bottomSection {
                color: #ffffff;
                width: 480px;
                margin-left: 240px;
                border: 3px dotted #000000;}
            #strikethrough {
                text-decoration: line-through;}
            .subsection {
                margin-bottom: 40px;}
            .orangeColor {
                color: #fa8e13;}
            .bolder {
                font-weight: 700;}
            #topSection img {
                width: 240px;}
            #bottomSection img {
                width: 180px;}

        </style>
    </head>
    <body>
        <div id="topSection">
            <div class="subsection" style="text-align: center;">
                <h1>Cone</h1>
                <img src="images/FullSizeR.jpg" alt="photograph of jonatha cone" />
                <br />
                <a href="https://teachmecone.com/nojcone/">Demo Reel</a>
                <p>The man, <em>the myth</em>, <strong class="orangeColor bolder">the primitive form</strong>.</p>
                <hr />
            </div>
            <div class="subsection">
                <h2>In the beginning...</h2>
                <p>He was born in <span class="bolder">Upstate NY</span>. Have you been there? No you haven't because it is drab.</p>
            </div>
            <div class="subsection">
                <h2>Presently coding this document</h2>
                <p>Right now he is teaching this <a href="https://teachmecone.com/web-design-i/wd-i-class-03/">class</a> and writing this crummy biography</p>
            </div>
            <div class="subsection">
                <h2>His future</h2>
                <p>He has <span id="strikethrough" class="orangeColor">none</span>.</p>
            </div>
        </div>
        <div id="bottomSection">
            <a href="https://teachmecone.com/"><img src="images/coneImage.png" alt="teachmecone logo" /></a>
            <h3>List of likes:</h3>
            <ol>
                <li>Puppies</li>
                <li>Animation</li>
                <li>Indian Food</li>
            </ol>
            <h3>List of dislikes:</h3>
            <ul>
                <li>Cats</li>
                <li>Vehicles that go Vroom</li>
                <li>Bug meat</li>
            </ul>
            <h3>Table of favorite video games</h3>
            <table>
                <tr> <th>Genre</th> <th>RPG</th> <th>RTS</th> <th>FPS</th> </tr>
                <tr> <th>Game</th> <td>Diablo</td> <td>StarCraft</td> <td>Halo</td> </tr>
            </table>
        </div>
    </body>
</html>
browser view
In the beginning…
He was born in Upstate NY. Have you been there? No you haven’t because it is drab.
Presently coding this document
Right now he is teaching this class and writing this crummy biography
His future
He has none.

List of likes:
- Puppies
- Animation
- Indian Food
List of dislikes:
- Cats
- Vehicles that go Vroom
- Bug meat
Table of favorite video games
| Genre | RPG | RTS | FPS |
|---|---|---|---|
| Game | Diablo | StarCraft | Halo |
Background Image:
- background-image
- url(“images/images”);
- background-repeat
- repeat, no-repeat, repeat-x, repeat-y
- background-attachment
- fixed, scroll
- background-position
- left top, left center, left bottom, center top,center center, center bottom, right top, right center, right bottom
- background
- background-color, background-image, background-repeat, background-attachment, background-position
browser view
Background Shorthand:
It is possible to write all of the background properties on a single line instead of adding individual properties for each. You write it out as background-color, background-image, background-repeat, background-attachment, background-position.
example: background: pink url(“images/smiley.jpg”) no-repeat fixed center center;}
#bgImage {
	background-image: url("images/textureTile.jpg");}
#bgRepeatX {
	background-image: url("images/textureTile.jpg");
	background-repeat:repeat-x;}
#bgRepeatY {
	background-image: url("images/textureTile.jpg");
	background-repeat:repeat-y;}
#bgRepeatNo {
	background-image: url("images/textureTile.jpg");
  background-repeat:no-repeat;}
#bgScroll {
	background-image: url("images/textureTile.jpg");
	background-attachment:fixed;}
#bgPosition {
	background-image: url("images/textureTile.jpg");
	background-repeat:no-repeat;
	background-position:right top;}
List Style Properties:
- list-style-type
-
- For Unordered Lists:
- none, disc, circle, square
-
- For Ordered Lists:
- decimal, decimal-leading-zero, lower-alpha, upper-alpha, lower-roman, upper-roman
- list-style-image
- url(“images/bullet.png”);
- list-style-position
- outside, inside
browser view
- item 01
- item 02
- item 03
- item 01
- item 02
- item 03
- item 01
- item 02
- item 03
- item 01: this is longer so that you can see the difference between an inside and outside list style position.
- item 02: this is longer so that you can see the difference between an inside and outside list style position.
- item 03: this is longer so that you can see the difference between an inside and outside list style position.
#listStyleOrdered {
	list-style-type:upper-roman;}
#listStyleUnordered {
	list-style-type:square;}
#listStyleImage {
	list-style-image:url("images/cone.png");}
#listStyleOutside {
	list-style-position:outside;}
#listStyleInside {
	list-style-position:inside;}
Applying background and list styling
Instructions:
We can add some styling to the lists as well as add a background image.
To add style to the lists add the following between the <style> tags:
ul li {
list-style-type: square;}
ol li {
list-style-type: lower-alpha;}
Add the background image to the body selector:
body {
background-color: orange;
background-image: url(‘images/wallPaper.gif’);
background-attachment: fixed;
width: 960px;
font-family: Verdana, Geneva, Tahoma, sans-serif;
font-size: .85em;}
<!DOCTYPE html>
<html>
    <head>
        <title>Cone's Biography</title>
        <meta charset="UTF-8">
        <meta name="description" content="All about Jon Cone's life">
        <meta name="keywords" content="Handsome, Smart, Cool Guy">
        <meta name="author" content="Jonathan Cone">
        <meta name="viewport" content="width=device-width, initial-scale=1.0">
        <style>
            body {
                background-color: orange;
                background-image: url('images/wallPaper.gif');
                background-attachment: fixed;
                width: 960px;
                font-family: Verdana, Geneva, Tahoma, sans-serif;
                font-size: .85em;}
            #topSection {
                background-color: #ffffff;
                margin: 20px;
                padding: 20px;
                border-right-style: solid;
                border-bottom-style: solid;
                border-color: #0000004c;
                border-width: 5px;}
            #bottomSection {
                color: #ffffff;
                width: 480px;
                margin-left: 240px;
                border: 3px dotted #000000;}
            #strikethrough {
                text-decoration: line-through;}
            .subsection {
                margin-bottom: 40px;}
            .orangeColor {
                color: #fa8e13;}
            .bolder {
                font-weight: 700;}
            #topSection img {
                width: 240px;}
            #bottomSection img {
                width: 180px;}
            ul li {
                list-style-type: square;}
            ol li {
                list-style-type: lower-alpha;}
        </style>
    </head>
    <body>
        <div id="topSection">
            <div class="subsection" style="text-align: center;">
                <h1>Cone</h1>
                <img src="images/FullSizeR.jpg" alt="photograph of jonatha cone" />
                <br />
                <a href="https://teachmecone.com/nojcone/">Demo Reel</a>
                <p>The man, <em>the myth</em>, <strong class="orangeColor bolder">the primitive form</strong>.</p>
                <hr />
            </div>
            <div class="subsection">
                <h2>In the beginning...</h2>
                <p>He was born in <span class="bolder">Upstate NY</span>. Have you been there? No you haven't because it is drab.</p>
            </div>
            <div class="subsection">
                <h2>Presently coding this document</h2>
                <p>Right now he is teaching this <a href="https://teachmecone.com/web-design-i/wd-i-class-03/">class</a> and writing this crummy biography</p>
            </div>
            <div class="subsection">
                <h2>His future</h2>
                <p>He has <span id="strikethrough" class="orangeColor">none</span>.</p>
            </div>
        </div>
        <div id="bottomSection">
            <a href="https://teachmecone.com/"><img src="images/coneImage.png" alt="teachmecone logo" /></a>
            <h3>List of likes:</h3>
            <ol>
                <li>Puppies</li>
                <li>Animation</li>
                <li>Indian Food</li>
            </ol>
            <h3>List of dislikes:</h3>
            <ul>
                <li>Cats</li>
                <li>Vehicles that go Vroom</li>
                <li>Bug meat</li>
            </ul>
            <h3>Table of favorite video games</h3>
            <table>
                <tr> <th>Genre</th> <th>RPG</th> <th>RTS</th> <th>FPS</th> </tr>
                <tr> <th>Game</th> <td>Diablo</td> <td>StarCraft</td> <td>Halo</td> </tr>
            </table>
        </div>
    </body>
</html>
browser view
In the beginning…
He was born in Upstate NY. Have you been there? No you haven’t because it is drab.
Presently coding this document
Right now he is teaching this class and writing this crummy biography
His future
He has none.

List of likes:
- Puppies
- Animation
- Indian Food
List of dislikes:
- Cats
- Vehicles that go Vroom
- Bug meat
Table of favorite video games
| Genre | RPG | RTS | FPS |
|---|---|---|---|
| Game | Diablo | StarCraft | Halo |
Art Elements and Design Principles
Art Elements and Design Principles:
The language we use to describe art. Generally these rules are used to describe fine art but they can also be applied to new media such as photography, graphic design, animation, and others.
In a four year art or graphic program you would be required to to 2D Comp or something similar. We will cover them here.

Art Elements:

Form
Form is the illusion of three-dimensional shape. This usually involves the utilization of linear and aerial perspective.

Line
A line is the path between two or more points. This can be either explicit or implicit.

Color
Color is specific temperature of light reflected off the piece of work. Different colors have different psychological effects.

Value
The amount of lightness and darkness ranging from pure white to pure black.

Space
Space represents a general area. Generally speaking you can define a piece of artwork in positive and negative space.

Texture
This is the physical property of how the surface would feel if touched. I would say that is more about how an area is broken up.
Design Principles:

Balance
The visual weight of the artwork that may be symmetrical or asymmetrical.

Contrast
The extreme difference in an image between elements.
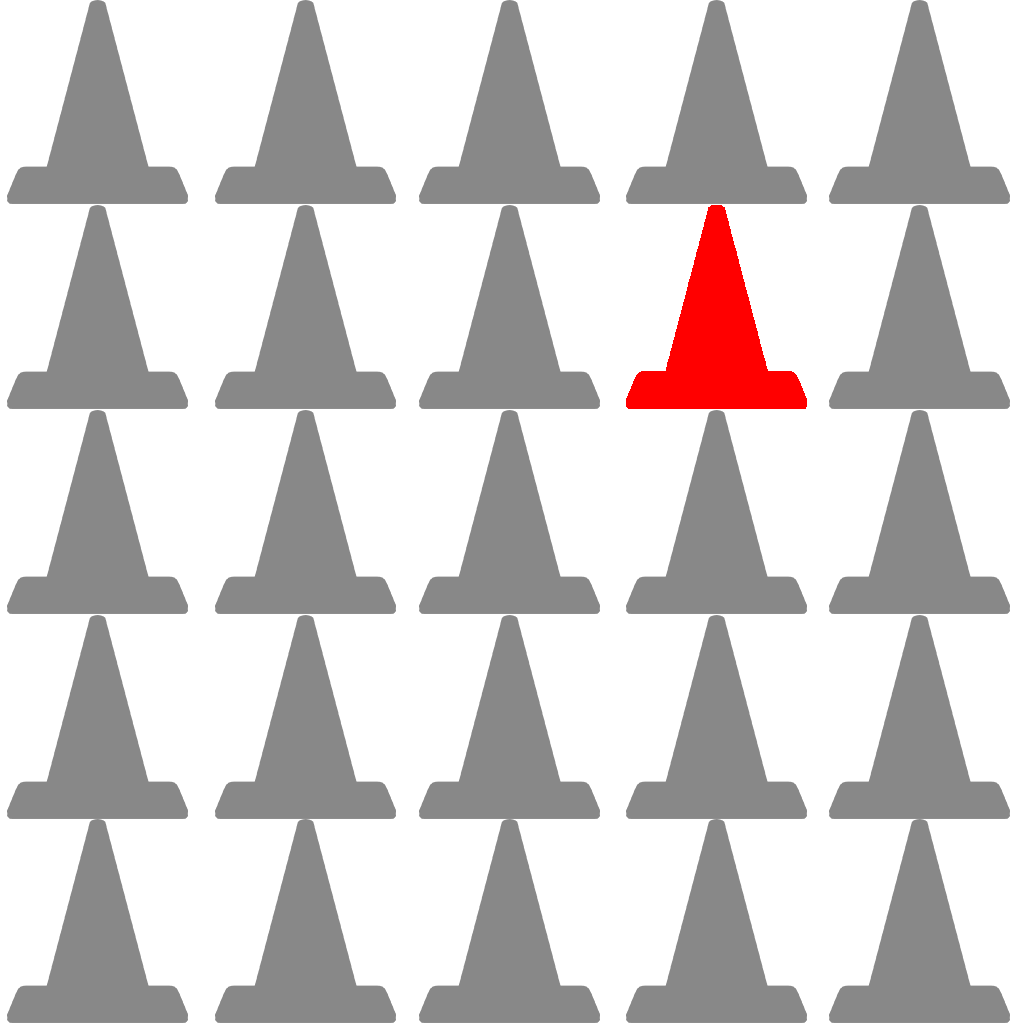
Emphasis
When one element of a piece of artwork draws more attention than others.

Movement
To give the illusion of motion in a two dimensional space.

Pattern
Repeating elements in an image.

Rhythm
Much like music this is the application of varied pattern.

Unity
Unity is the coherence of the elements in a piece that make is appear as a whole.
Image Editing Basics
You may ignore this section:
Normally we would be in class and utlizing Photoshop. If you have Photoshop you can watch the tutorial below below but it’s directed towards beginners. The Lab Tutorial Slider will cover image editing in PhotoPea.
Adobe Photoshop:
Adobe Photoshop is the industry leading raster image editing software. It is part of the Adobe Creative Cloud, which is a subscription based service. There are full courses on Photoshop alone so we will only cover the basics necessary to edit photographs.
Basics:
- Image Size
- change the size of the image
- Cropping
- cut out the parts of the image you don’t want
- Alpha
- add transparency to your image
- Basic Enhancements
- simple color and contrast correction
- File Size
- save your image as an appropriate file format

Basic Image Editing Video Tutorials
This tutorial will guide you through basics of image editing in Adobe Photoshop.
Alternatives:
If you are serious about becoming a web designer you should definitely add Photoshop to your list of tools. I know for many (most) of you the subscription of the Adobe Creative Cloud may be prohibitive so here are some other free options:
Editing images
Instructions:
This is not a digital imaging course. We in fact have one at Cecil called VCP 116 Digital Imaging I. I would highly suggest that course if this subject interests you. You will need to know a little digital imaging to make it as a web designer. Please follow the video tutorial to the right for directions on how to use Photopea for basic image editing.
Some highlights:
- Open Photopea inside your browser
- Use
 crop tool to clip your image (cut into the image removing areas)
 - Use Image>Image size… to change the overall size of the image
- Apply Image>Adjustments> reveals various functions that will adjust the image value, color, and other qualities
- You may remove the background by selecting the subject matter using the
 object select tool to select the object you wish to keep. Then invert your selection by selecting Select>Inverse. Press Del to delete the selected area. You may also use the
  erasor tool to remove areas as well.


Lab assignment submission
Instructions:
Before you submit you should review your code and Save your file (File > Save), navigate to your file on your Desktop, and double-click it to open
Look for any errors. If there are any, look through your code and fix them. When you are happy, proceed
Your site is not just the single HTML document you have created but the root folder and all contents therein. You MUST submit the ENTIRE folder
You cannot submit folders on Canvas. Instead we can zip the folder and submit that. Navigate to the location of your site folder. Right-click over top of it and select Compress to zip file on Windows and Compress on MacOS. A new zipped file will be created
Lastly, log into Canvas (Here) and click on this course. Inside the course, under module Week 03, select Week 03: Fixed-Width Page (link) Lab, then upload the zipped file.
<!DOCTYPE html>
<html>
    <head>
        <title>Cone's Biography</title>
        <meta charset="UTF-8">
        <meta name="description" content="All about Jon Cone's life">
        <meta name="keywords" content="Handsome, Smart, Cool Guy">
        <meta name="author" content="Jonathan Cone">
        <meta name="viewport" content="width=device-width, initial-scale=1.0">
        <style>
            body {
                background-color: orange;
                background-image: url('images/wallPaper.gif');
                background-attachment: fixed;
                width: 960px;
                font-family: Verdana, Geneva, Tahoma, sans-serif;
                font-size: .85em;}
            #topSection {
                background-color: #ffffff;
                margin: 20px;
                padding: 20px;
                border-right-style: solid;
                border-bottom-style: solid;
                border-color: #0000004c;
                border-width: 5px;}
            #bottomSection {
                color: #ffffff;
                width: 480px;
                margin-left: 240px;
                border: 3px dotted #000000;}
            #strikethrough {
                text-decoration: line-through;}
            .subsection {
                margin-bottom: 40px;}
            .orangeColor {
                color: #fa8e13;}
            .bolder {
                font-weight: 700;}
            #topSection img {
                width: 240px;}
            #bottomSection img {
                width: 180px;}
            ul li {
                list-style-type: square;}
            ol li {
                list-style-type: lower-alpha;}
        </style>
    </head>
    <body>
        <div id="topSection">
            <div class="subsection" style="text-align: center;">
                <h1>Cone</h1>
                <img src="images/FullSizeR.jpg" alt="photograph of jonatha cone" />
                <br />
                <a href="https://teachmecone.com/nojcone/">Demo Reel</a>
                <p>The man, <em>the myth</em>, <strong class="orangeColor bolder">the primitive form</strong>.</p>
                <hr />
            </div>
            <div class="subsection">
                <h2>In the beginning...</h2>
                <p>He was born in <span class="bolder">Upstate NY</span>. Have you been there? No you haven't because it is drab.</p>
            </div>
            <div class="subsection">
                <h2>Presently coding this document</h2>
                <p>Right now he is teaching this <a href="https://teachmecone.com/web-design-i/wd-i-class-03/">class</a> and writing this crummy biography</p>
            </div>
            <div class="subsection">
                <h2>His future</h2>
                <p>He has <span id="strikethrough" class="orangeColor">none</span>.</p>
            </div>
        </div>
        <div id="bottomSection">
            <a href="https://teachmecone.com/"><img src="images/coneImage.png" alt="teachmecone logo" /></a>
            <h3>List of likes:</h3>
            <ol>
                <li>Puppies</li>
                <li>Animation</li>
                <li>Indian Food</li>
            </ol>
            <h3>List of dislikes:</h3>
            <ul>
                <li>Cats</li>
                <li>Vehicles that go Vroom</li>
                <li>Bug meat</li>
            </ul>
            <h3>Table of favorite video games</h3>
            <table>
                <tr> <th>Genre</th> <th>RPG</th> <th>RTS</th> <th>FPS</th> </tr>
                <tr> <th>Game</th> <td>Diablo</td> <td>StarCraft</td> <td>Halo</td> </tr>
            </table>
        </div>
    </body>
</html>
browser view
In the beginning…
He was born in Upstate NY. Have you been there? No you haven’t because it is drab.
Presently coding this document
Right now he is teaching this class and writing this crummy biography
His future
He has none.

List of likes:
- Puppies
- Animation
- Indian Food
List of dislikes:
- Cats
- Vehicles that go Vroom
- Bug meat
Table of favorite video games
| Genre | RPG | RTS | FPS |
|---|---|---|---|
| Game | Diablo | StarCraft | Halo |
You’re Done
Did you remember to?
- Read through this webpage
- Complete and submit the 03 Fixed-Width Page (links) Lab on Canvas


/cdn.vox-cdn.com/assets/3231623/binglogo.jpg)

