In this lab we will create the "bones" of a theme. The basics of it is relatively simple but we will be using PHP to write our code. This is much more complex than HTML and CSS. However it follows most of the same rules as JavaScript so it won't feel entirely foreign (hopefully). When we are done your theme will officially be functioning.
Click on the > to start
You may use what you created in the last lab .

- The theme is a collection of files and folders that work together. A such, a theme's file/folder structure must be designed in a specific manner.
- You will need to make a root folder for your theme. In Local, right-click on the site name and select Show Folder. The folder will appear.
- Navigate to yourSiteName/app/public/wp-content/themes. You should see the other themes available to your site (twentytwentyone, twentytwenty, etc.). Create a new folder and name it "yourLastNameTheme." All of your theme files and folder will be placed inside this.
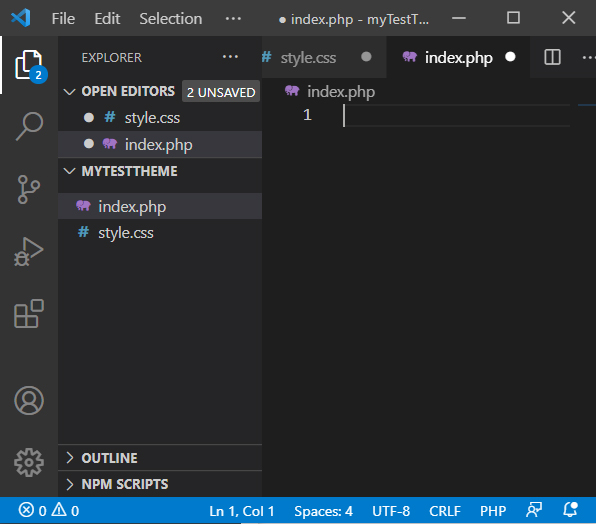
- Open Visual Studio Code. Drag your newly created folder into the window to load the folder location. It will appear in a left panel.
- Press the New File
 button to create a new file. Save this document as style.css.
 - Press the New File
 button again. This time save the document as index.php.
 - The absolute required theme files have been created.


You can see the file path in the image above

/*
Theme Name: YourLastNameTheme
Author: YourFullNameHere
Description: A super simple theme created in web design II
Version: 1.0
*/- A heading must be entered in the stylesheet of the theme. This gives information about the theme name, author, version, and other information.
- Open the style.css file. Enter the following:
/*
Theme Name: YourLastNameTheme
Theme URI: YourThemeWebsite
Author: YourFullNameHere
Author URI: YourWebsiteProfile
Description: A super simple custom theme created in web design II
Version: 1.0
*/ - Other information may also be included in the heading. You can view the documentation here to learn what other items may be included.

Cone styling head

<?php
date_default_timezone_set("America/New_York");
$currentTime = date("H");

if($currentTime > 18){
    $greetingTxt = "Good Evening!";}

else if($currentTime > 12){
    $greetingTxt = "Good Afternoon!";}

else if($currentTime > 0){
    $greetingTxt = "Good Morning!";}
else {
    $greetingTxt = "Welcome!";}

echo "<h1>" . $greetingTxt . "</h1>";
?>

<h3>PHP can contain HTML code!</h3>
<p>Isn't that neat? I mean maybe not neat. Not even cool. But it definitely is a thing.</p>- Wordpress uses template files for the design of your posts. You may make different templates for different types of posts. The fallback template for all post types is index.php. Therefore we will create this file first.
- Open the index.php file to begin creating your main template.
- Try entering some HTML such as:
<h2>PHP can contain HTML code!</h2>
<p>Isn't that neat? I mean maybe not neat. Not even cool. But it definitely is a thing.</p>
In Wordpress you should be able to preview what you wrote. - Let's try entering some PHP code into our PHP document (go figure). Enter:
<?php
date_default_timezone_set("America/New_York");
$currentTime = date("H");
if($currentTime > 18){
$greetingTxt = "Good Evening!";}
else if($currentTime > 12){
$greetingTxt = "Good Afternoon!";}
else if($currentTime > 0){
$greetingTxt = "Good Morning!";}
else {
$greetingTxt = "Welcome!";}
echo "<h1>" . $greetingTxt . "</h1>";
?> - As you can see you may write basic HTML code for basic formatting as well as PHP for more dynamic behavior.
- You will probably feel a little overwhelmed with PHP when you start out (and even after). There are loads of resources online. One good resource on PHP is on w3schools.com.

<?php

wp_head();

if ( have_posts() ) :
    while ( have_posts() ) : the_post();
        the_title();
        the_content();
    endwhile;
endif;

wp_footer();

?>- In Wordpress "The Loop" is a code snippet that is used constantly when writing themes and other content. It cycles through content in order to display or alter it in some way. Currently our index.php template file is just displaying what we wrote and not any of the content we created inside of Wordpress. We will use the loop to insert our content.
- Remove the code we created in the previous page (that was just some practice).
- Enter the following:
<?php
wp_head();
if ( have_posts() ) :
while ( have_posts() ) : the_post();
the_title();
the_content();
endwhile;
endif;
wp_footer();
?> - This is the most basic necessary code to load in the title and content of the page. You may preview the the page in Wordpress and you should see your what you created now.

<?php

function my_files() {
    wp_enqueue_style('main_styles', get_stylesheet_uri());
}

add_action('wp_enqueue_scripts', 'my_files');

?>- Technically the theme has the bare necessities but it is not very robust. For instance, even though we have created the style.css document with the heading it doesn't actually function as a stylesheet currently. In order to add more function we must create the functions.php document (what a twist).
- Press the New File
 button. Save the file as functions.php.
 - Enter:
<?php
function my_files() {
wp_enqueue_style('main_styles', get_stylesheet_uri());
}
add_action('wp_enqueue_scripts', 'my_files');
?>
in the functions.php document. - This will load the style.css stylesheet when Wordpress loads scripts. Now any CSS rules you create in the stylesheet will be applied.
- More functions will be added to this document later but this is a good start.


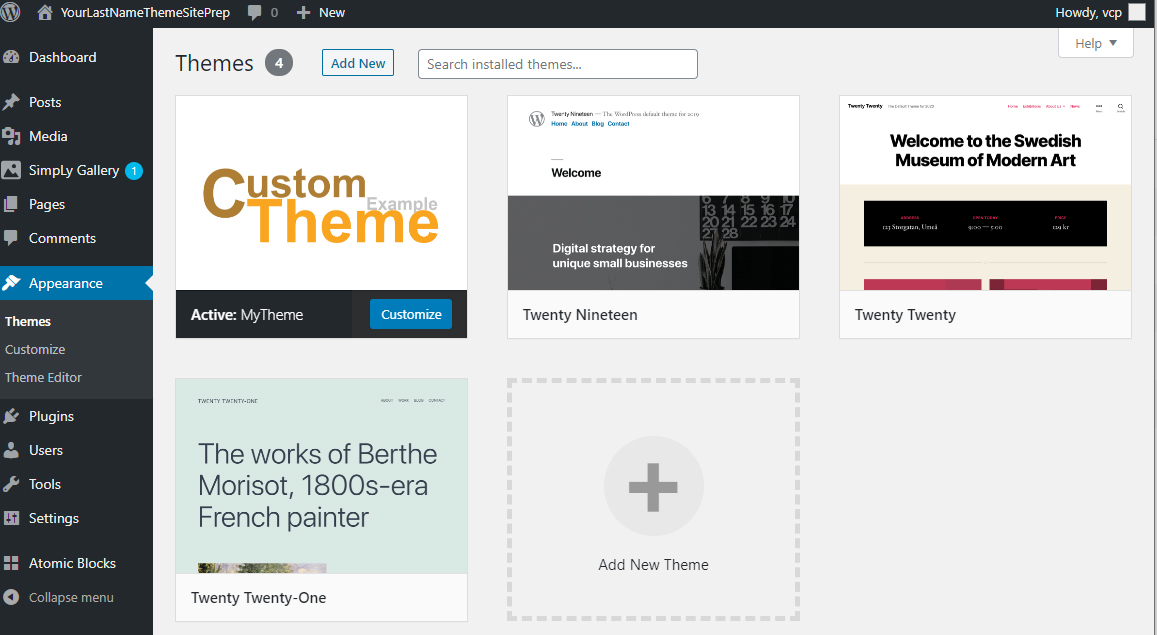
- You have the basic documents necessary for the theme to operate. If you look at your theme in the Appearance>Themes area you will see there is no image for your theme. This is a pretty simple addition.
- Normally you would want to take a screen capture of your site as the image but we haven't really done much to take a screenshot of. Instead we will just make a simple logo.
- In Photopea, Photoshop, or whatever your favorite editor is create an image that is 1200 by 900 pixels (width x height). Design a logo to represent your site.
- Save your final image as screenshot.jpg in the theme root folder.
- If you refresh your window in the theme area of Wordpress you should see your image with your theme name.


- You may view your while working on it but also from the Local interface by pressing the View Site button at the top right of the program. When you are happy with it, it is time to export it out.
- In Local right-click on the site name in the list on the left. In the popup choose Export. Don't enter anything in the window. Press Export. In the popup choose where you want to export and export.
- Now, log into Blackboard (Here) and click on this course. Inside the course, select Week 07, then the Class 07: Custom Theme Site (theme setup) Lab folder, then the assignment with the same name. Finally, Attach the zipped file.
/*
Theme Name: YourLastNameTheme
Author: YourFullNameHere
Description: A super simple theme created in web design II
Version: 1.0
*/
<?php

wp_head();

if ( have_posts() ) :
    while ( have_posts() ) : the_post();
        the_title();
        the_content();
    endwhile;
endif;

wp_footer();

?>
<?php

function my_files() {
    wp_enqueue_style('main_styles', get_stylesheet_uri());
}

add_action('wp_enqueue_scripts', 'my_files');

?>
You have officially created a Wordpress theme! This lab was all about just setting it up. Obviously it is not the most advanced or even attractive theme thus far. In the next lab we will delve deeper into PHP and the theme.
If you run into any issues please do not hesitate to contact me:
- jcone@cecil.edu
- (240) 466-1996

