Outline:
- Course Introduction
- Intro to Rigging
- Model Prep
- Simple Rigs (part 01)
- Assignment 01
Course Introduction
Class Lecture Part 01
Introductions:
- Me: Jonathan Cone
- I am a full-time faculty in Cecil's Visual Communication Program as well as an adjunct professor at Wilmington University. I am mostly responsible for the game design and web design programs. I am also a freelance animator typically working on visualizations.
-
- Office Hours
- Mon by appointment
- Tues 1:00pm - 2:00pm, 5:00pm – 6:30pm
- Wed 5:00pm - 6:30pm
- Thurs 1:00pm - 2:00pm
- Fri by appointment
-
- Contact Information
- 410-287-6060 X 1470
- jcone@cecil.edu
Demo Reel
-
- Name:
- What's your name? What do you go by?
-
- Why you are here:
- Is this required for your major? Are you taking this course as an elective? Personal Enrichment?
-
- Experience:
- How comfortable are you in 3D? Maya?
Course Description:
In this project based course you will learn the proper steps to rig three-dimensional character and object models. Once you have created your digital puppets you will learn the basics of animation as well.
You may download the course syllabus:
ANI 325 Character Rigging Syllabus
Canvas:
You are expected to use Canvas. Canvas will be used for:
- Assignment descriptions/rubrics
- Assignment submissions
- Grades
- Announcements
- Etc.
Here is the link:
Canvas
Assignments:
There are four projects. You are generally given three weeks to complete each. Although you are not asked to submit your progress each week you will be told what you should do each week to have the project done by the due date.
You can see the project and weekly layout to the right.
Projects:
- Motion Graphic
- Model and Surface objects (logo).
- Create simple rigs.
- Animate a logo.
- Human Action Cycle
- Rig a humanoid model using Human IK.
- Produce motion capture and apply it to your rig.
- Cleanup and cycle your human action animations.
- Character Rig
- Create a skeleton and bind it.
- Manipulate blend shapes.
- Paint bind weights.
- Produce rigging solvers (FK/IK).
- Cleanup hierarchy.
- Lip-Sync Animation
- Layout and block scene.
- Interpolate poses.
- Polish animation, render, and edit the final film.
Intro to Rigging
Definition:
The ropes, chains, etc., employed to support and work the masts,yards, sails, etc., on a ship. (dictionary.com) Obviously this is referring to boat rigging but it is actually pretty close to 3D rigging as well. 3D riggers produce the deformers, constraints, solvers, and controllers that allow a model to be animated. As a character rigger/TD you are expected.
- You are required to know what is expected of a character and how to implement Maya’s tools to make it possible
- This means a rig has to be “right” and “clean.” (unlike modeling, texturing, animating, etc.)
- If problems are not resolved ahead of time they will haunt you down the pipeline, half your job as a Character TD is problem solving
In Production:
- Modeler: Builds the body of the car.
- Texturer: Paints the car and adds decals and other details.
- Rigger: Produces the engine, wiring, and functional aspects of the car that allows a driver to drive it.
- Animator: Drives the vehicle.
- Lighter/Renderer: This would just be the sun or lamp that illuminates the car.
Nodes:
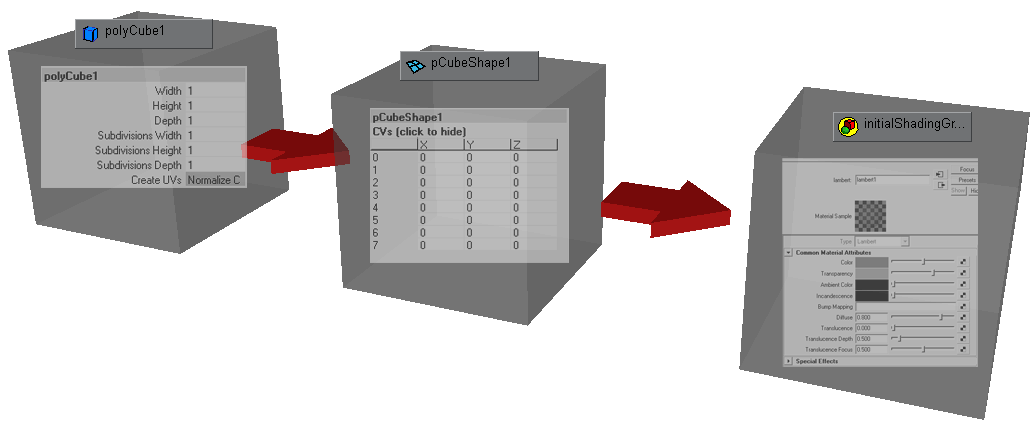
Maya is a comprised of nodes that can be manipulated and connected using the hypergraph and other utilities. Nodes are kind of like little boxes with a variety of stuff in them you can manipulate (Attributes) and Maya is the warehouse where they are stored. Rigging is the collection of organized and connected nodes using a very high-level programming language to create a framework with which the animator can affect the character’s mesh. (how’s that for a run-on sentence).


DAG (Directed Acyclic Graph):
Basically means that you have to have a linear parenting structure, cannot cycle (hence the name, duh). Is viewable in the hypergraph and outliner (not hidden). Transform, shape, constraints and lots of others are DAG nodes.
DG (Dependency Graph):
You can connect these anyway you like, even cycle (this is usually a bad idea and you will get a message from Maya). Is usually hidden and not easily found (in the hypergraph click on the input/output connections button). Keyframes, shaders, utility nodes, deformers and lots of others are DG nodes.

Model Prep
Model Prep:
The very first thing you need to do before you rig any model is to clean it up. Often there are extra odd nodes, mesh mistakes, un-optimized geometry, poor topology, etc. Any of these errors can have major irreversible consequences down the production line.
Make the Model Deformable:
- High Resolution enough.
- Edges run perpendicular to the desired motions.
Modeling Text Tutorial
Simple Rigs (part 01)
Simple Rigs:
Here are some tutorials on making some really basic rigs
Lattice Rig Tutorial
Wire Rig Tutorial
Multiple Deformers Rig Tutorial
Squash Rig Tutorial
Bend Rig Tutorial
Assignment 01
Motion Graphic
The first project you will complete in this course will be to produce a short motion graphic. It should be something like an animated logo that would be appropriate as a slate before a film or game.
First you must create your models, apply materials, texture, and most importantly rig them. Your rigs should be relatively simple. Merely utilize basic deformers such as non-linears, produce controllers, and parent everything appropriately.
Then, utilizing the straight-ahead animation technique you will create motion with your objects that follow animation canon to create a short 5 to 15 second clip. You will submit both your Maya project folder as well as a high quality playblast.
For Next Class: Complete the logo model and surfacing
You will be graded on the following:
- Modeling & Surfacing
- Create the models (logo, environment, etc.) and texture them.
- Rigging
- Utilizing a variety of deformers create controls that allow you to animate your assets at the component level.
- Animation
- Create motion on your rigged objects in an interesting and entertaining manner.
- Output (lighting/rendering and maya project file/folder structure)
- Maintain a strong file and folder structure that encapsulates all elements of your project. Render out a high quality playblast of your motion graphic.
Resources:
- You can find the rubric under the Assignments content folder in Canvas.
Assignment 01 Tutorial Video
